• Skip to primary navigation
  • Skip to main content
  • Skip to primary sidebar
  • Home
  • About
    • Publications & Press
    • Books
  • Nutrition
    • Women’s Health
      • Fertility
    • Ask the RDN
    • Simple Swap Tips
  • Recipes
  • Services
    • Shop
  • Contact
  • Navigation Menu: Social Icons

    • Facebook
    • Instagram
    • Pinterest
    • Twitter
    • YouTube

Shaw Simple Swaps logo

menu icon
go to homepage
search icon
Homepage link
  • Home
  • About
    • Publications & Press
    • Books
  • Nutrition
    • Women’s Health
      • Fertility
    • Ask the RDN
    • Simple Swap Tips
  • Recipes
  • Services
    • Shop
  • Contact
  • Navigation Menu: Social Icons

    • Facebook
    • Instagram
    • Pinterest
    • Twitter
    • YouTube
    • Facebook
    • Instagram
    • Pinterest
    • Twitter
    • YouTube
  • ×

    Blog

    Air Fryer Bratwurst

    August 3, 2021

    4 bratwursts in a white pan with mustard.

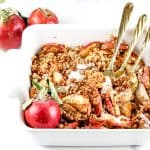
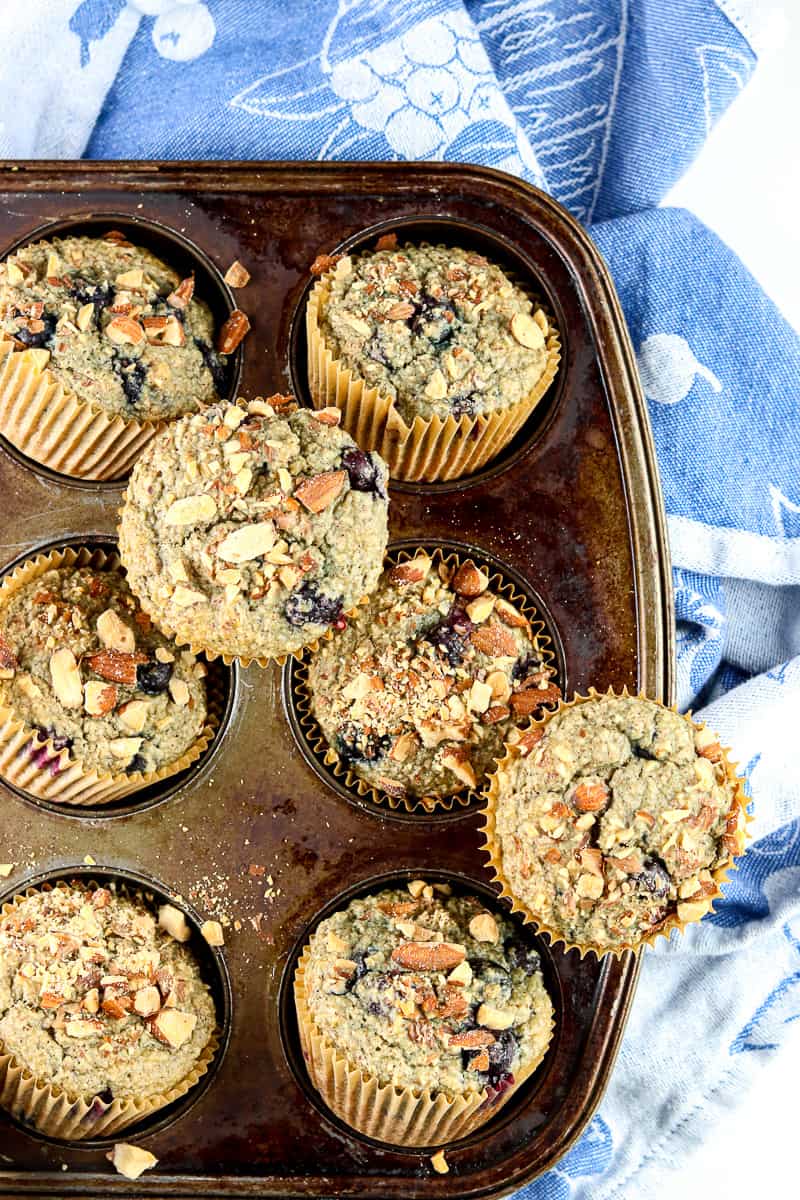
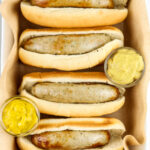
    Dinner (or lunch) in 10 minutes or less? Count me in! This Air Fryer Bratwurst Recipe is the answer to your dinner-in-a-flash prayers and can be modified to suit your dietary needs. Juicy, fragrant, and topped with your favorite veggies, the humble bratwurst is the breakout star of your next air fryer meal!

    Air fryer bratwurst in buns in a casserole dish.
    [feast_advanced_jump_to]

    Why you need to make this Recipe for Bratwurst in the Air Fryer

    Whether the summer heat (or rain) is making grilling unappealing, or you simply don’t want to slave over the stove top or hot oven, you air fryer can come to the rescue!

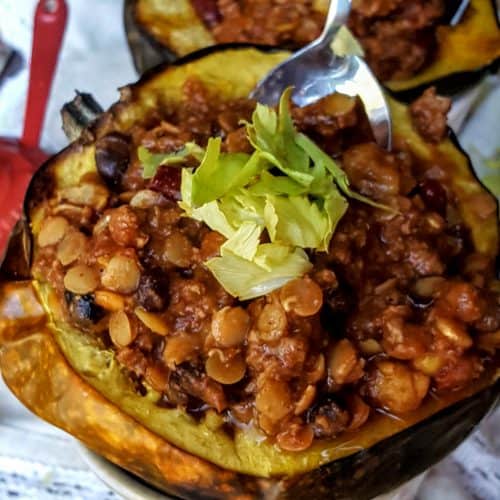
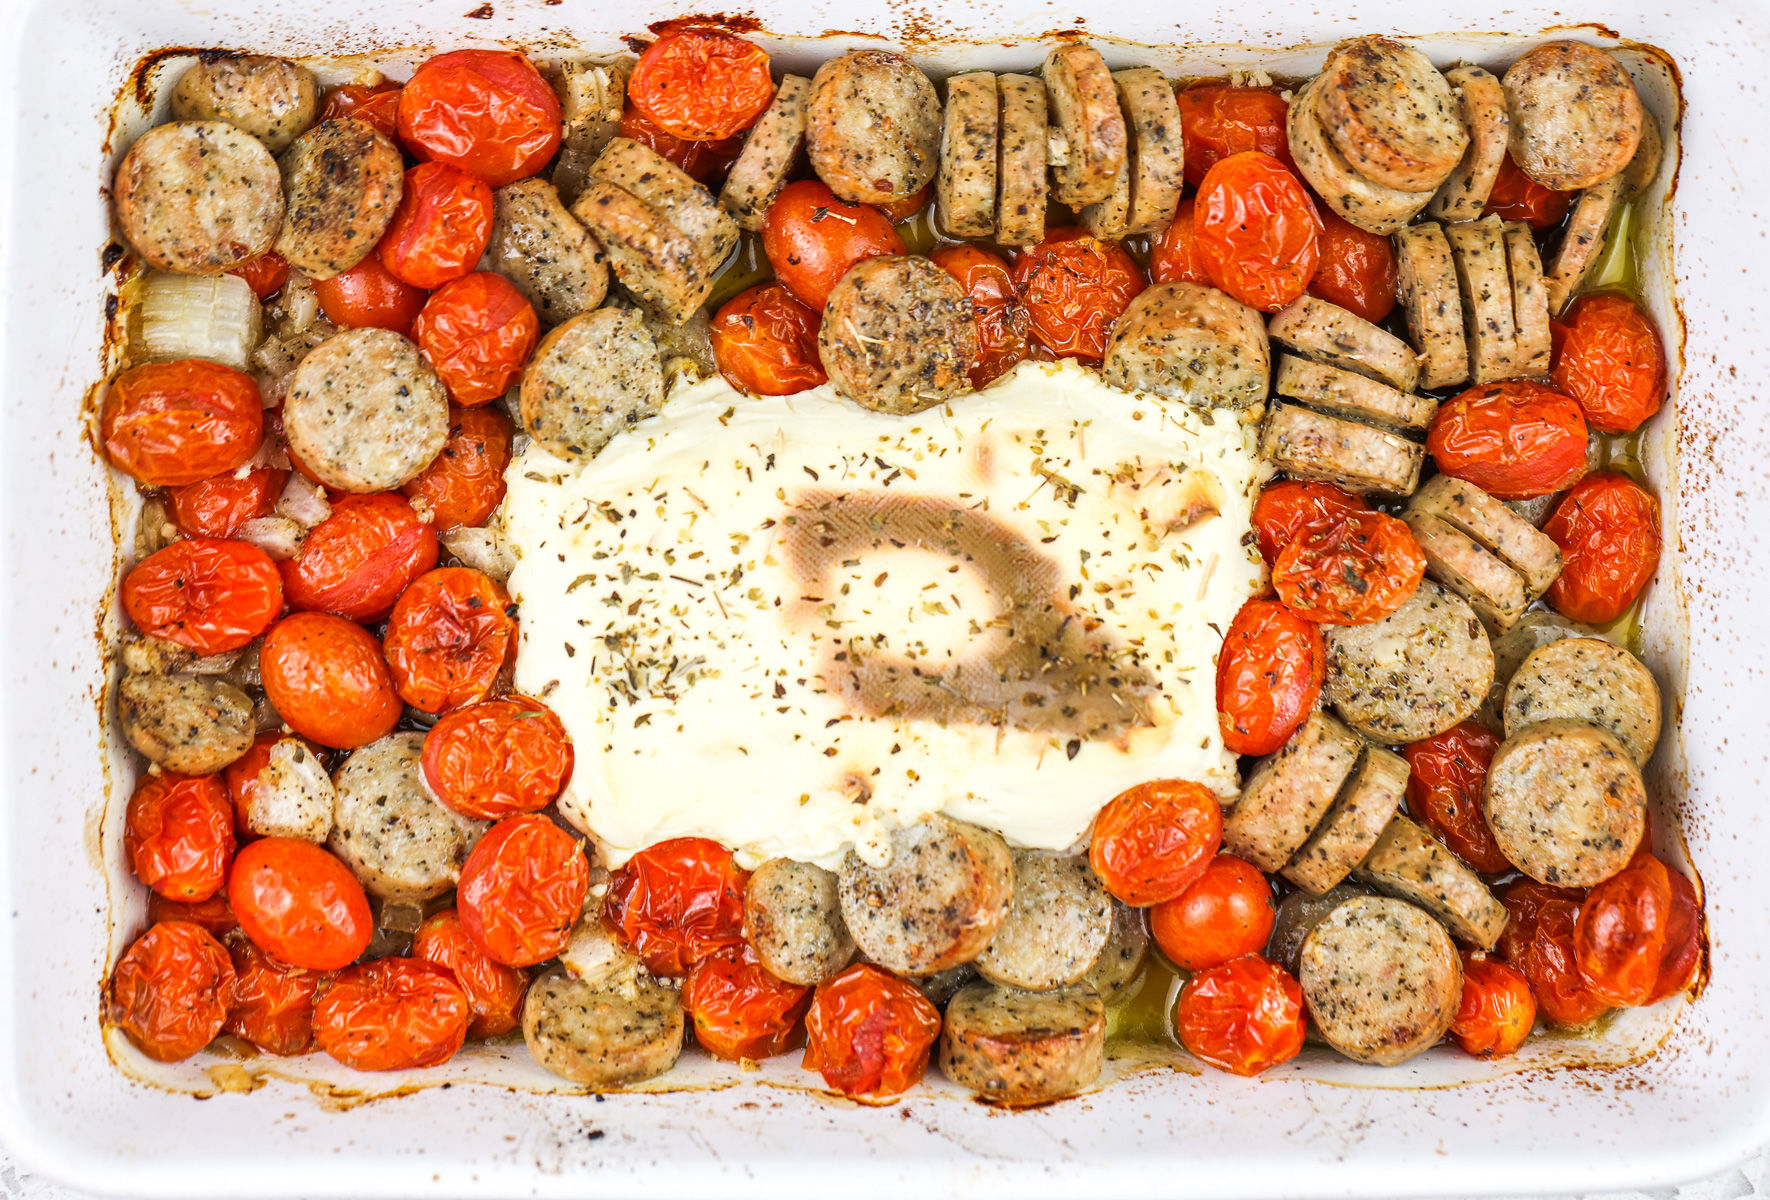
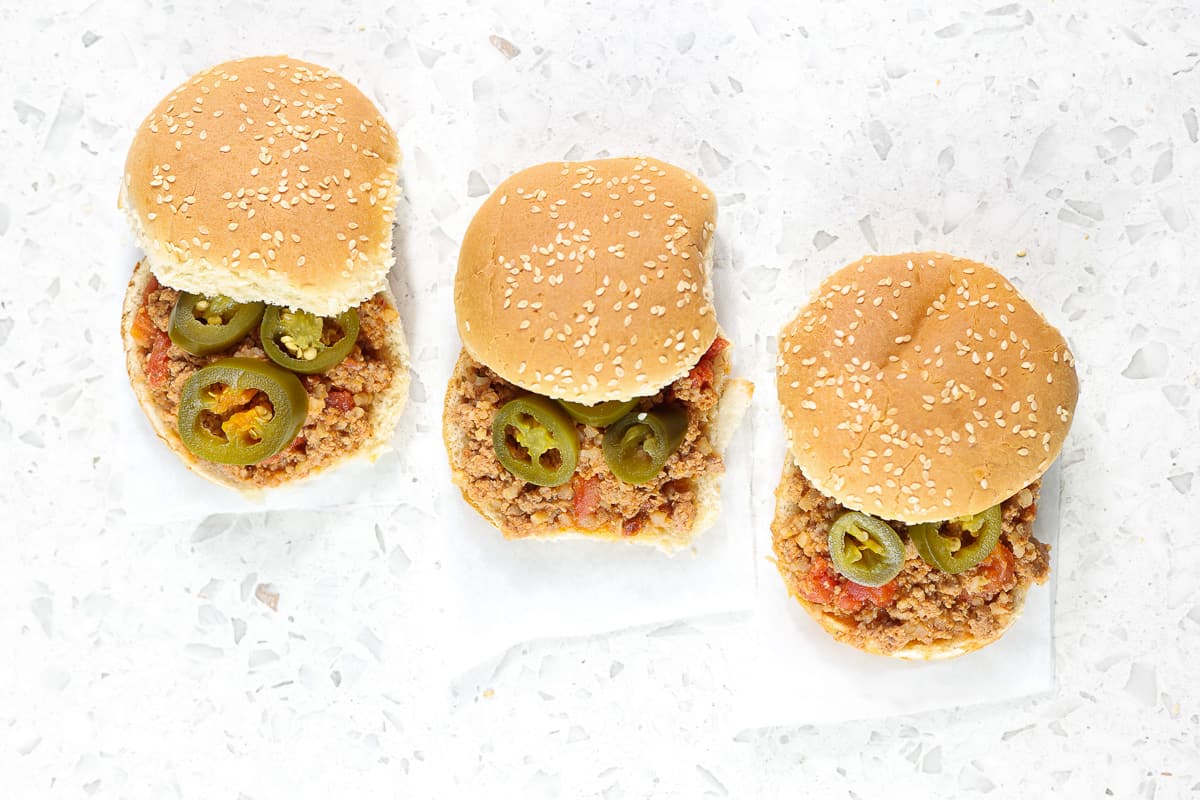
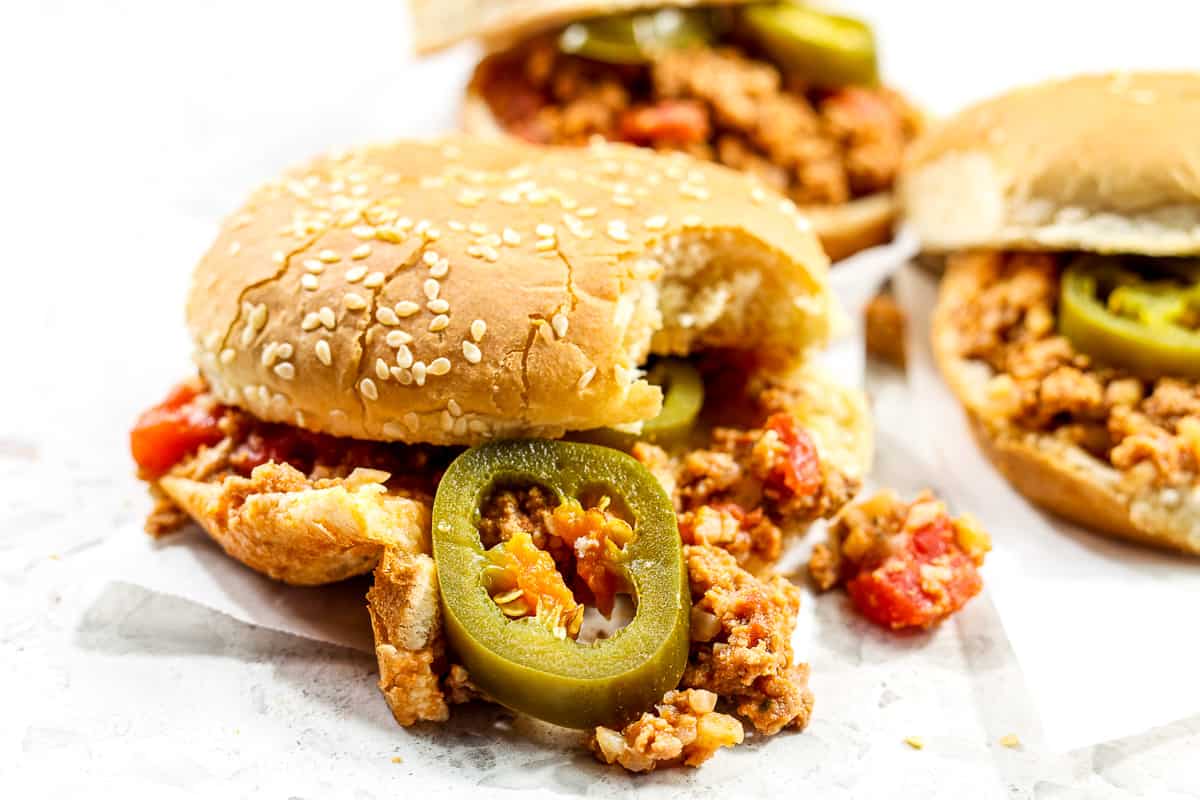
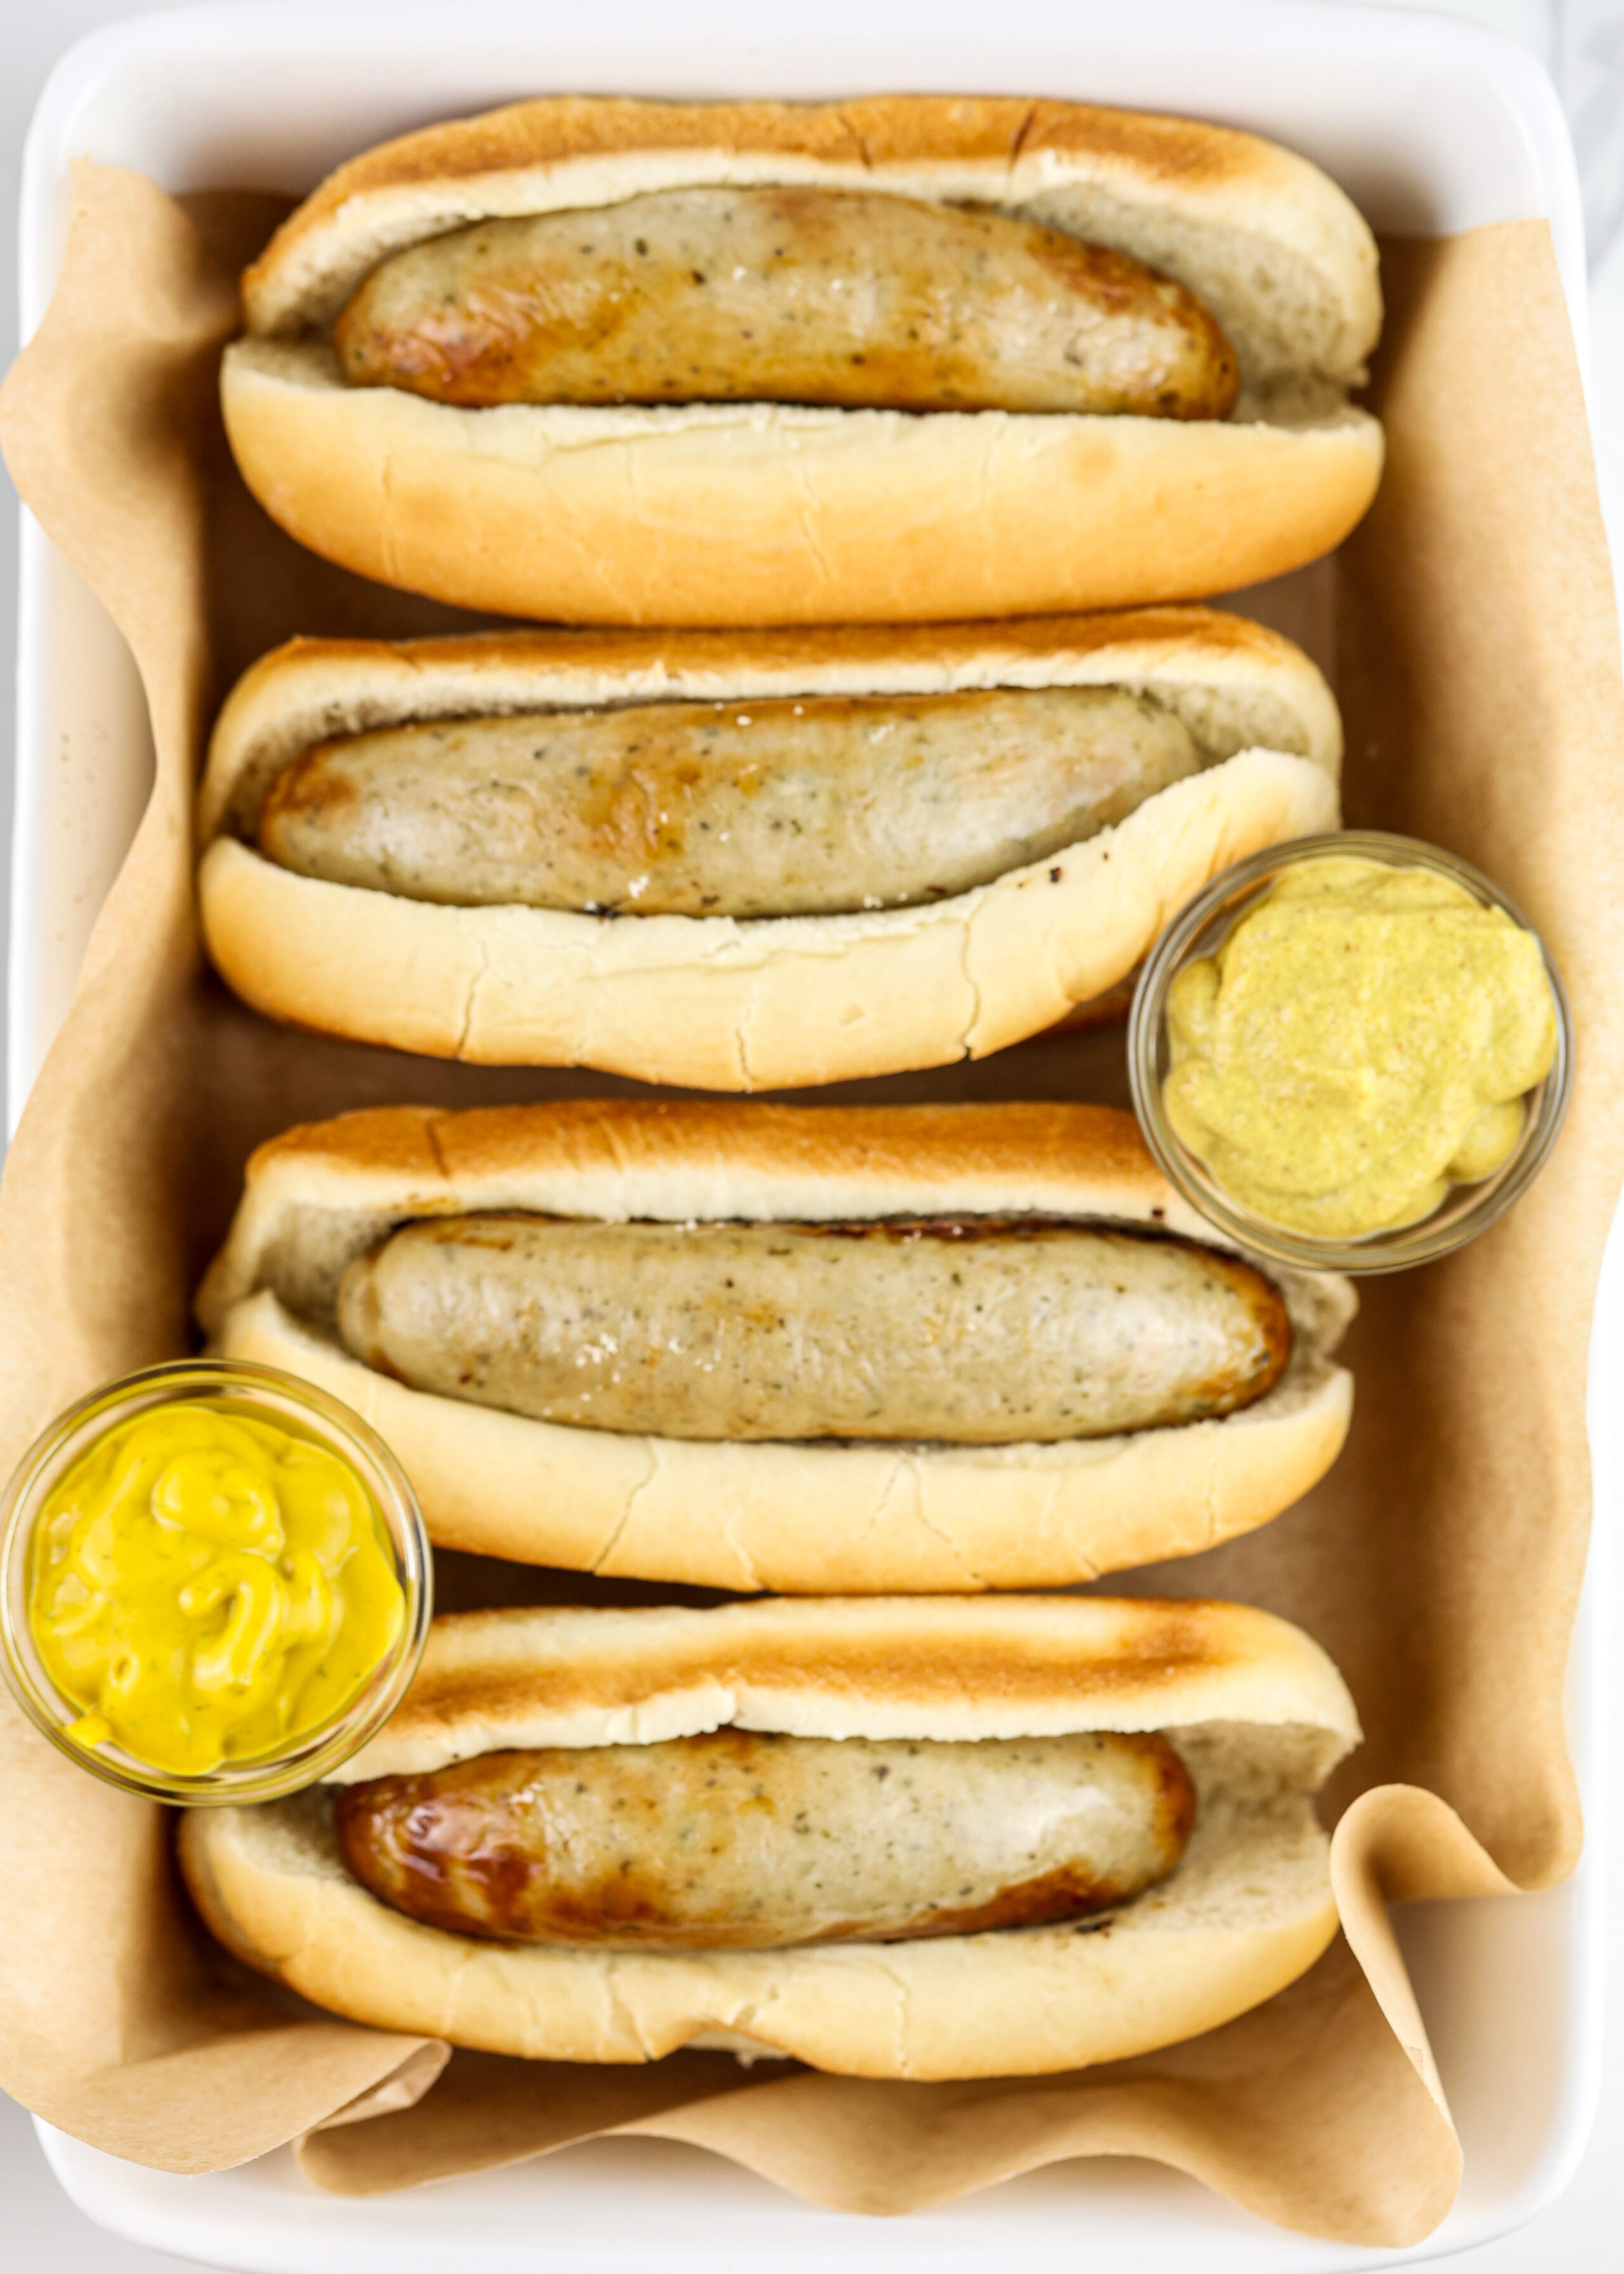
    Cooking bratwurst has never been easier and there is no shortage of ways to make this meal your own! Serve atop a bun with your favorite veggies, alongside cabbage and noodles, or accompanied by a bright Coleslaw, it’s totally up to you!

    Whether is your first time making bratwurst or you’re looking for something new, these Air Fryer Bratwurst are sure to please!

    Close up of a bratwurst in a bun served with mustard.

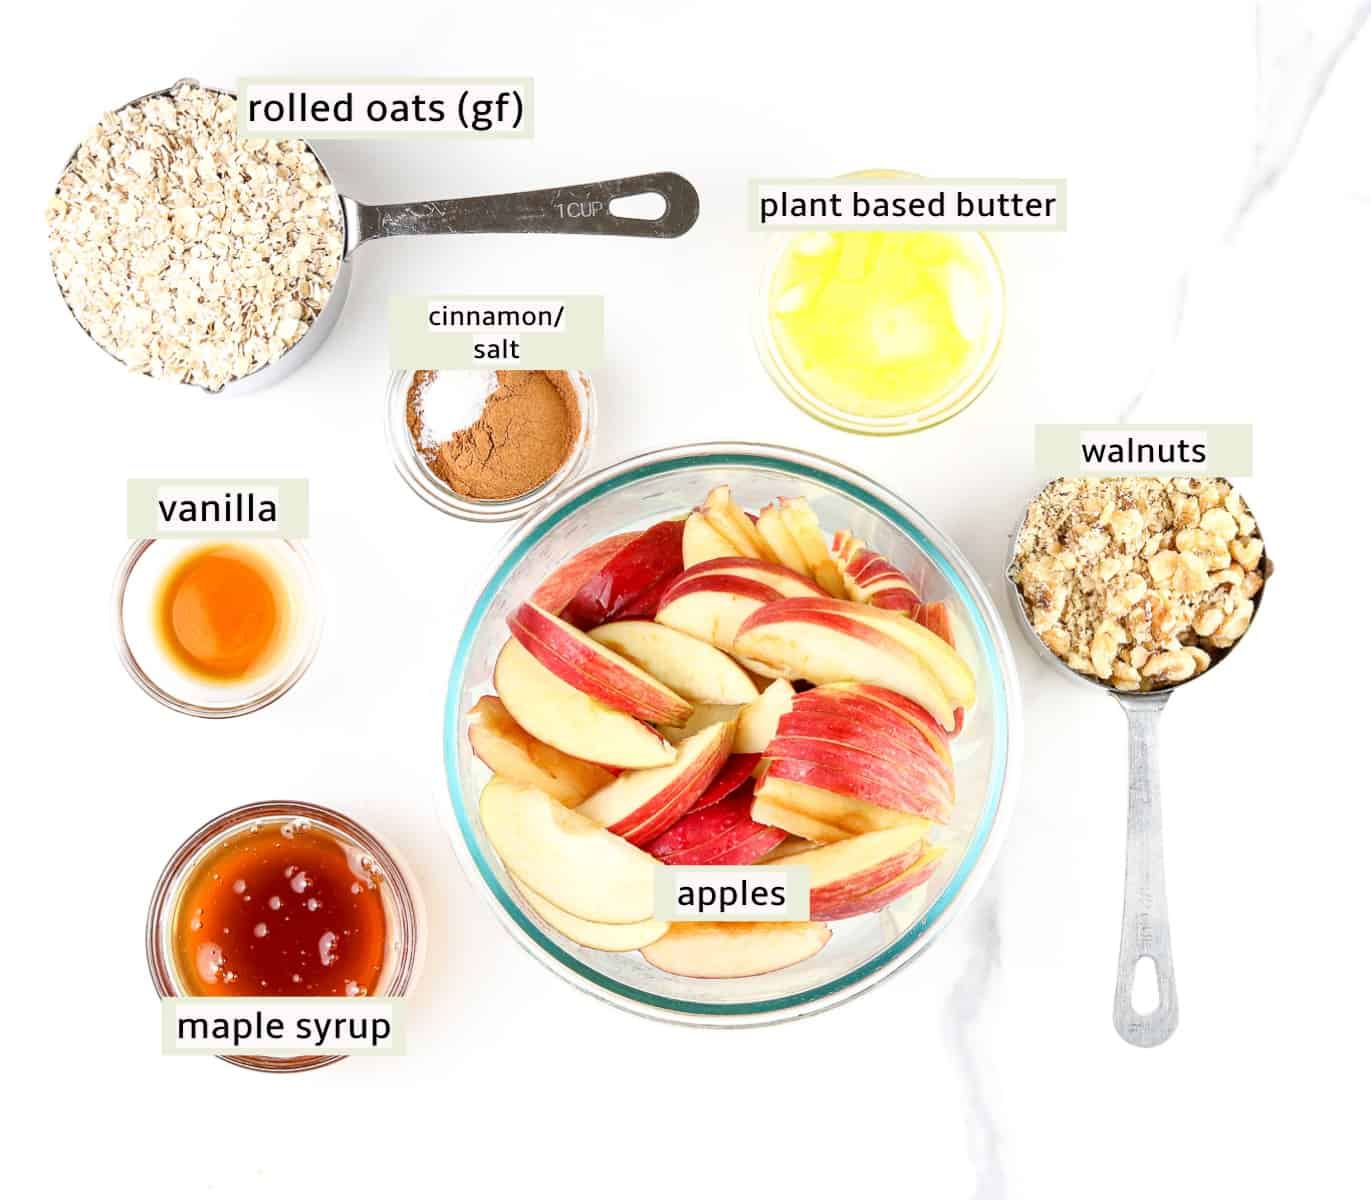
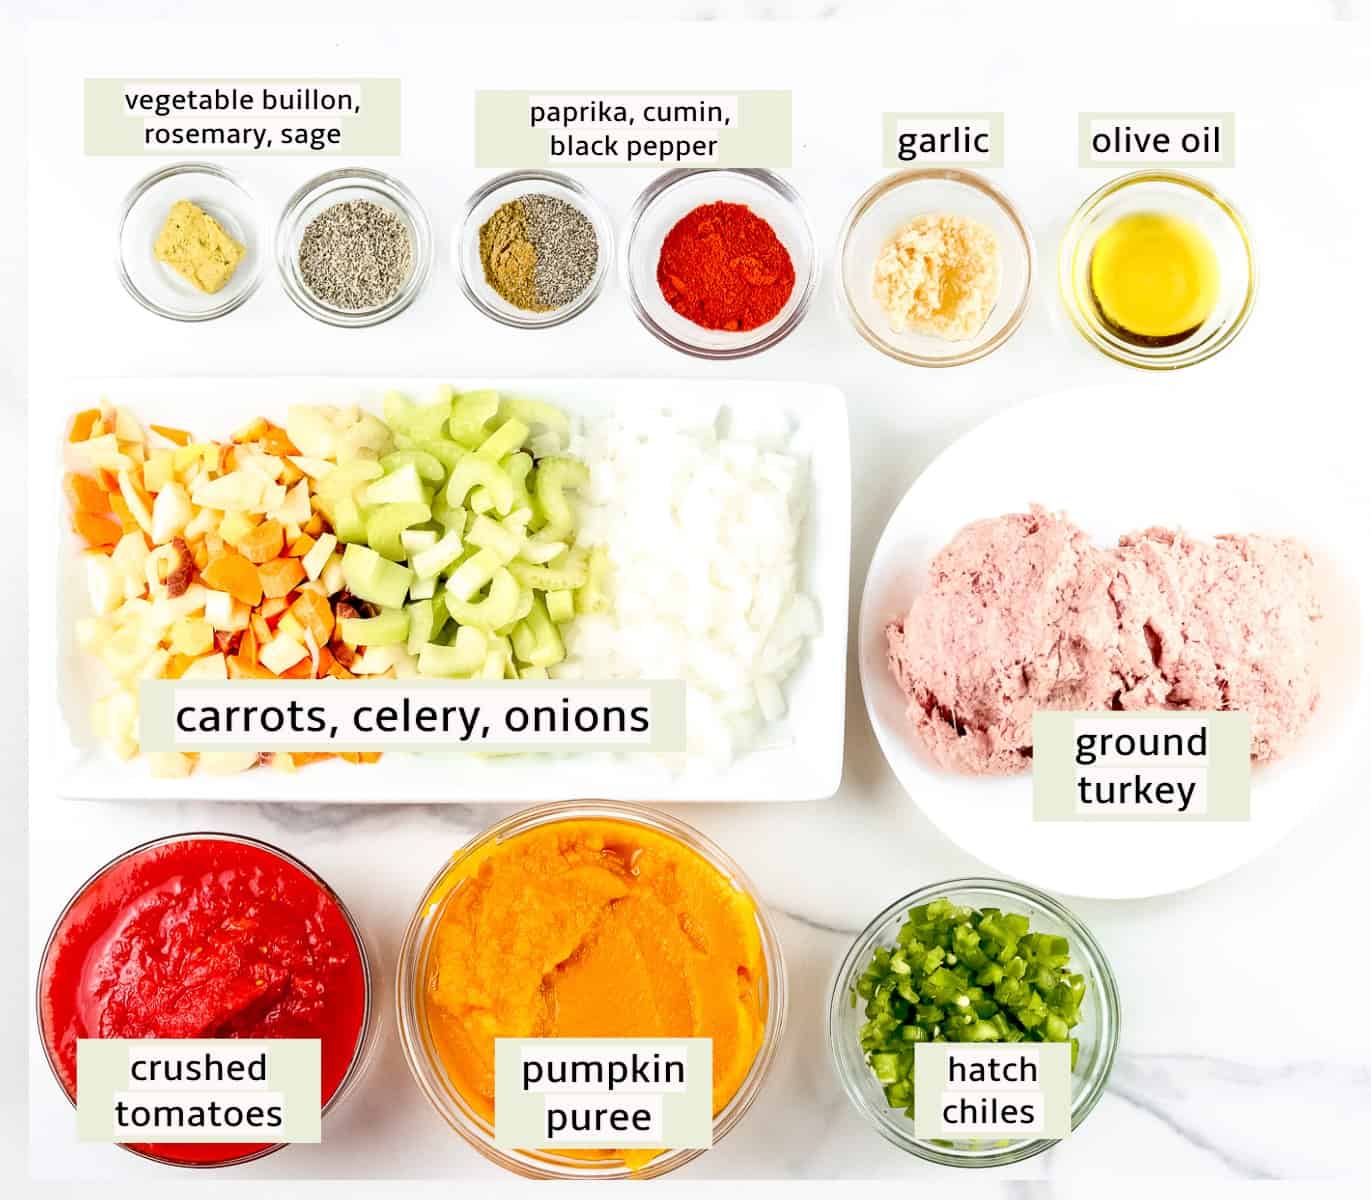
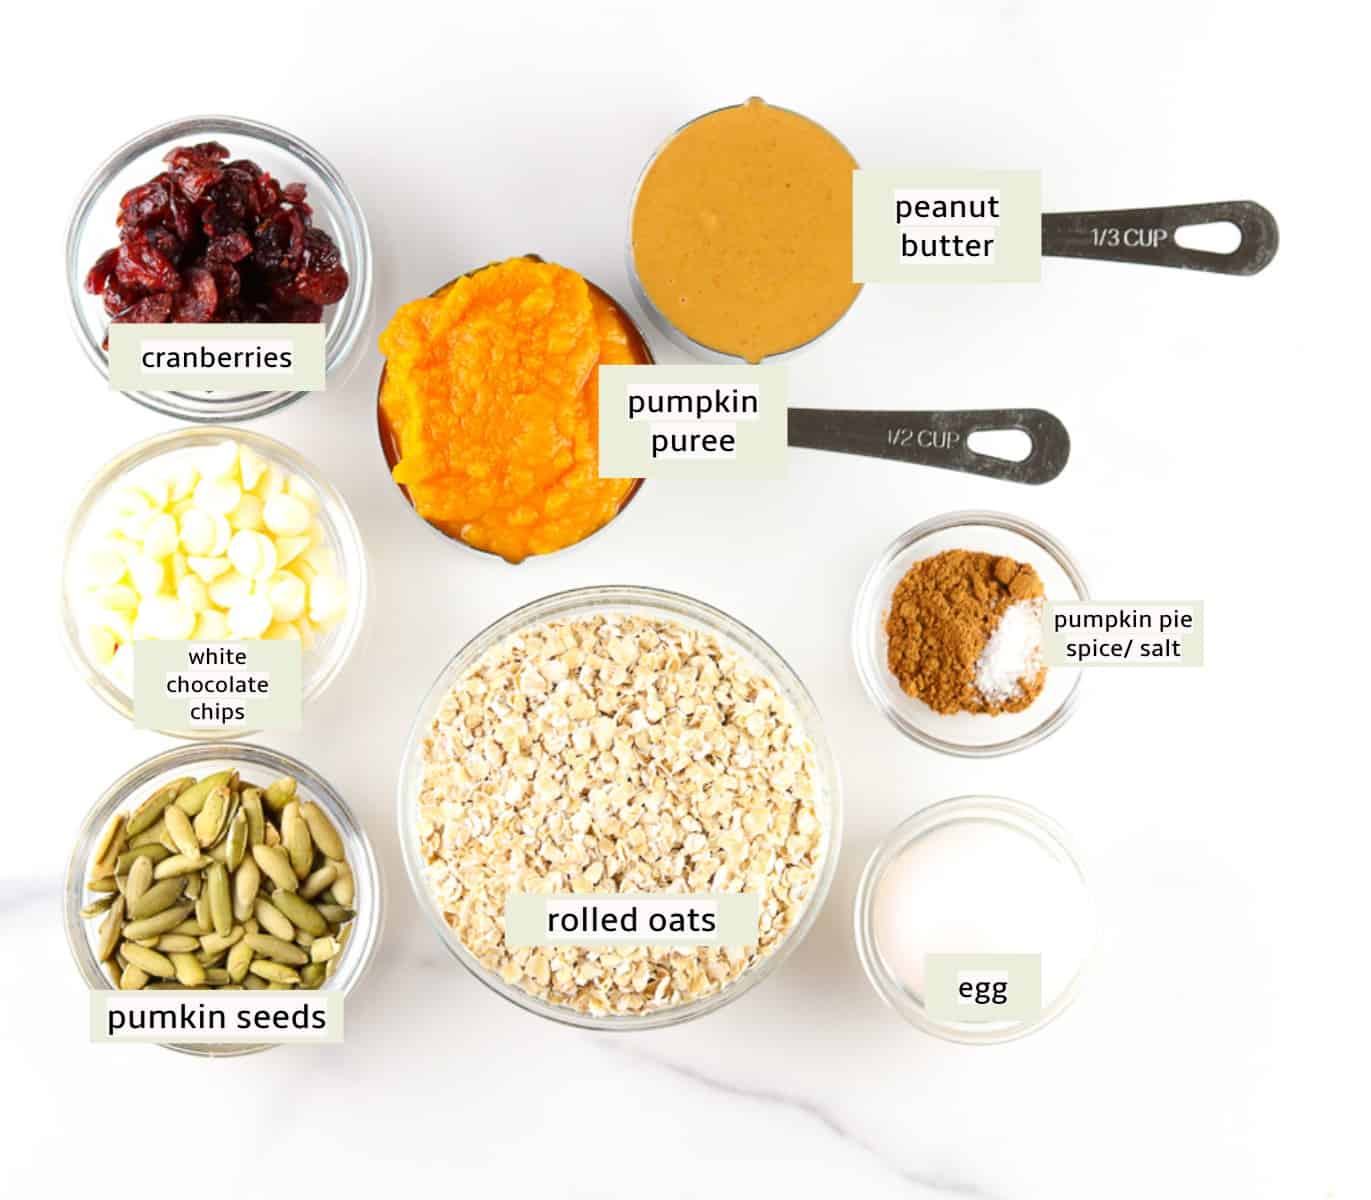
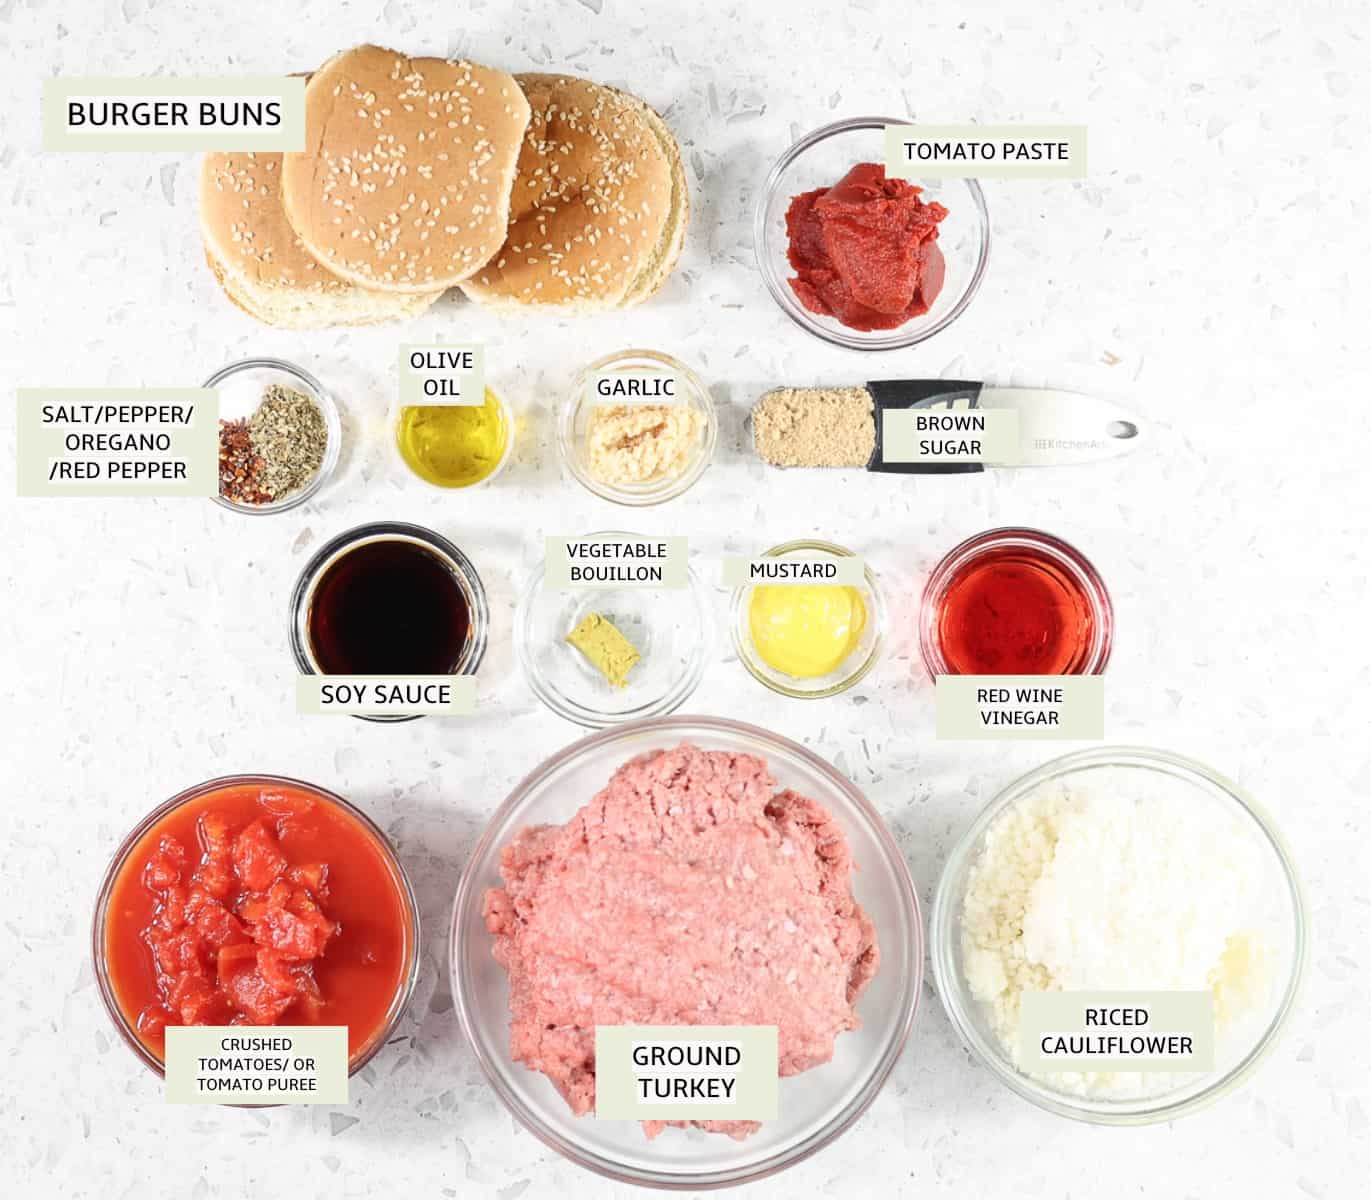
    What you need to make these Air Fryer Brats
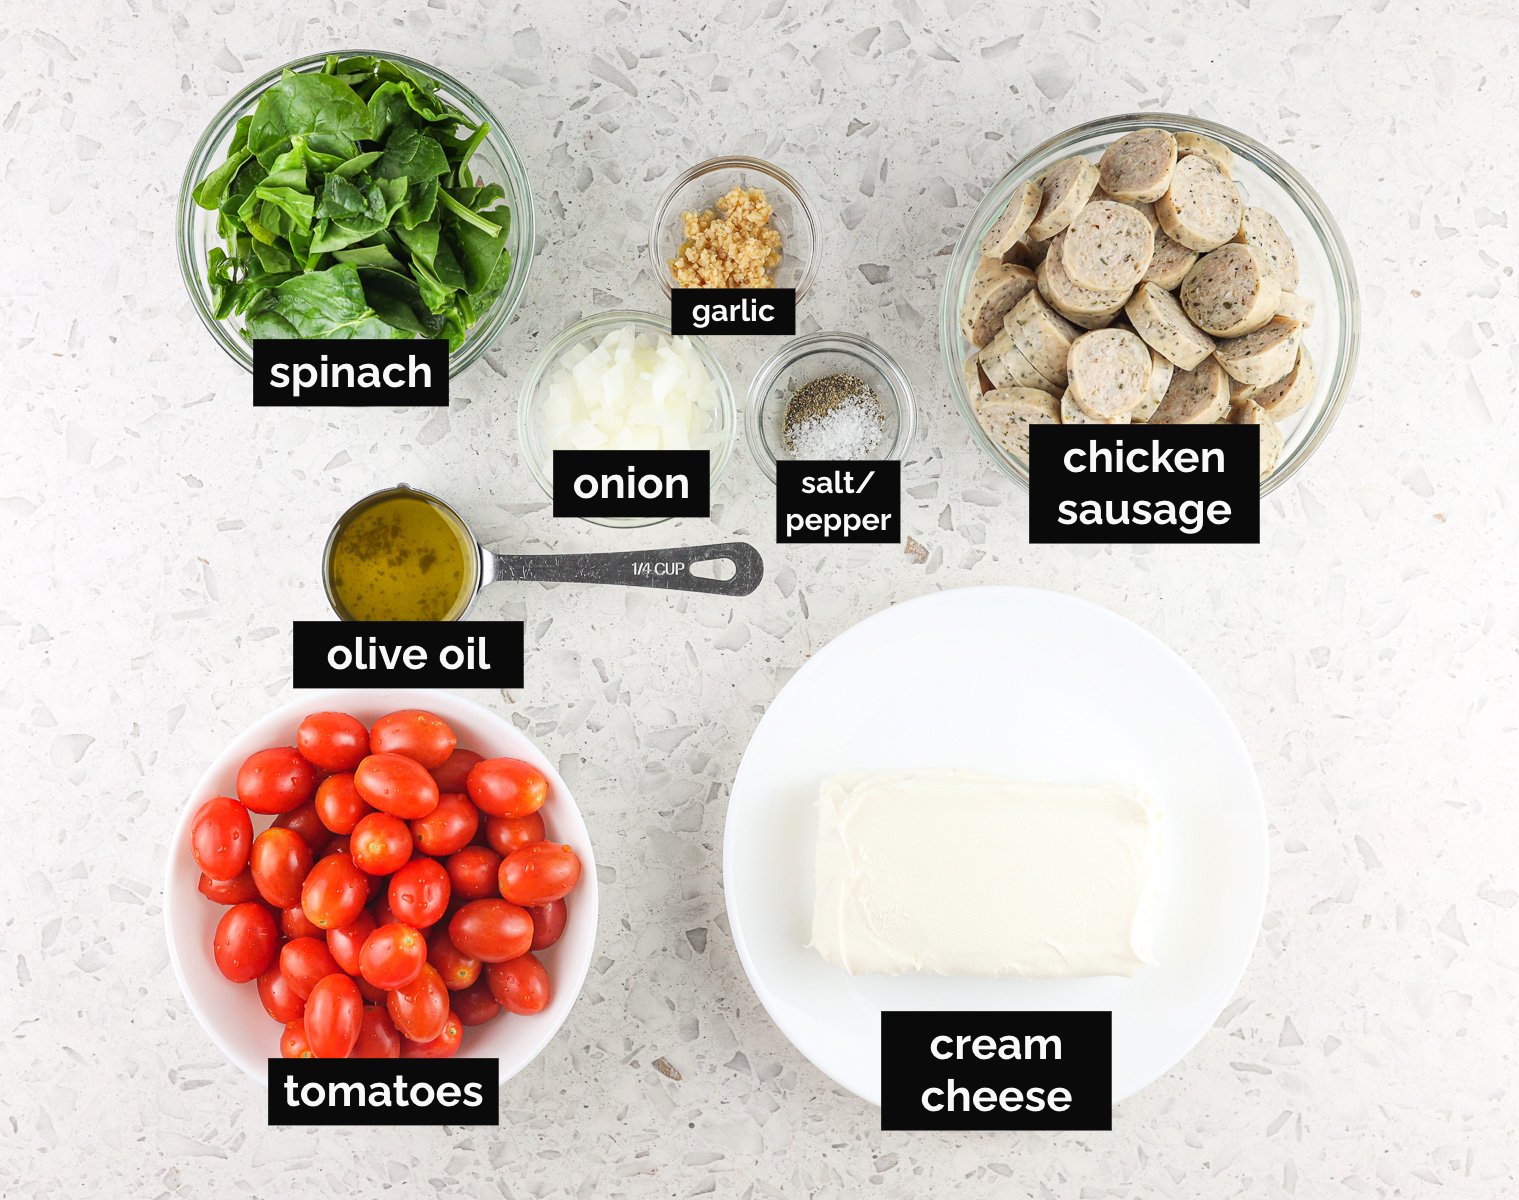
    Ingredients for Air Fryer Bratwurst laid on platters.

    Ingredient Tips

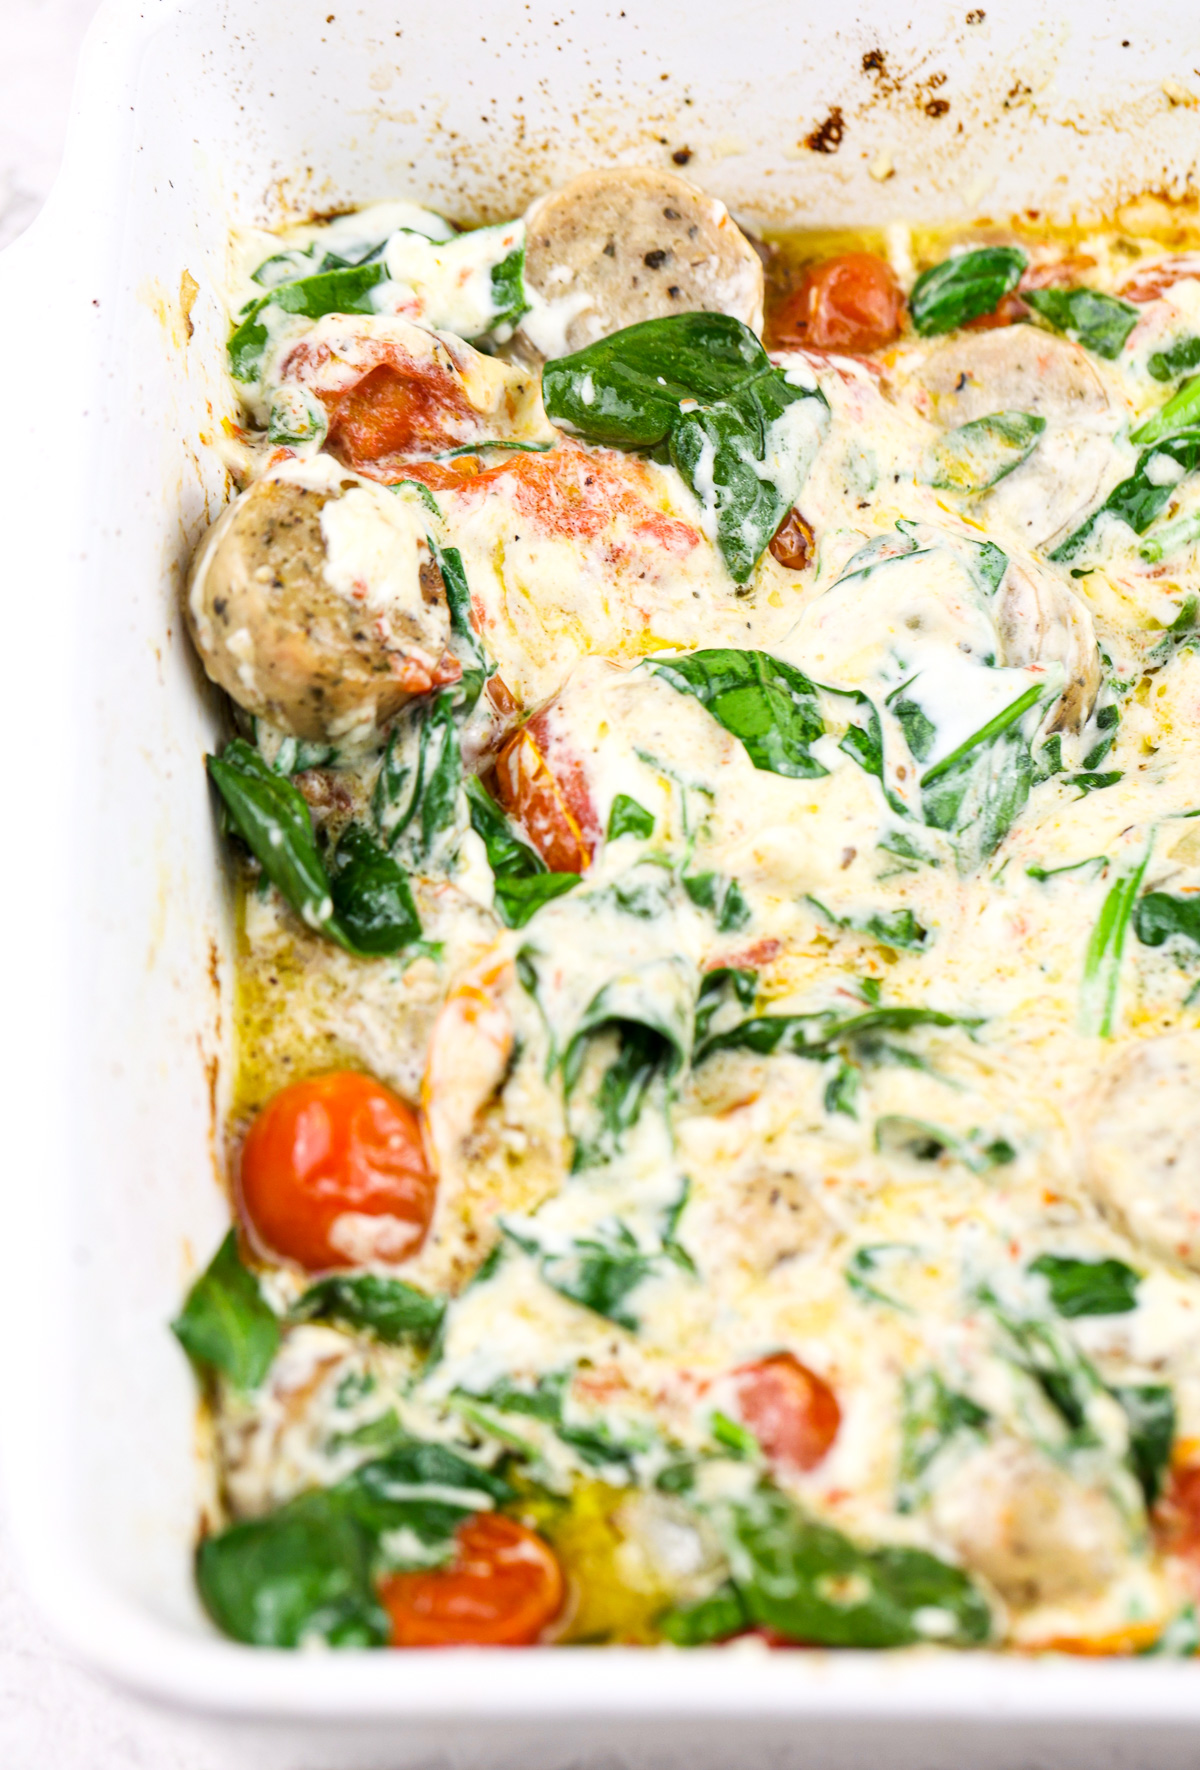
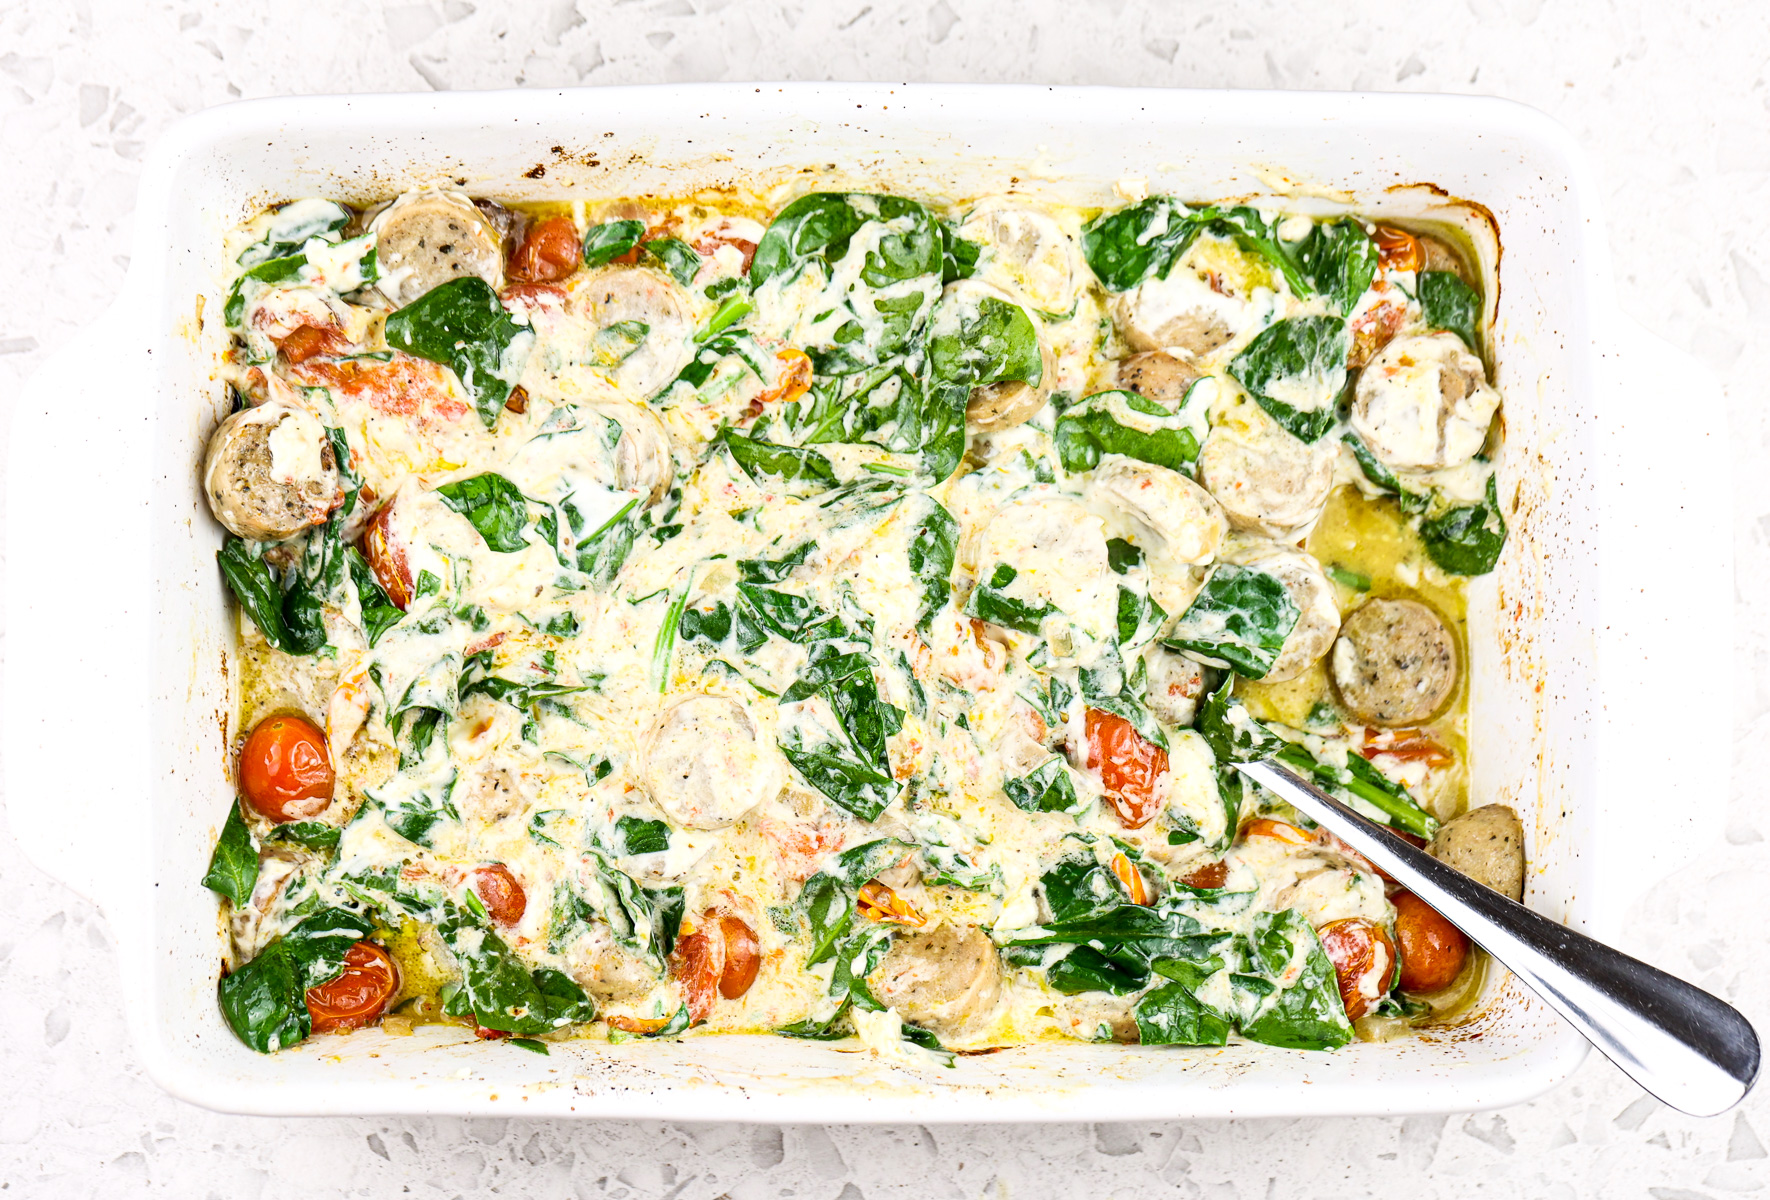
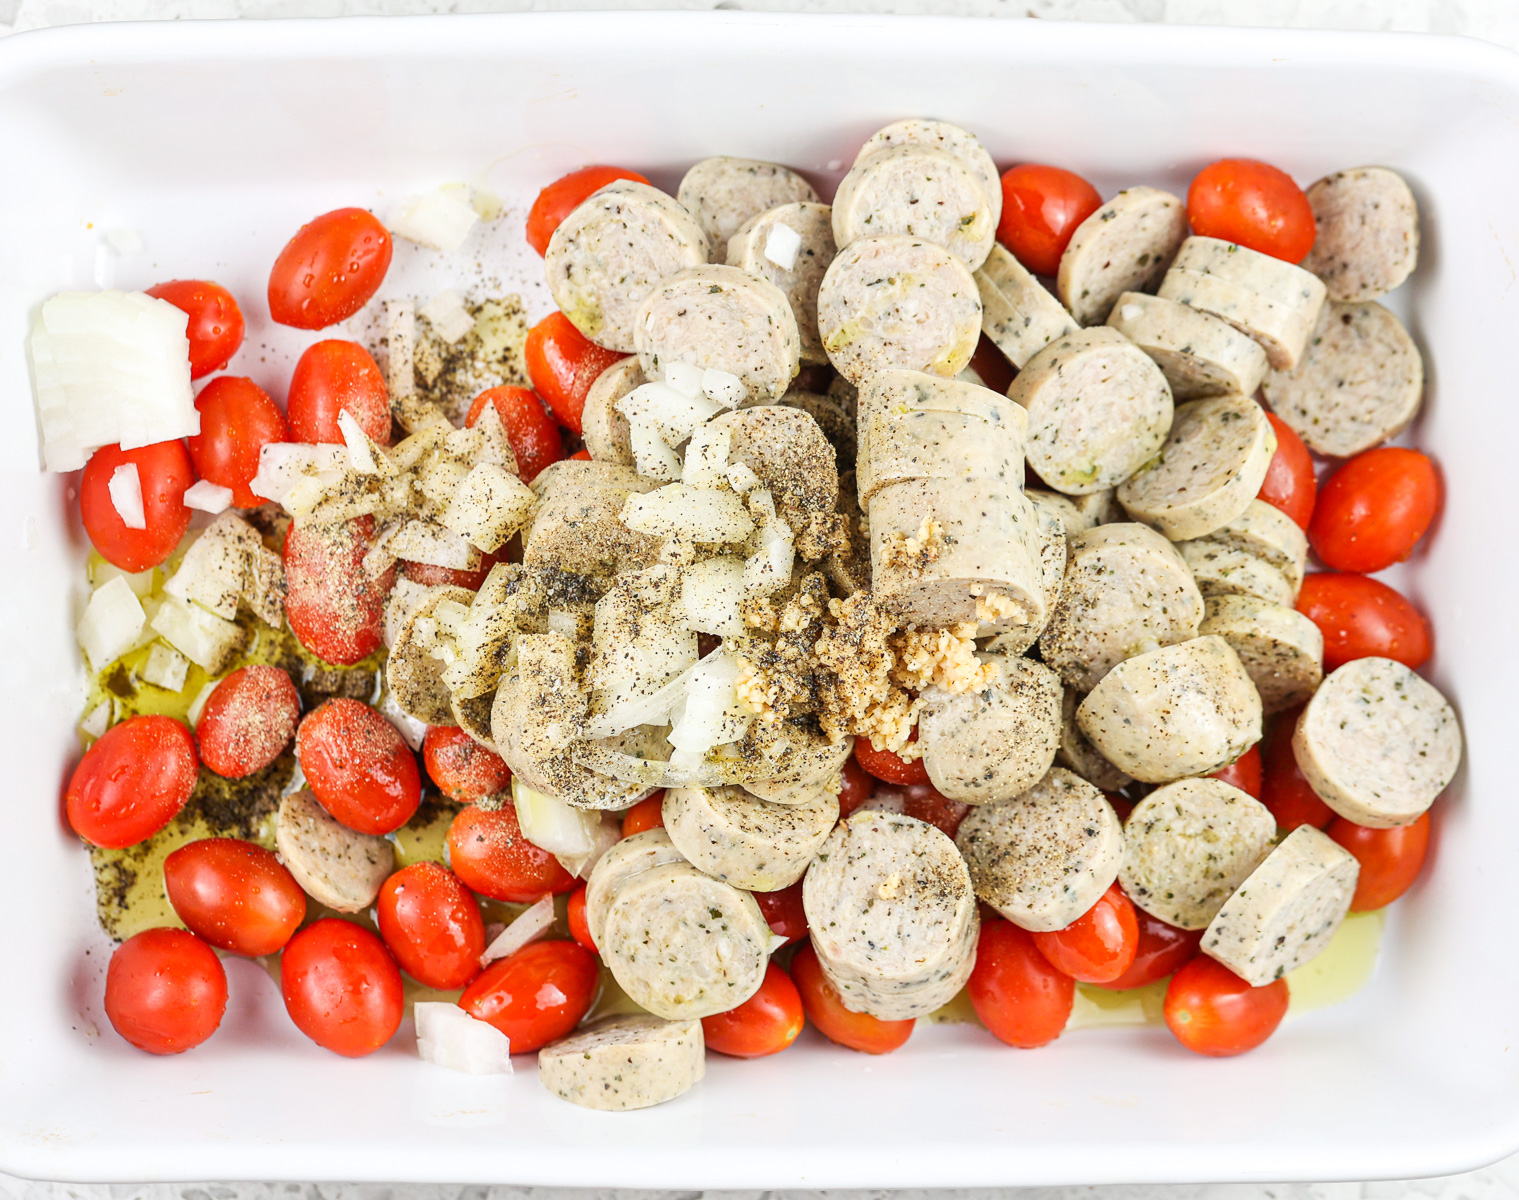
    • Bratwurst: Look for a sausage that has fewer ingredients and is lower in sodium. For example, The Meat Hook Bratwurst that has 6 ingredients and 580 mg of sodium per serving (not sponsored, just an example!) These would be a good option. As mentioned in my Creamy Sausage Casserole with Tomatoes post, processed meats can be eaten occasionally. As long as they are chosen mindfully, they can be part of a balanced diet.
      • If you’d like the most control over what’s going in your brats, you can totally make them from scratch!
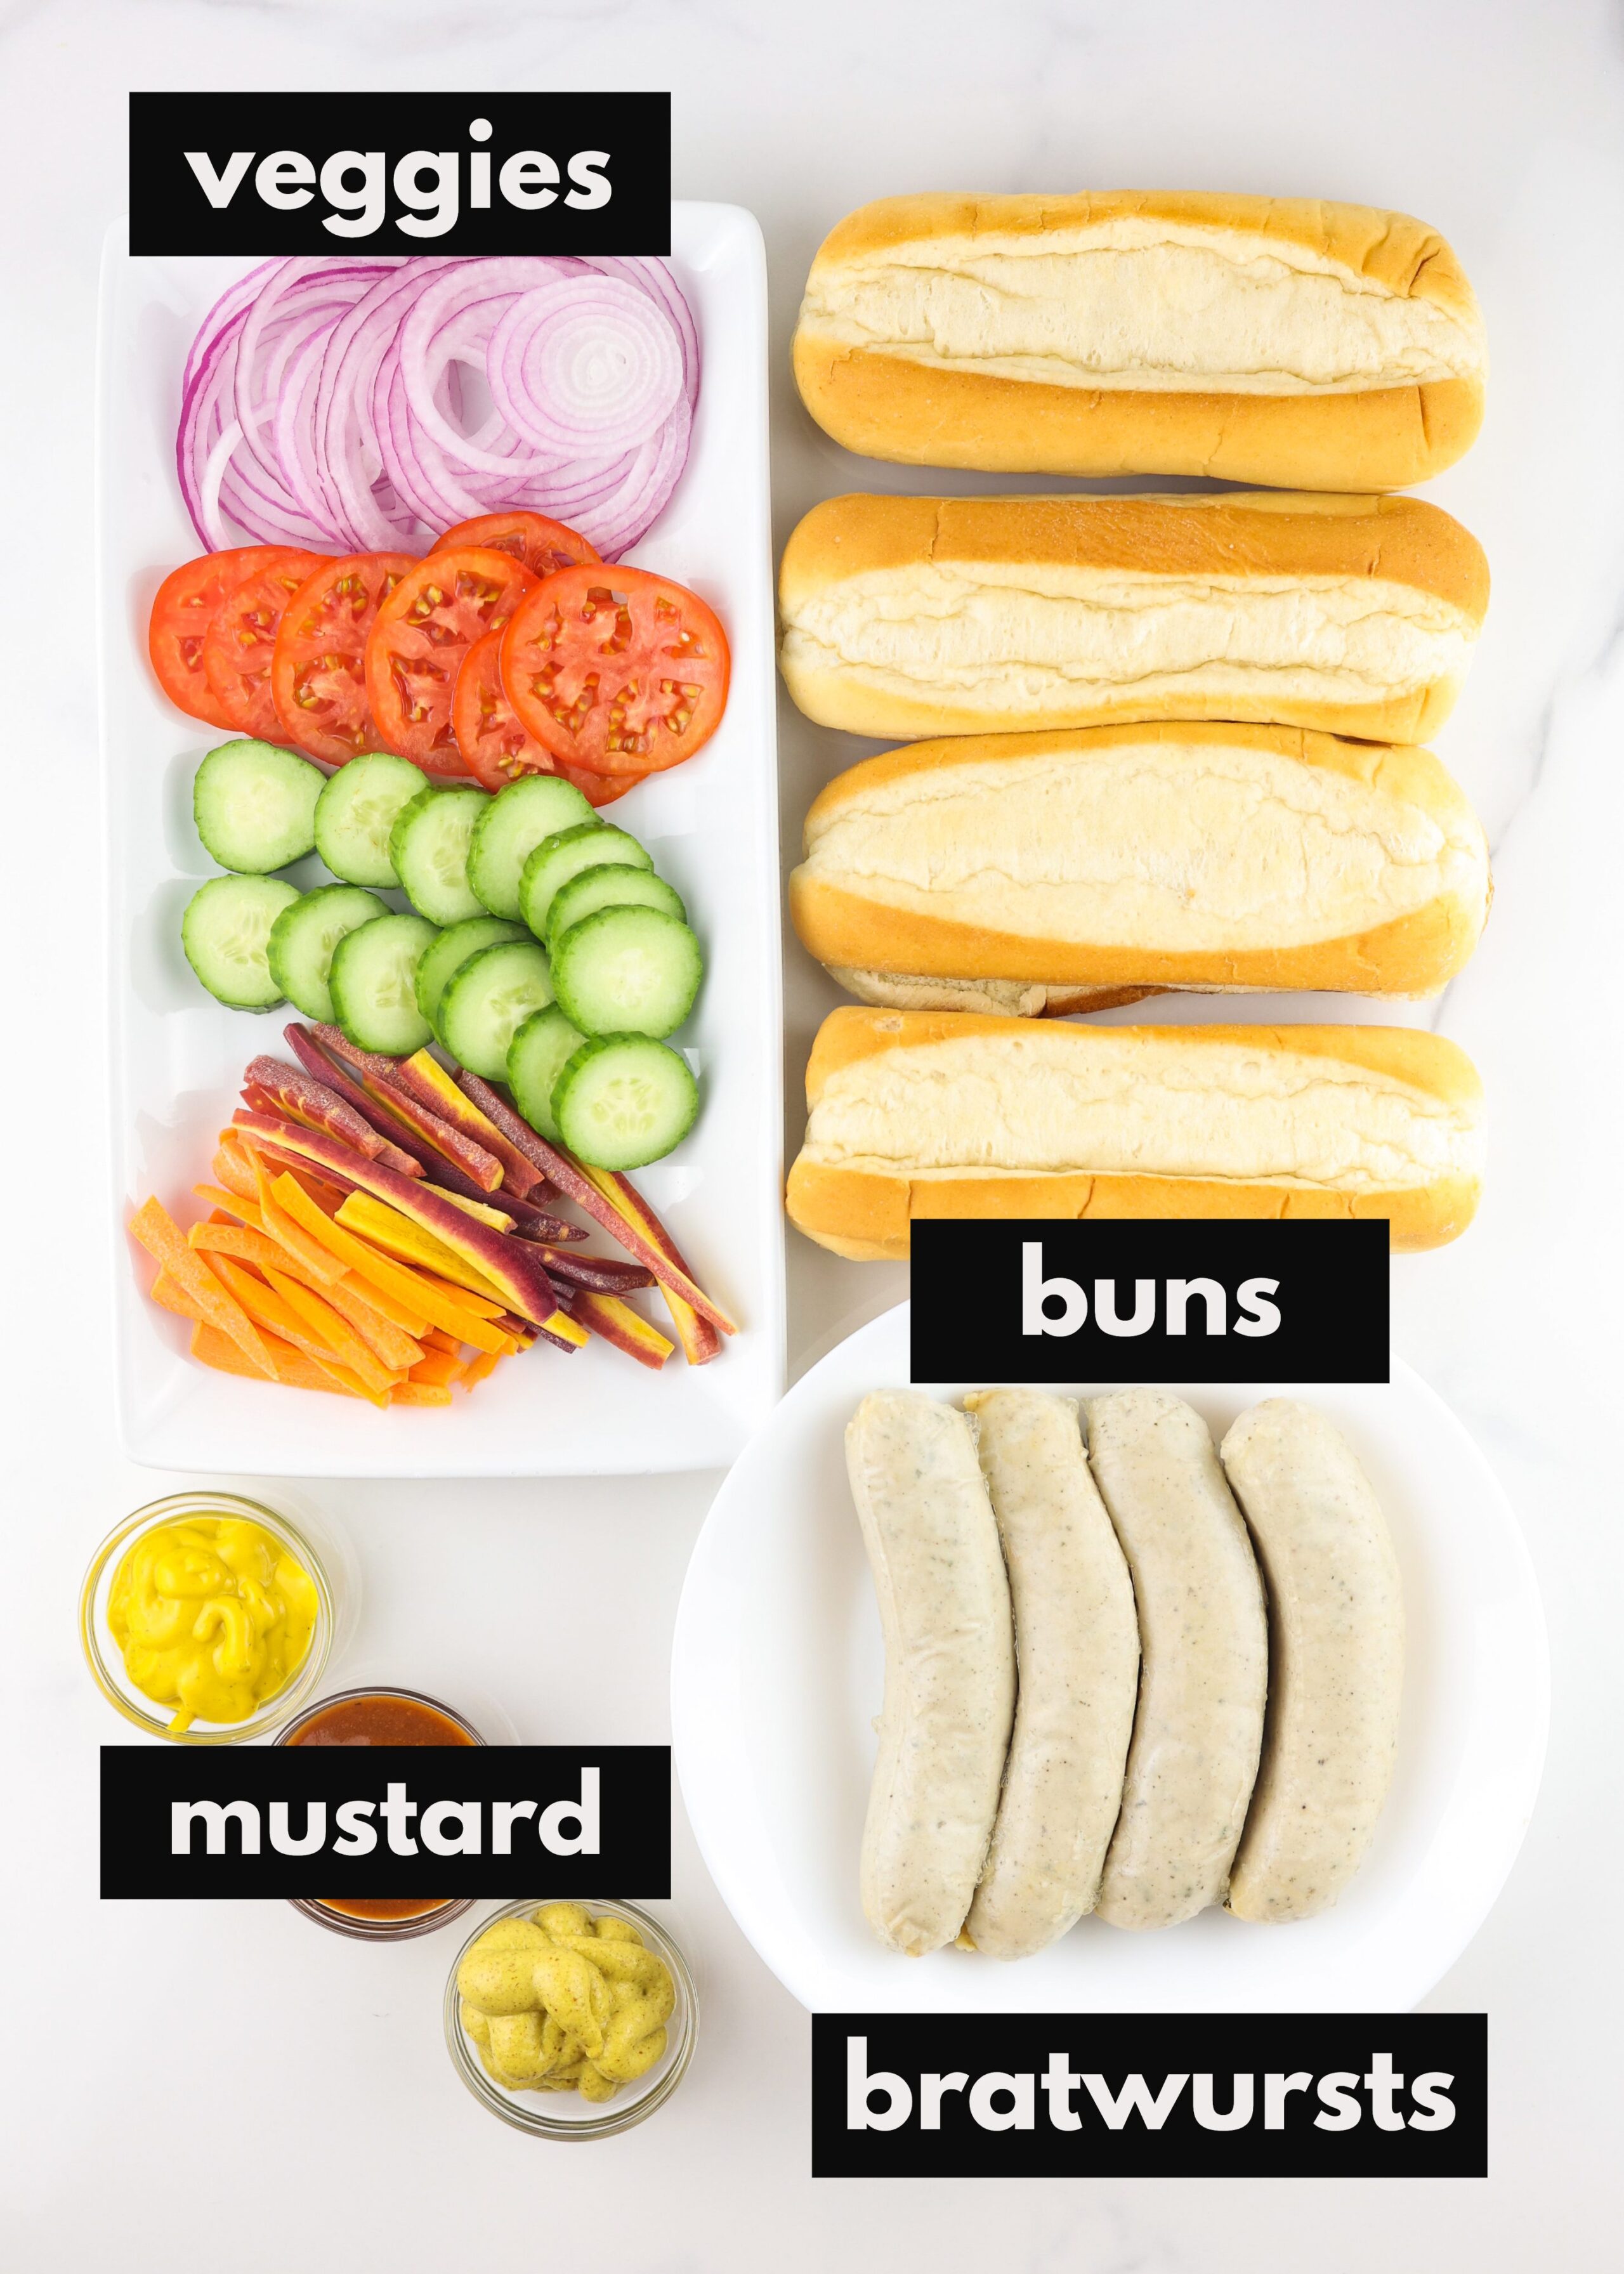
    • Mustard: Choose whichever kind you like: spicy brown, Dijon, grainy, or simple yellow, anything goes!
    • Buns: Again, choose your favorite: white, whole wheat, potato, or pretzel would work!

    Ingredient Swaps

    • Vegan: Beyond Meat makes a bratwurst sausage, can you believe it! Sub them in and cook as directed, following the same steps indicated in the recipe below!
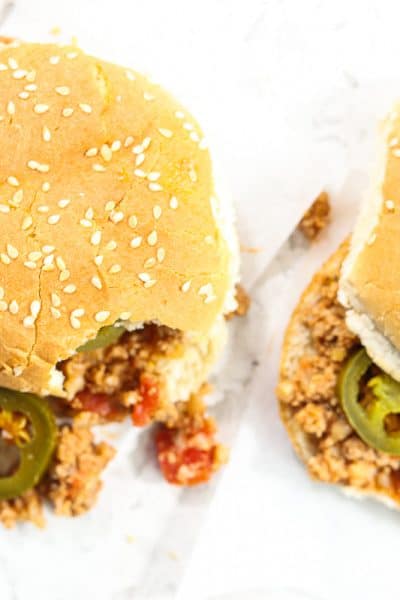
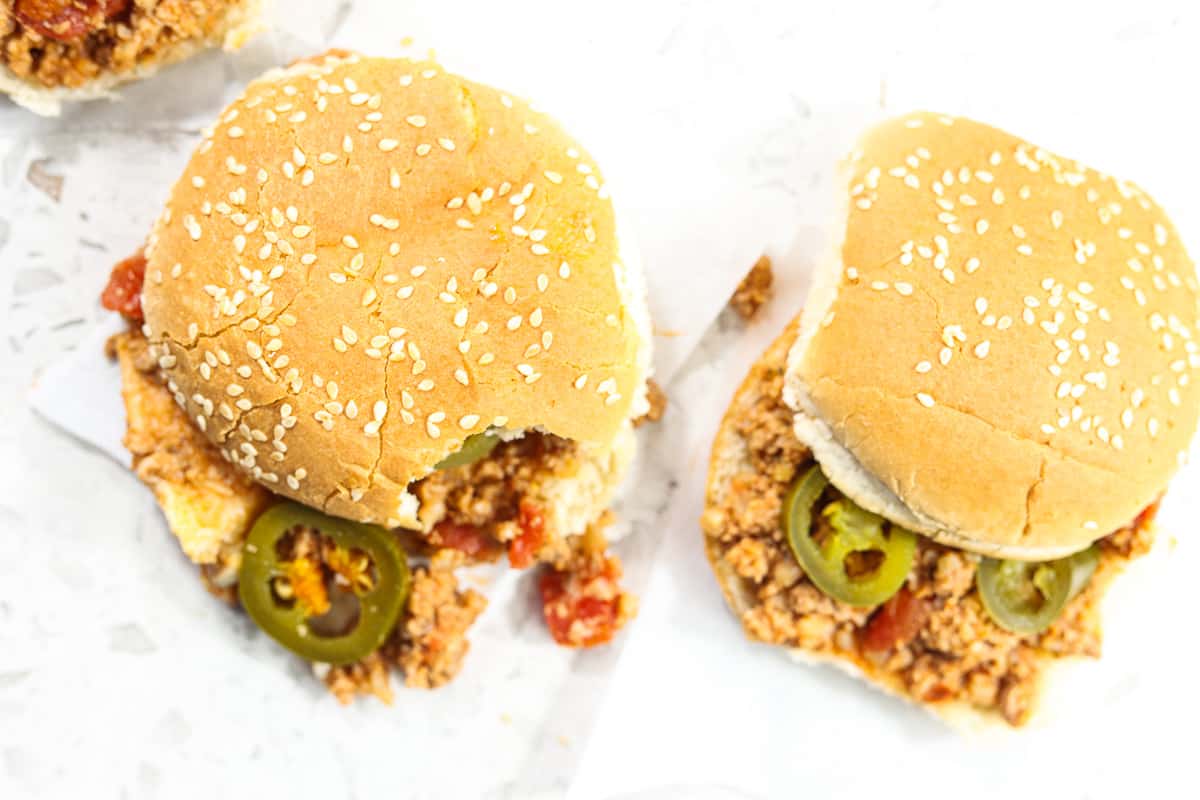
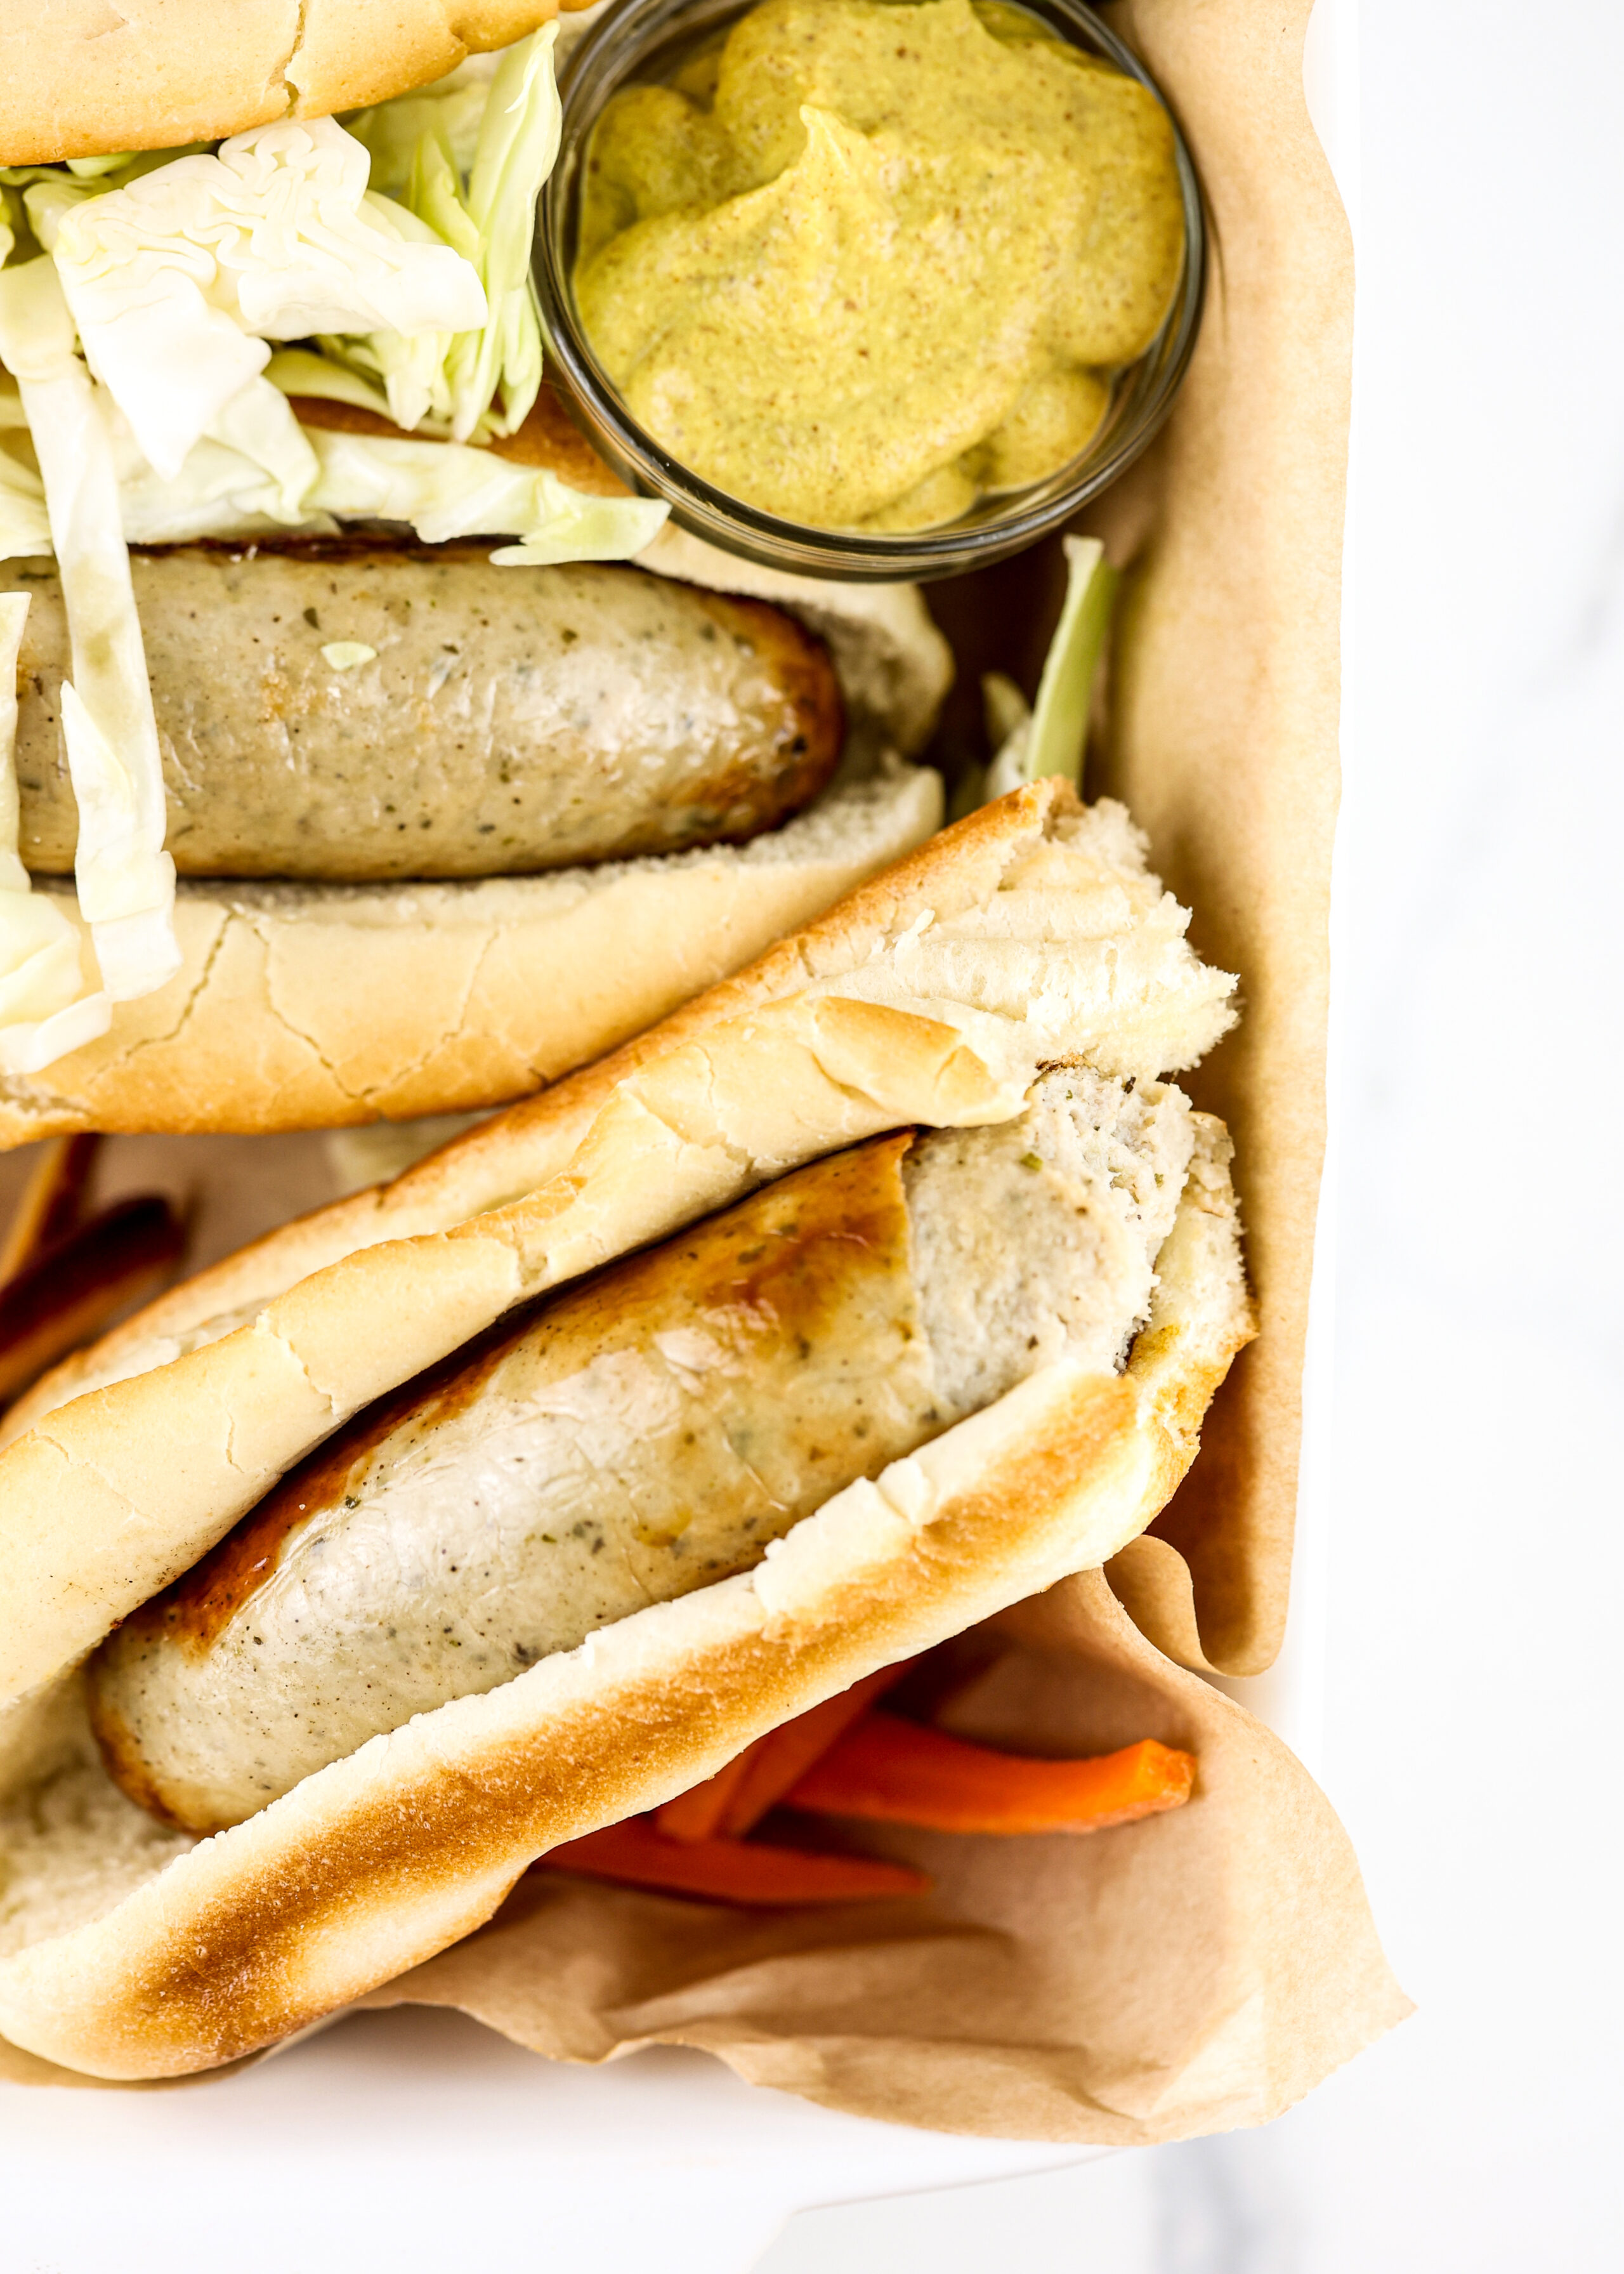
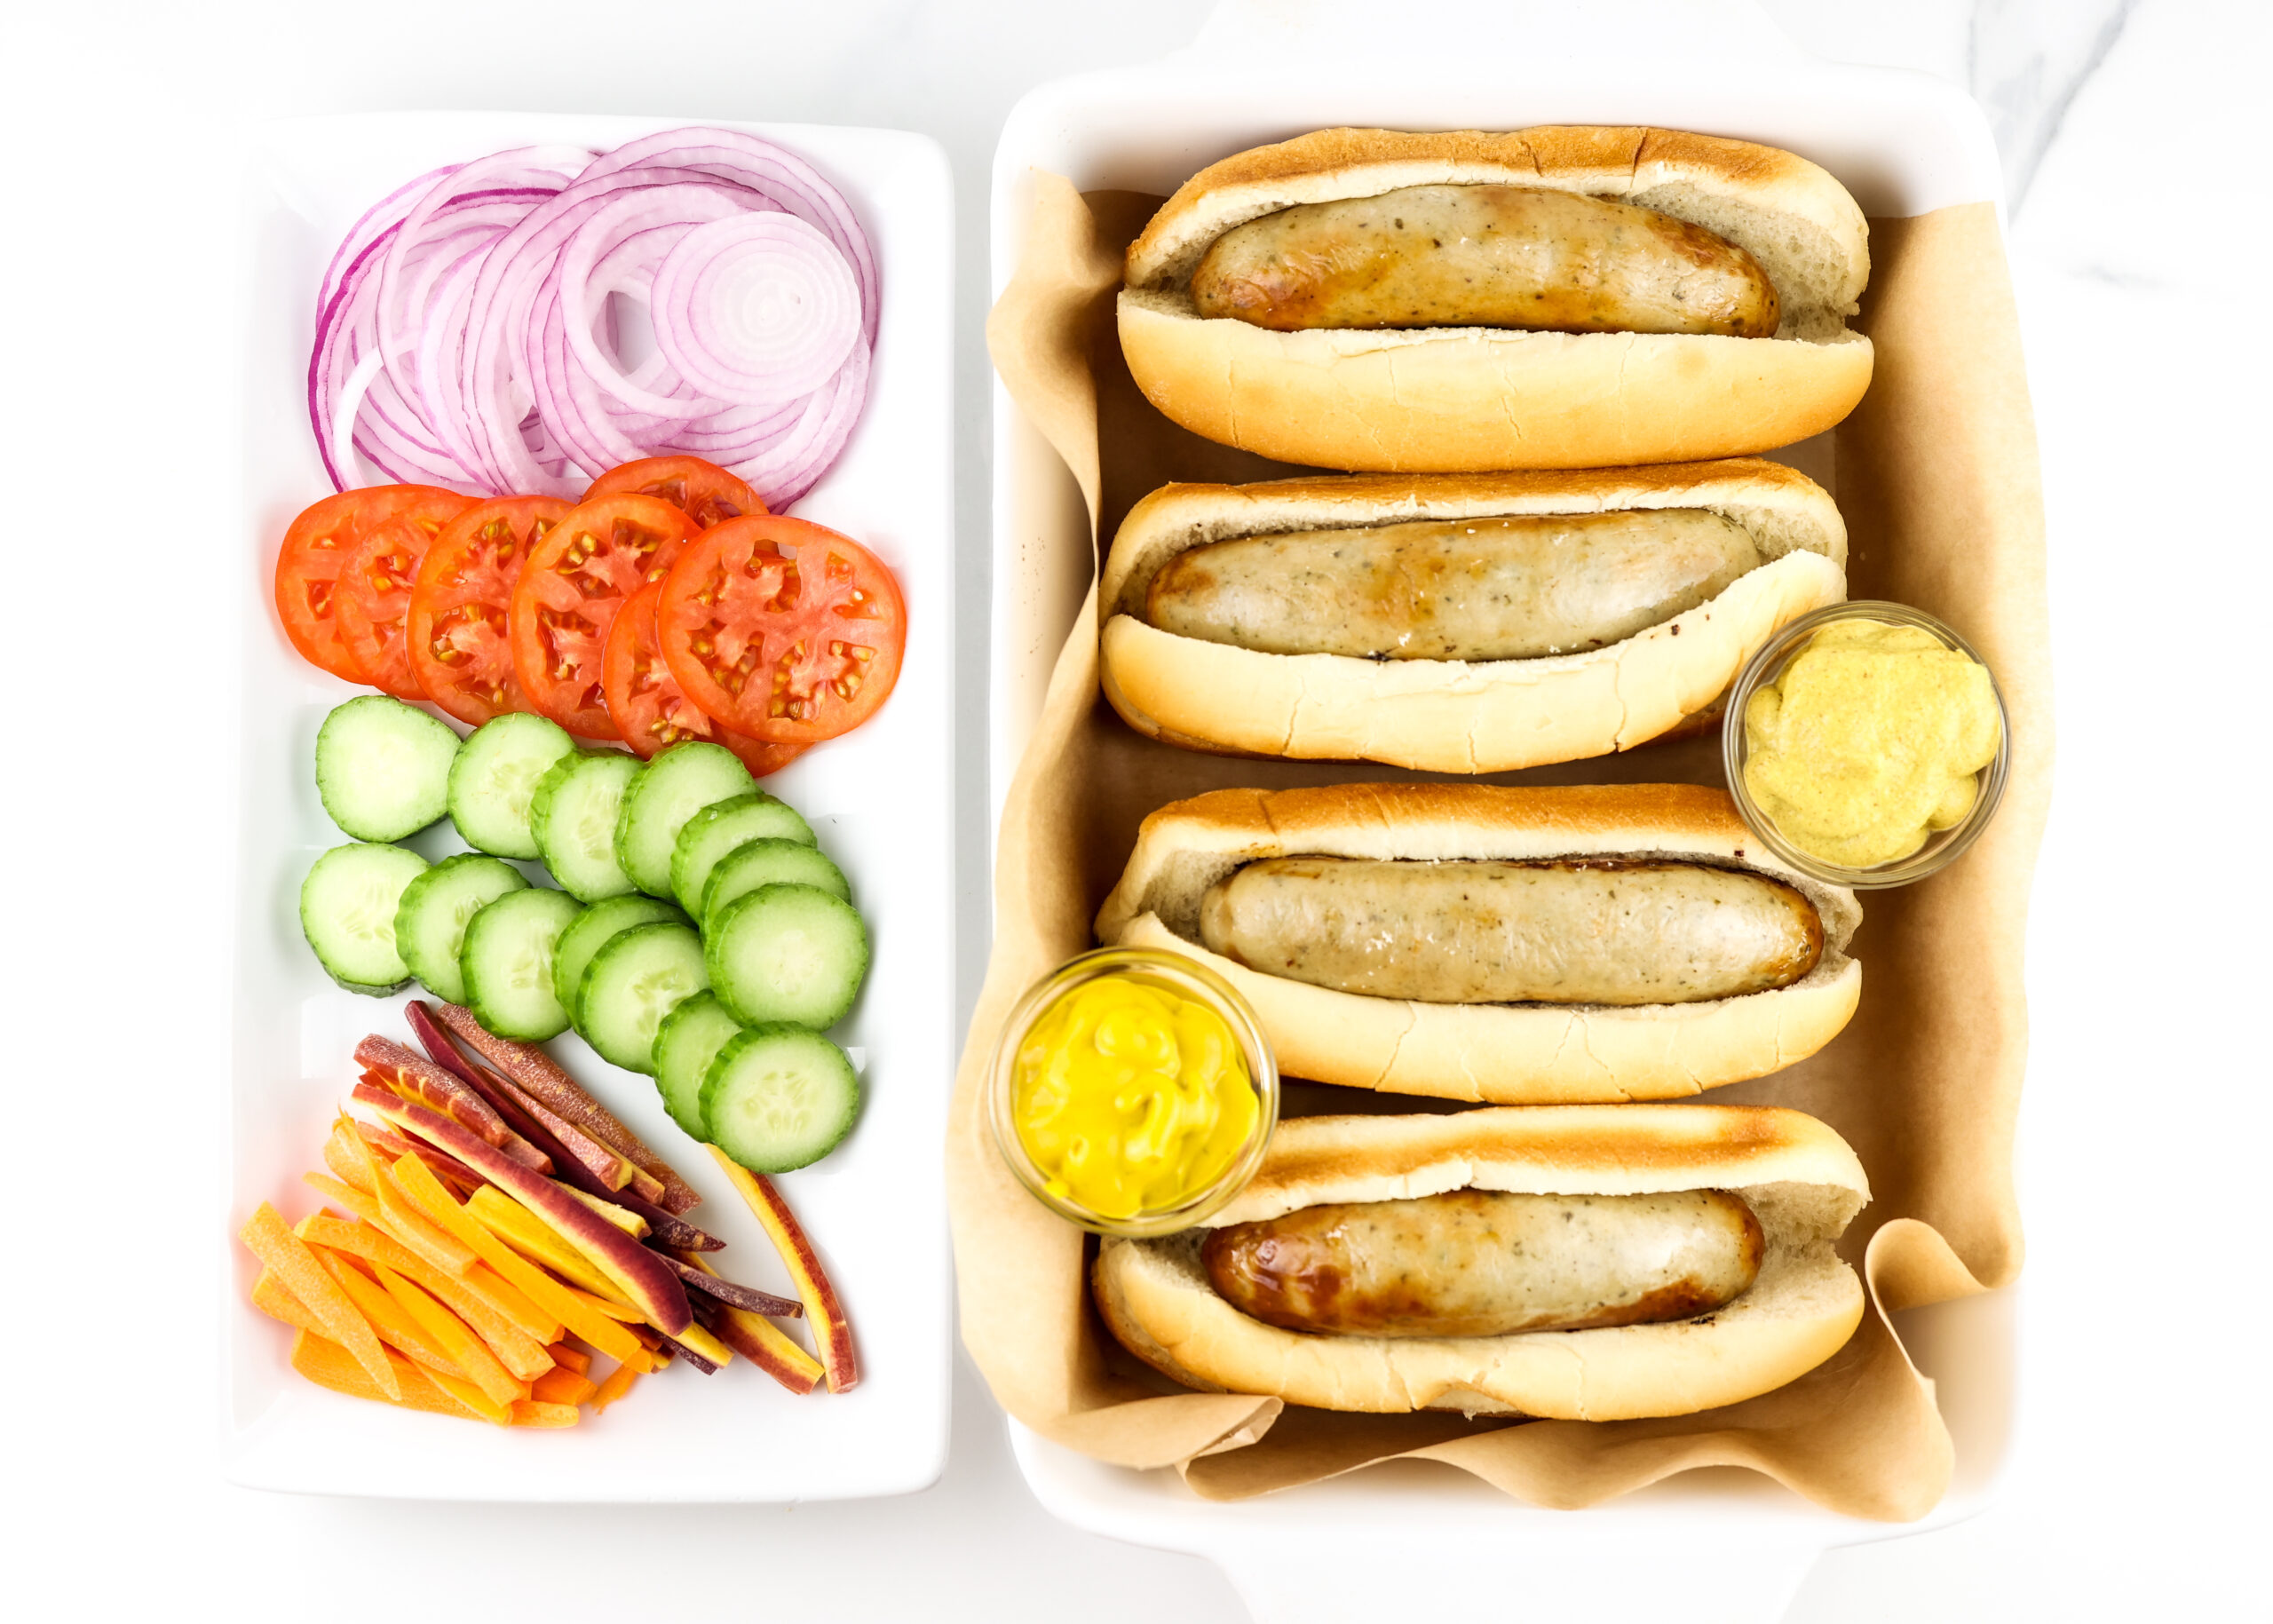
    • Toppings: If preparing to serve in a bun, follow your heart (and stomach) and choose the toppings you love best: sauerkraut, chopped cabbage slaw, sliced carrots, cucumber, onions, mustard, ketchup, or even my Habanero BBQ Sauce!

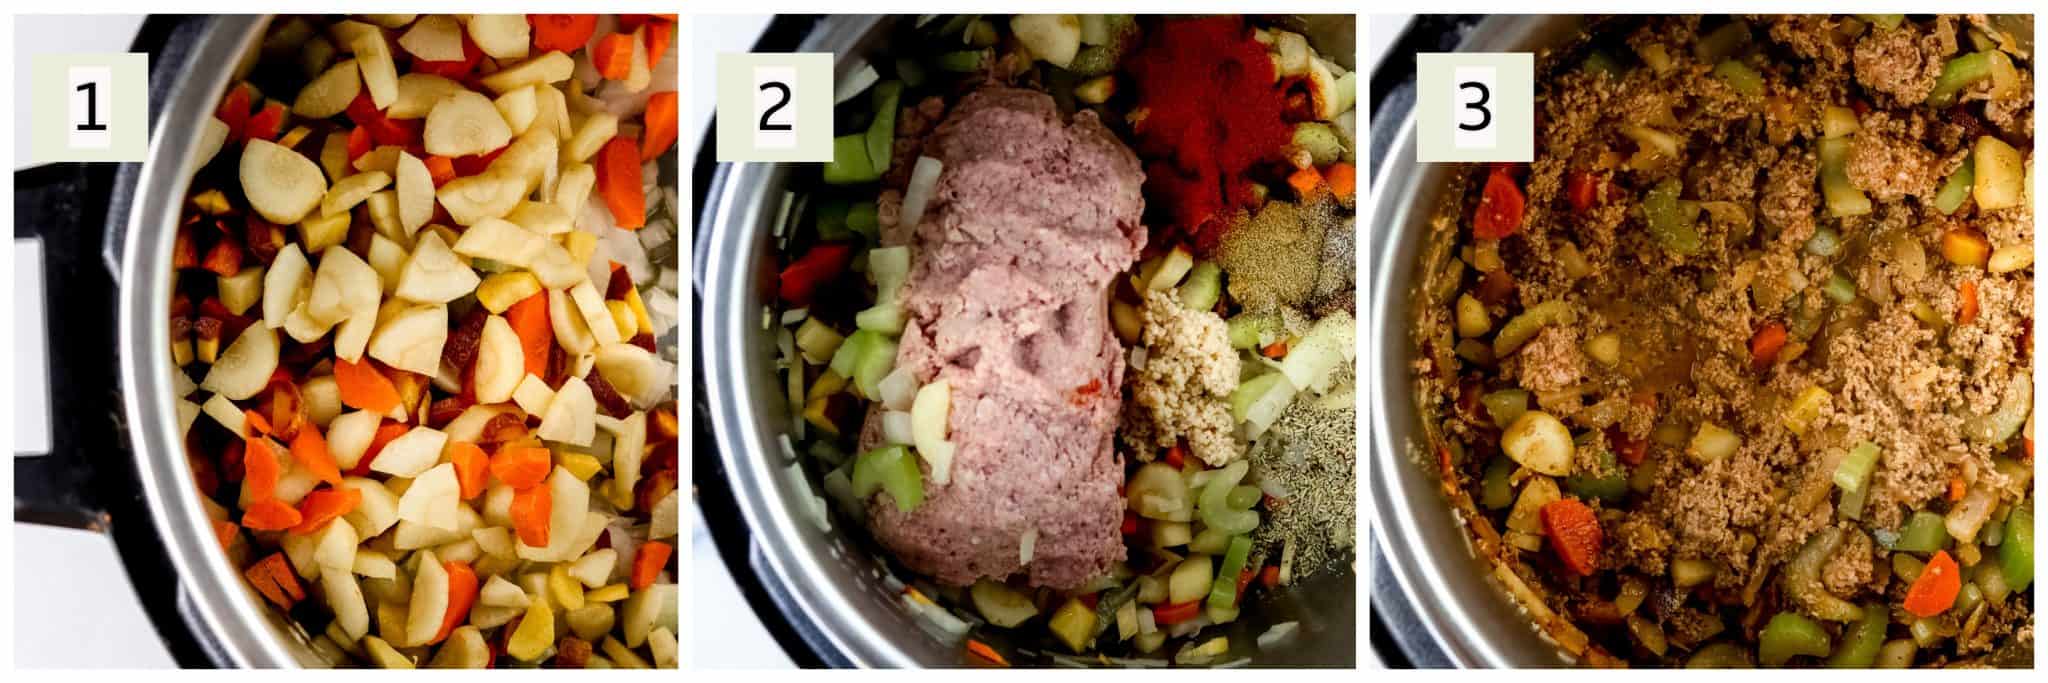
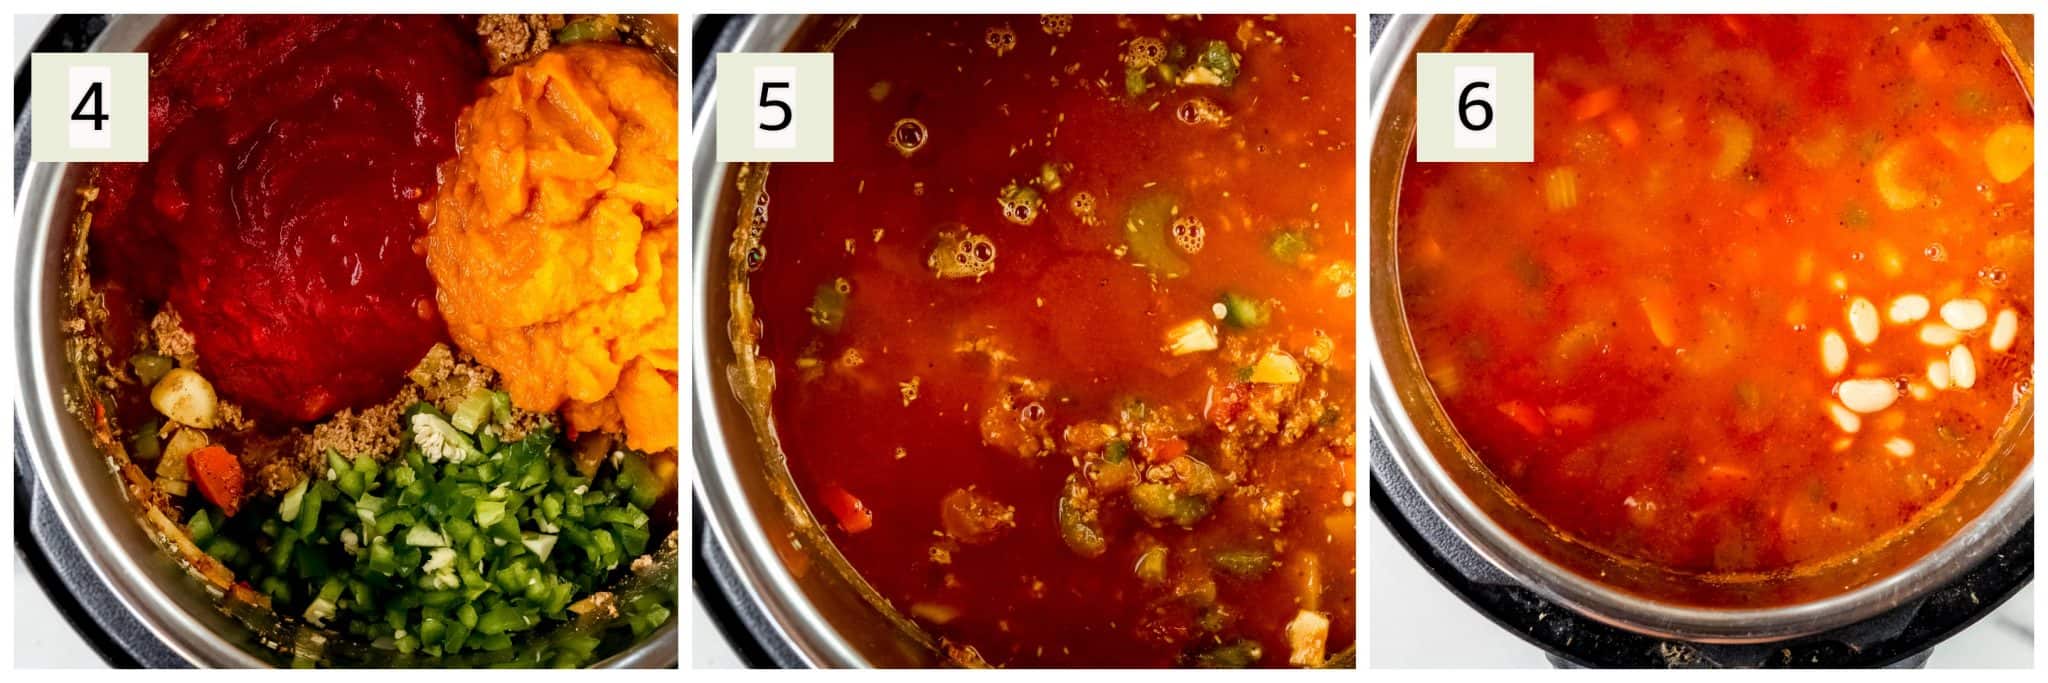
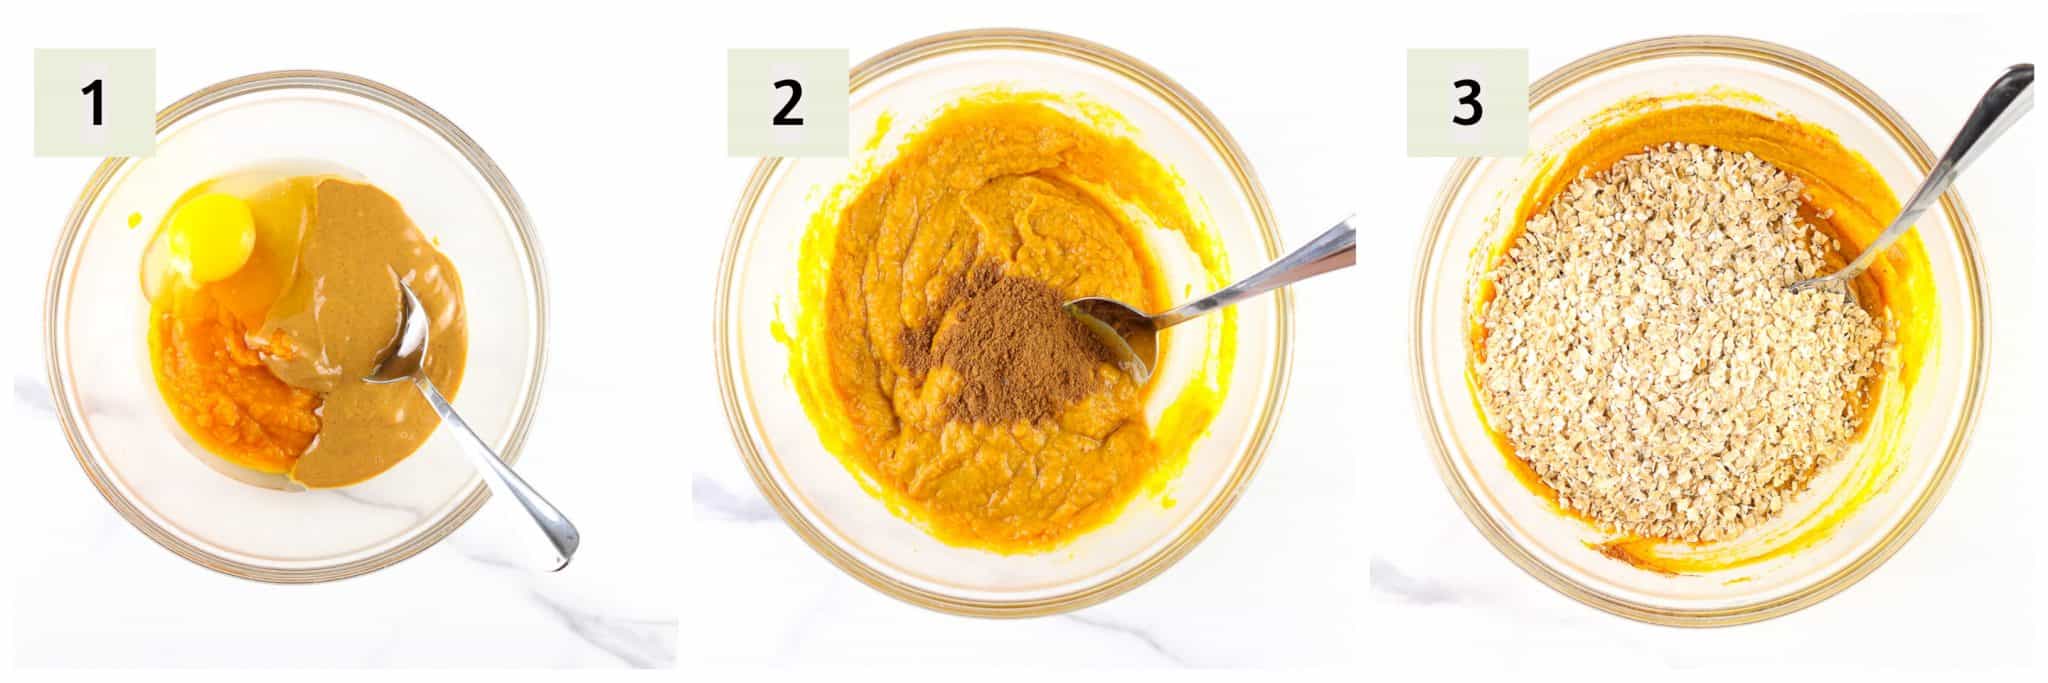
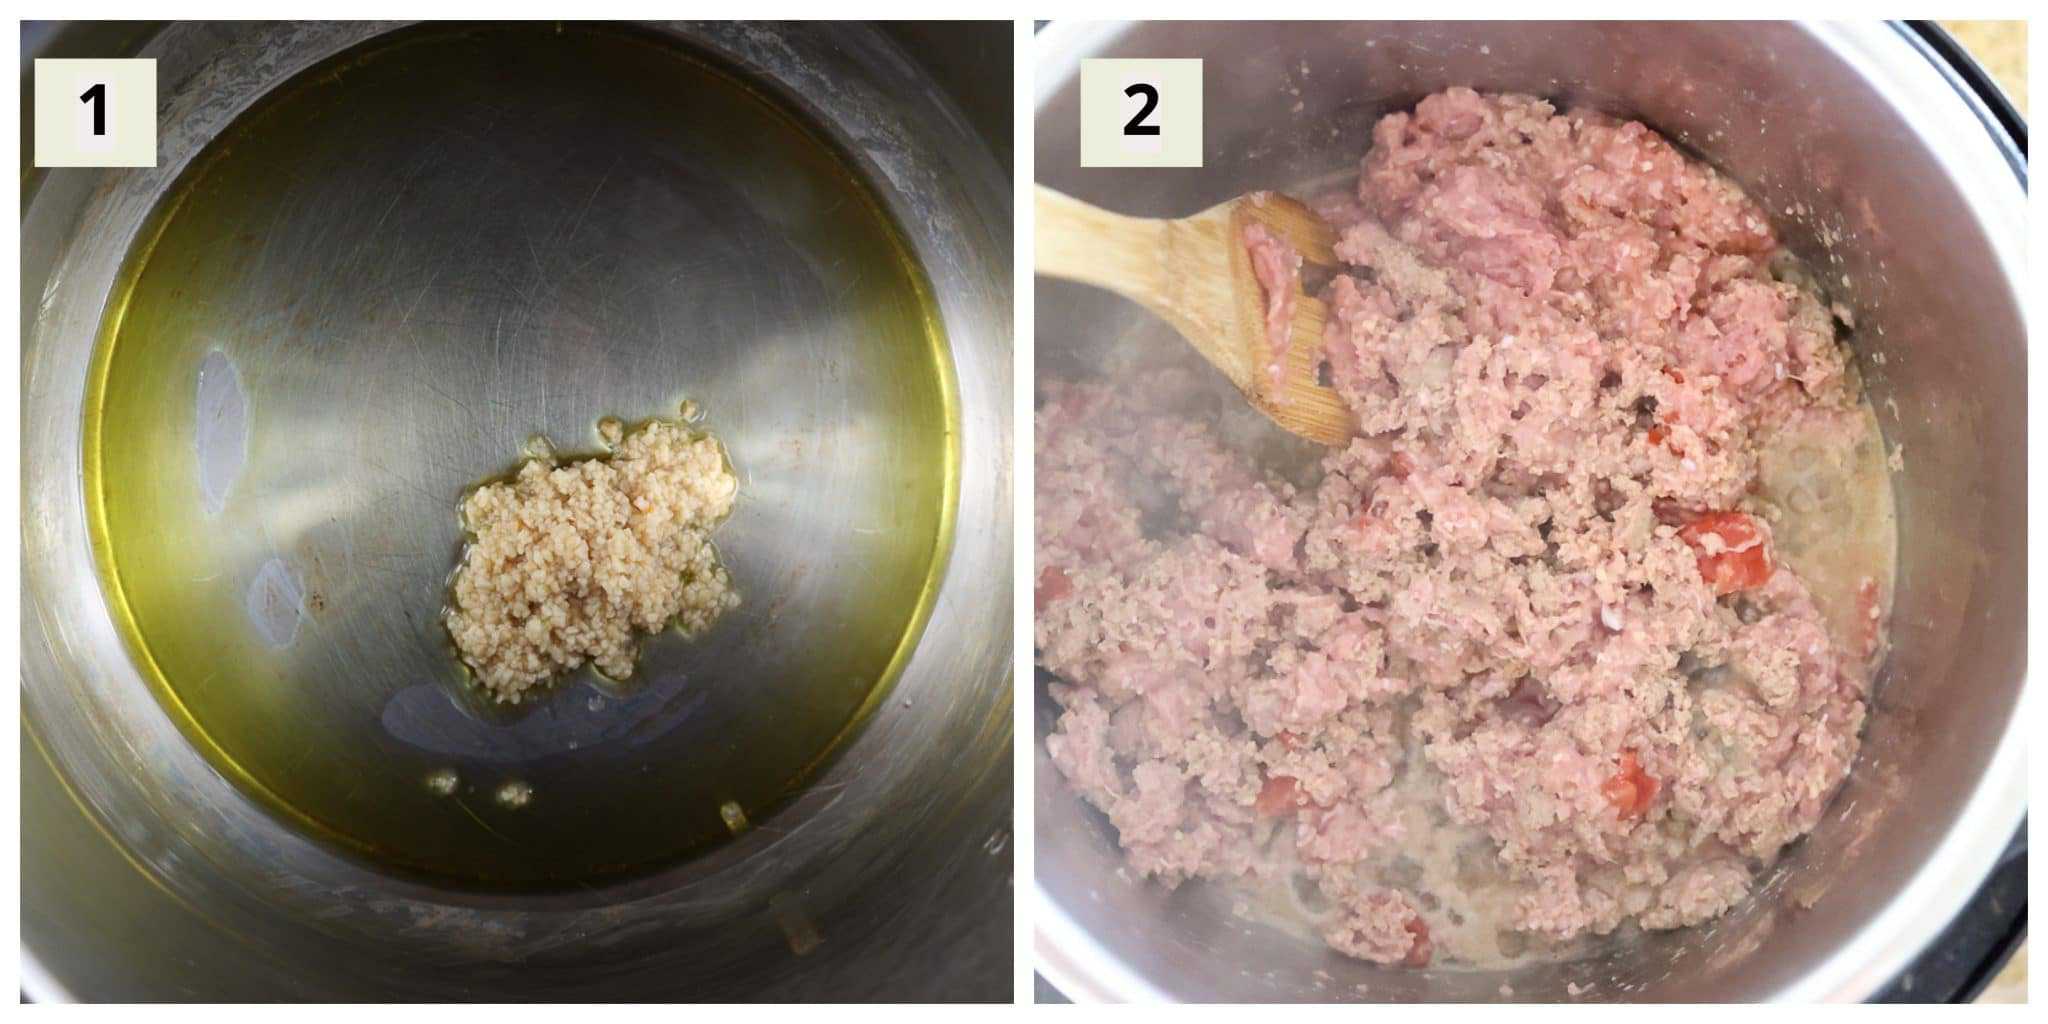
    How to Make Air Fryer Bratwurst

    Step-by-step directions for making the sausages.

    Recipe Notes + Expert Tips

    • Once air fried, it’s best to consume these brats. If you’re not planning to consume all of the sausages in a package, only cook what is needed and leave the rest in the refrigerator or freezer (and thaw later) until prepared to enjoy. Check your package for instructions about shelf-life!
    • Every air fryer is a little different, so be sure to review your manual for the proper settings!
    • While cooking at the proper time and temperature should be sufficient to cook your brats thoroughly, I always recommend temperature checking!
      • To read the temperature properly, insert an analog or digital thermometer into the sausage at it’s widest part. In this case, I like to insert from the end, not the side. This way, the thermometer sticks straight down the middle and is totally covered. Then, to confirm a food-safe temperature, the temperature should stay above 165 degrees F for 15 seconds.
    • If preparing to eat on a bun with toppings, the veggies can be prepped while the brats are cooking. To arrange the meal even faster, do the chopping prep the morning of, or the day before!
    Bratwurst in buns, on a platter, alongside veggie toppings.

    FAQ for these Brats in the Air Fryer

    Can I make these for a crowd? How many can I place in the air fryer?

    These brats are perfect for a group! However, how many to cook at a time really depends on the size of your air fryer. In order to get the brat skins nice and crispy, they’ll want to be in contact with the bottom of the fryer. Also, there should be at least a finger’s width of space between each sausage.

    That being said, fit as many brats as you’re able (given the space needed). If you need to make more than can be accommodated at a time, place the cooked sausages on a platter and cover with aluminum foil to keep warm until all brats are ready to be served.

    I didn’t think store bought sausages could be healthy. Please explain!

    I believe in, and abide by, the rule that “all foods fit”! What this means is that while eating for one’s health is most important, enjoying life and a variety of delicious foods comes in a close second!

    So, while most meals should be as healthful as possible i.e., low in saturated fats, mindful of sodium, added sugars, in proper portion sizes, and include plenty of non-starchy veggies (among other things, but that’s a good place to start), there is also room for foods that are satisfying and time saving!

    Thus, every once in a while, it’s a great option to choose a delicious store bought sausage, like bratwurst, chicken sausage, or hot Italian sausage, and include it as part of a balanced meal!

    Bratwurst in buns, in a casserole dish, topped with veggies and mustard.

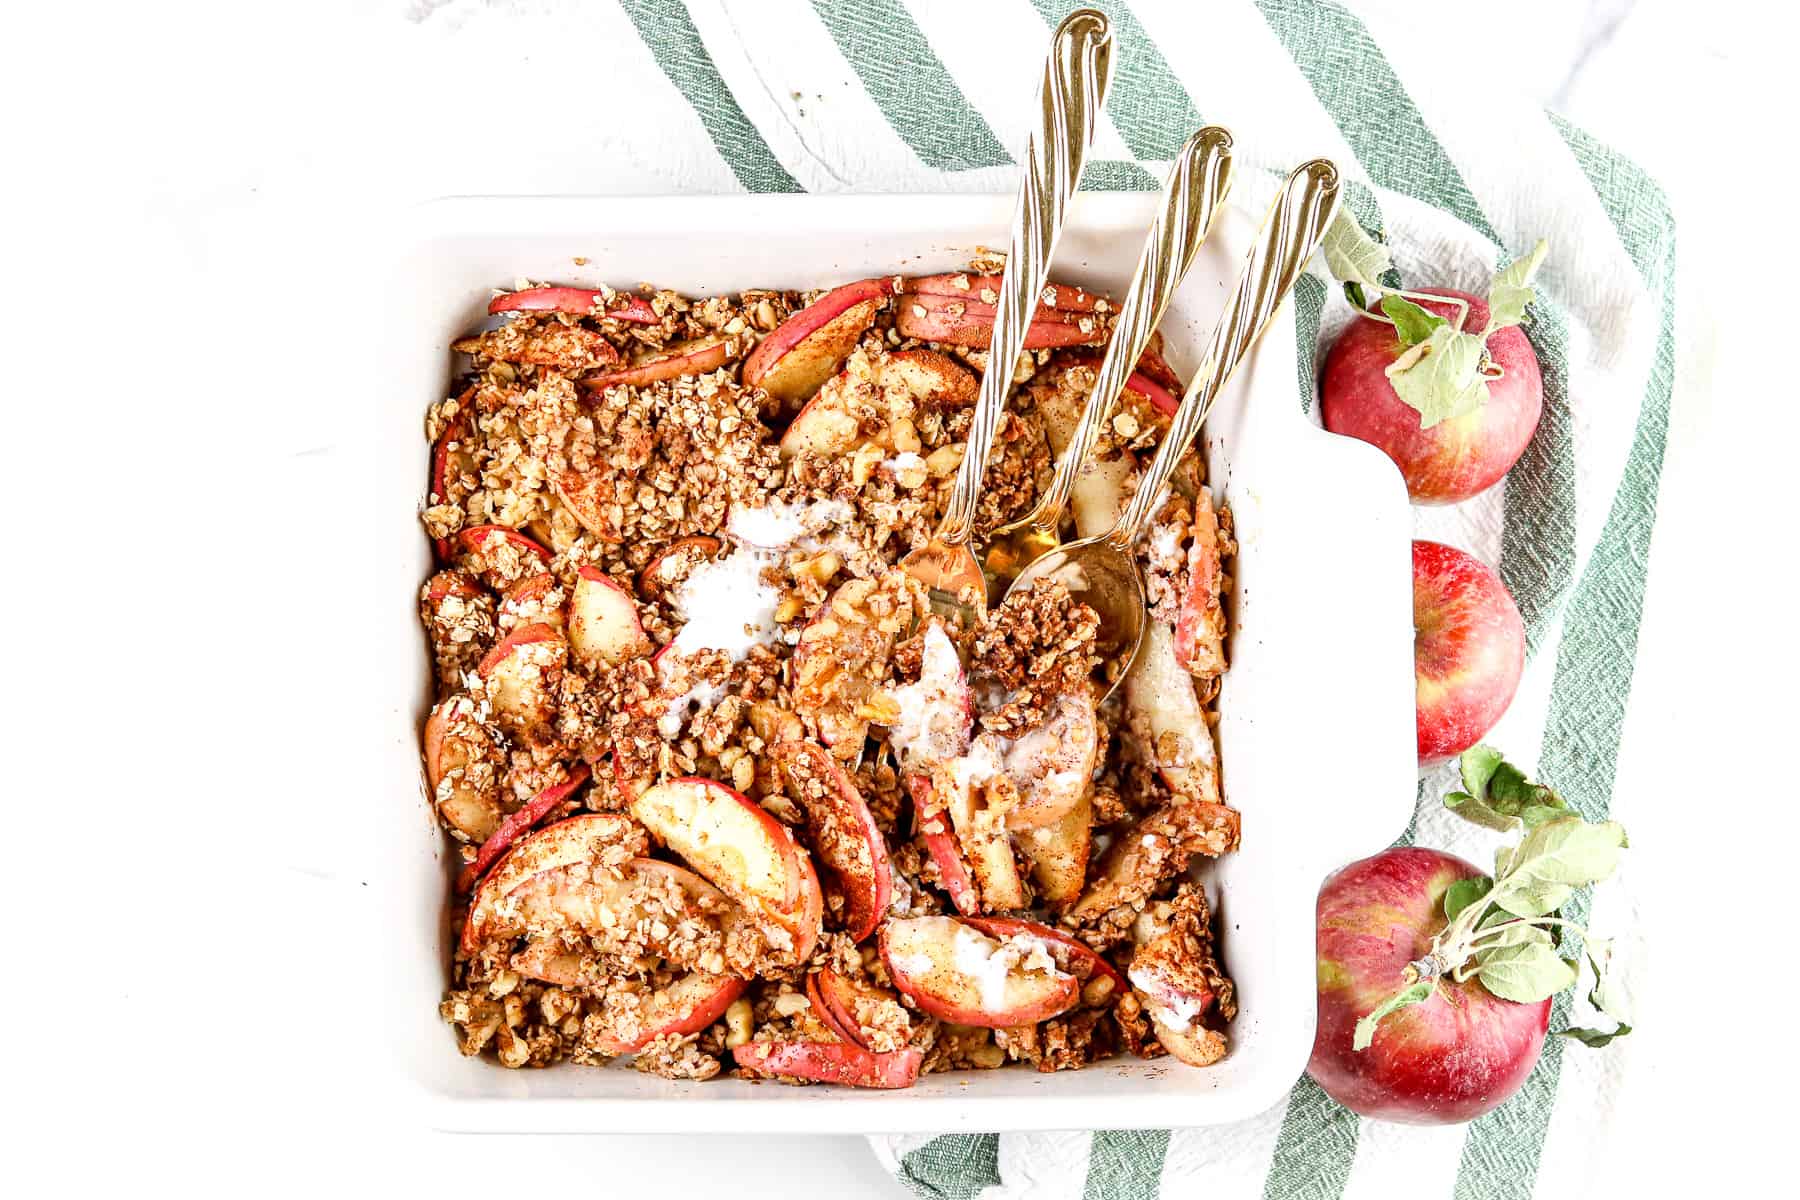
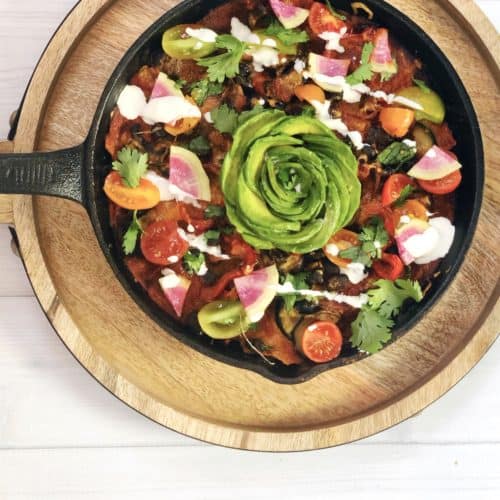
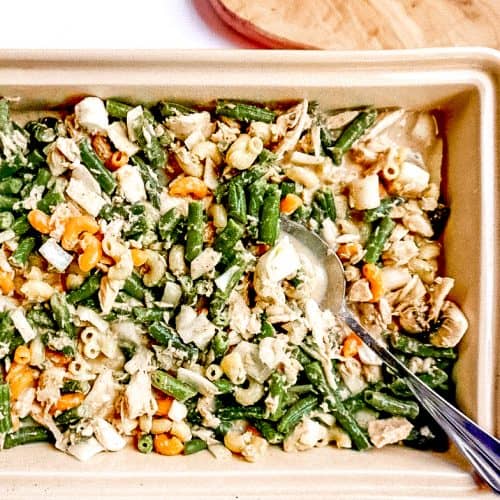
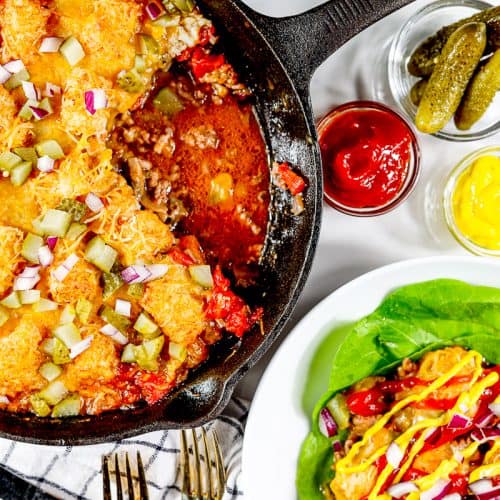
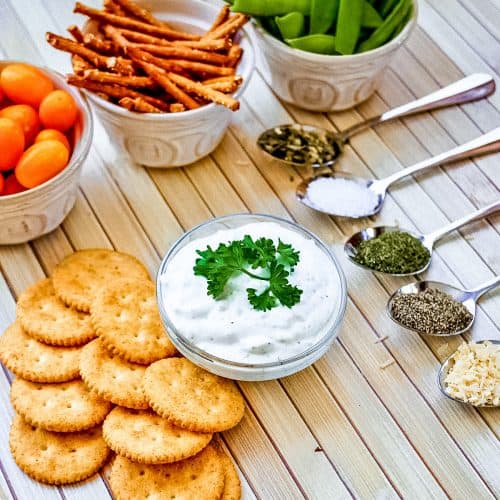
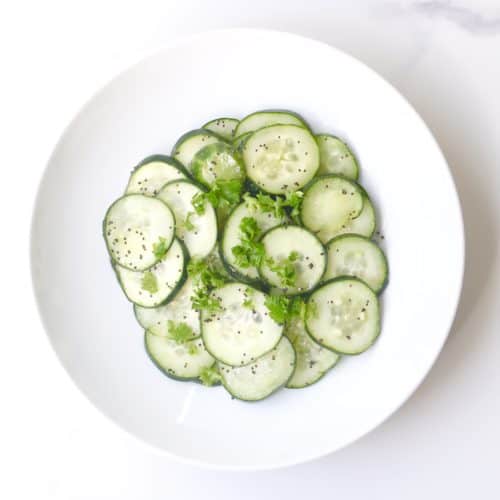
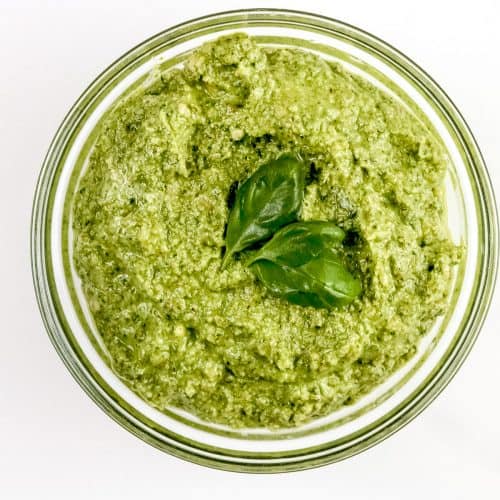
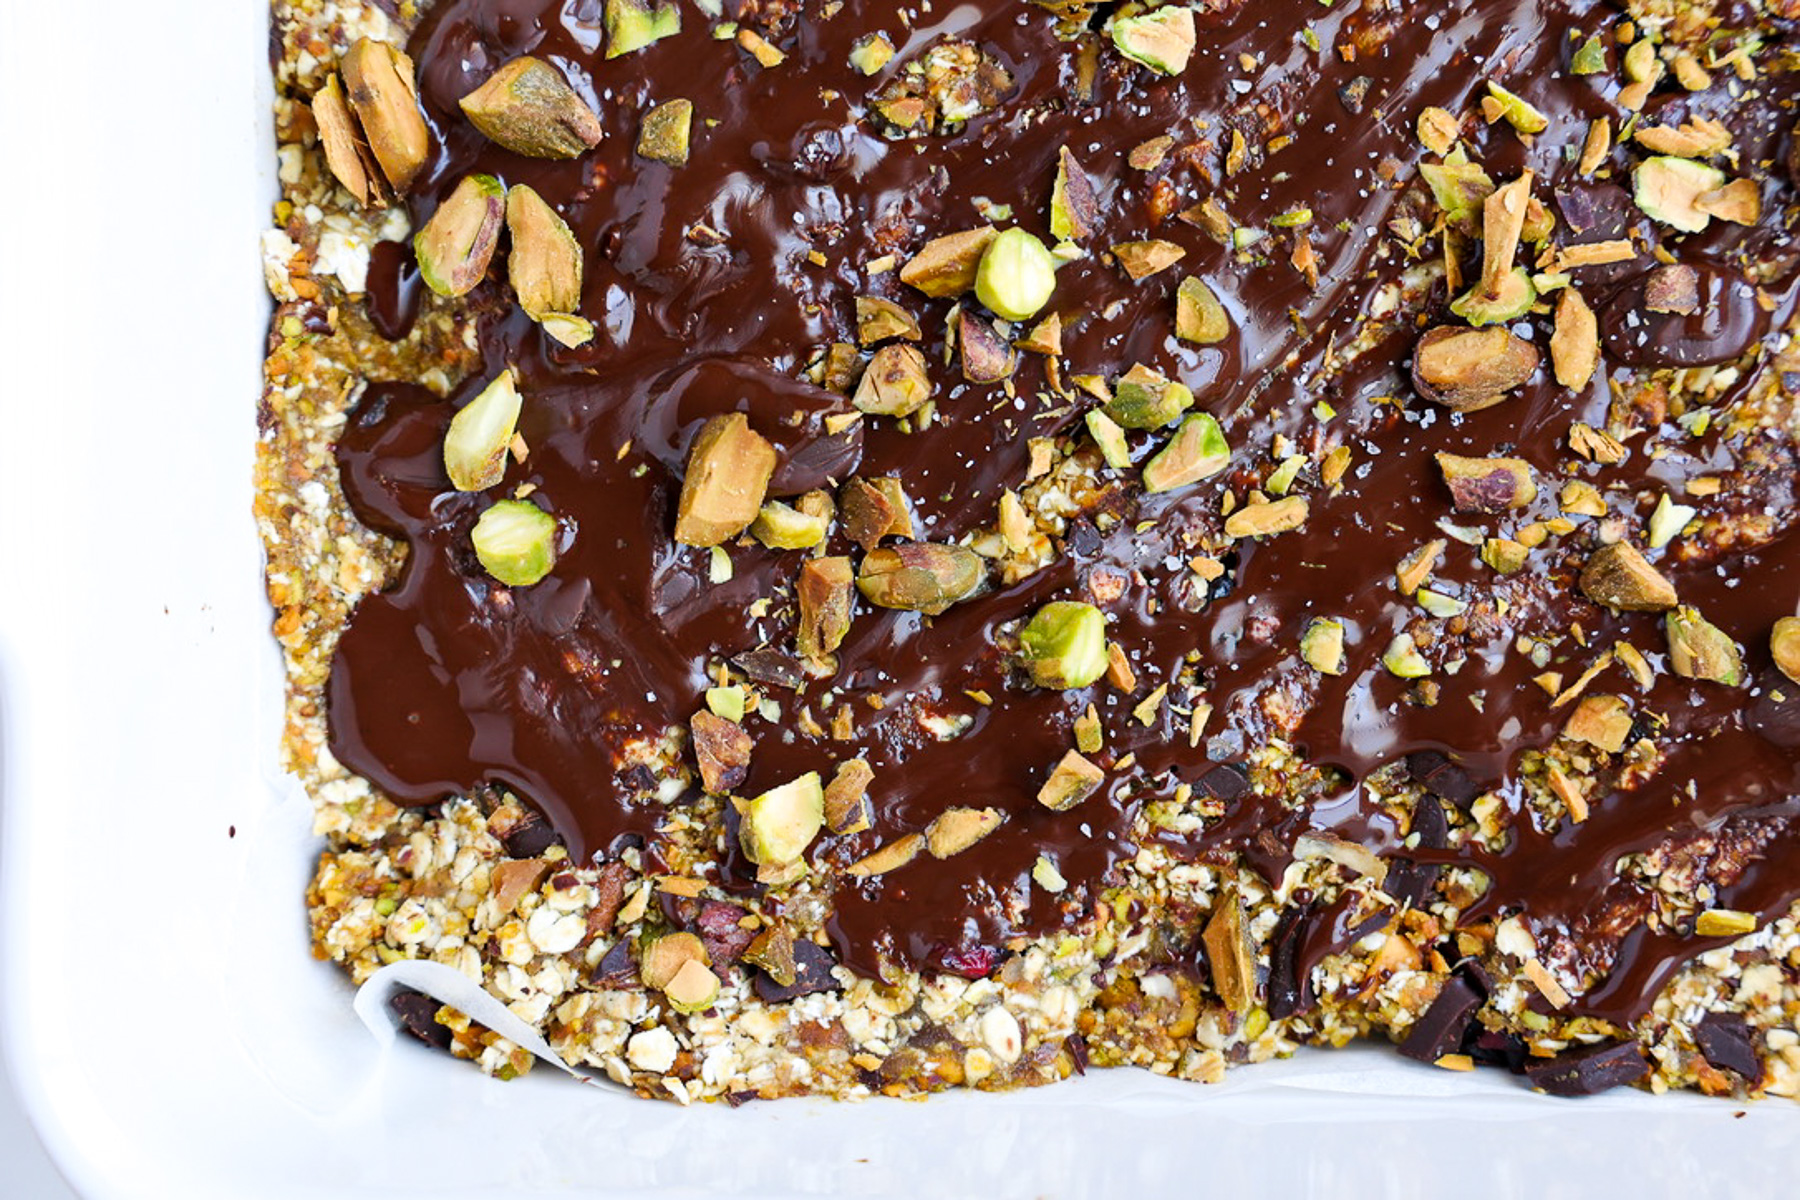
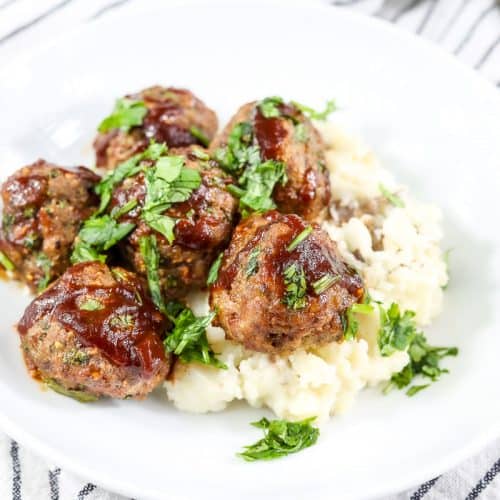
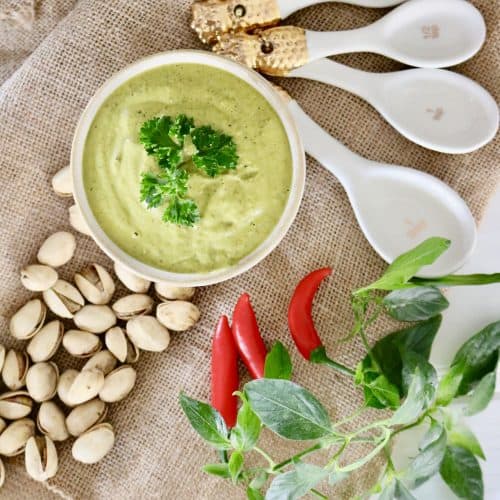
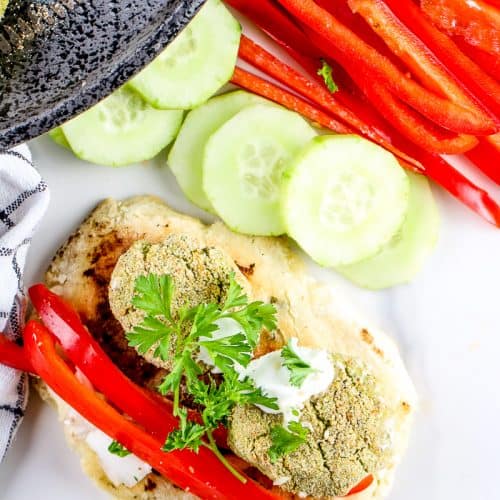
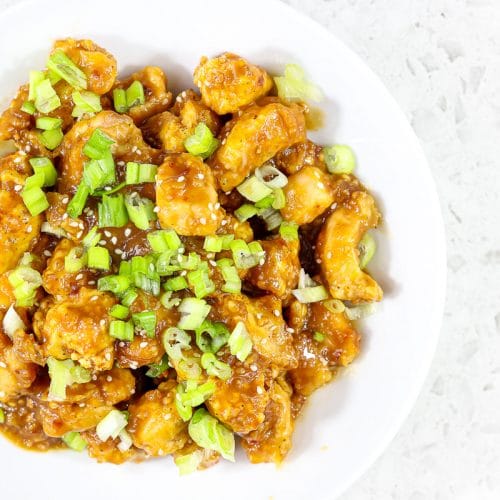
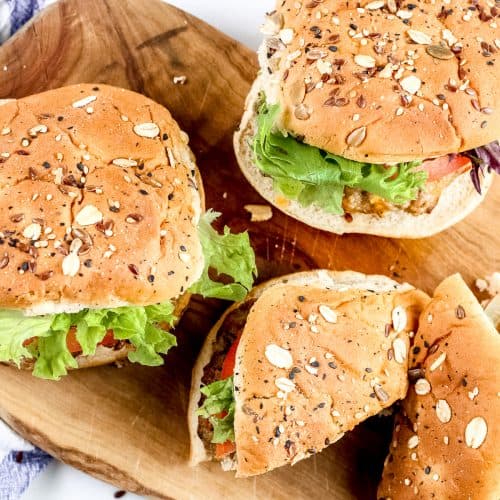
    Other Air Fryer Recipes you May Enjoy

    • Image of plated falafel with peppers.
      Air Fryer Falafel
    • Two plates of beef taquitos on a white and checkerboard black backdrop.
      Air Fryer Taquitos
    • Plated orange chicken.
      Air Fryer Orange Chicken
    • Image of air fryer turkey burgers plated.
      Air Fryer Turkey Burgers

    If you try this recipe, would you please do me a favor and leave a star rating in the recipe box and/or comment below! This helps immensely in Google to continue delivering high quality content to you. And please be sure to tag and share what you made with me on social, I love seeing your creations! You can find me here: Instagram – Facebook – Pinterest!

    4 bratwursts in a white pan with mustard.
    Print Recipe
    5 from 3 votes

    Air Fryer Bratwurst

    No time to grill? No problem! This 8 minute Air Fryer Bratwurst Recipe will bring that classic brat to life in no time! Pair it with fresh produce and fun sauces to make it your own (while boosting the nutrition, too!)
    Prep Time3 minutes mins
    Cook Time10 minutes mins
    Total Time13 minutes mins
    Course: Comfort Food
    Cuisine: American
    Servings: 4 bratwursts
    Calories: 253kcal
    Author: Liz Shaw

    Equipment

    • Air Fryer

    Ingredients

    • 4 each bratwursts
    • 4 each buns optional
    • mustard optional

    Veggies of Choice

    • pickled carrots
    • cabbage slaw
    • chopped tomatoes
    • onion

    Instructions

    • Spray air fryer basket with cooking spray. Place bratwursts into air fryer basket and set temperature to 370 degrees F.
    • Cook for 8 to 10 minutes, shaking the basket halfway through cooking. When cooking completes, internal temperature should read 165 degrees F.
    • Place inside a bun and add desired toppings. Enjoy immediately!

    Notes

    • Once air fried, it’s best to consume these brats. If you’re not planning to consume all of the sausages in a package, only cook what is needed and leave the rest in the refrigerator or freezer (and thaw later) until prepared to enjoy. Check your package for instructions about shelf-life!
    • Every air fryer is a little different, so be sure to review your manual for the proper settings!
    • While cooking at the proper time and temperature should be sufficient to cook your brats thoroughly, I always recommend temperature checking!
      • To read the temperature properly, insert an analog or digital thermometer into the sausage at it’s widest part. In this case, I like to insert from the end, not the side. This way, the thermometer sticks straight down the middle and is totally covered. Then, to confirm a food-safe temperature, the temperature should stay above 165 degrees F for 15 seconds.
    • If preparing to eat on a bun with toppings, the veggies can be prepped while the brats are cooking. To arrange the meal even faster, do the chopping prep the morning of, or the day before!
    •  

    Nutrition

    Calories: 253kcal | Carbohydrates: 3g | Protein: 12g | Fat: 21g | Saturated Fat: 7g | Polyunsaturated Fat: 1g | Monounsaturated Fat: 1g | Cholesterol: 50mg | Sodium: 605mg | Potassium: 5mg | Fiber: 1g | Sugar: 1g | Vitamin A: 1IU | Vitamin C: 1mg | Calcium: 2mg | Iron: 1mg

    Want more Shaw Kitchen recipes? Then sign up here for my 5 Day Stress-Free Meal Plan delivered straight to your inbox!

    Creamy Potato Soup

    July 29, 2021

    Image of potato soup in a bowl with salt and pepper.

    Looking for a lightened up version of a classic potato soup? Then this healthy Creamy Potato Soup is just for you! Filled with veggies and topped off with a lighter half and half to give that creamy flavor and texture, you won’t regret adding this to your meal plan this week.

    Image of potato soup with pistachios on top.

    Why you need to make this Healthy Potato Soup

    Rest assured, this recipe is straightforward and delicious!

    Potatoes are one of the most versatile and easy to cook starchy veggies. They often get a bad rap for their starch content and are notoriously linked with not-so-healthy cooking methods, but this soup turns that gossip on its head!

    The humble, satisfying potato deserves a place amongst health foods and should be regarded as such!

    On another note, I can’t think of a better way to use my Instant Pot! Remember, I did write the Instant Pot Cookbook For Dummies and I try to use it whenever I can.

    If you’re looking for more Instant Pot inspo, be sure to check out my Stuffed Sweet Potatoes, Shepherds Pie, Taco Soup, or Beef Brisket.

    Now onto this Creamy Potato Soup!

    What you need to make this Easy Creamy Potato Soup Recipe

    Ingredient image of preparation for potato soup.

    Ingredient Tips

    • Potatoes: Use whatever type of white potato variety you want! Russet and Yukon gold work great. Or, even swap in a purple and white sweet potato (we’ve done this and it’s delicious.) Check out the FAQ for more info on potato types!
    • Spices: I’ve kept the spices pretty minimal in this soup but you know your taste buds best! If there’s a flavor you’d like to add in, maybe dried thyme, sage, or rosemary, go for it! Just start small, 1/2-1 tsp to start, when the bay leaf is added.

    Ingredient Swaps

    • Mirepoix: For the onion, carrot, celery mix, you can use a store bought frozen mix. If you do, just note there may be more onion, and less of the other veggies, than I use here!
      • And if using frozen, thaw first, drain, then sauté.
    • Dairy free/vegan: If you need this to be dairy-free, you can omit the half and half and cheese. It will be delicious but just not super creamy potato soup (more of a broth base.)
      • For some non dairy subs, you can try to use a plant based Parmesan (it may not melt perfectly but you’ll get the flavor) and unsweetened (i.e. no added sugar) oat milk.
    • Vegetable bouillon: You can sub in a quart, or 32 oz, of vegetable broth if you have it on hand. I like bouillon for the shelf stability, though!
    • Pistachio garnish: If needed, sub toasted pumpkin seeds or even some roasted chickpeas!
    • Garlic: If you have powdered on hand instead of fresh, add 3/4-1 tsp. For reference, 1/8 tsp garlic powder can be used for 1/2 tsp freshly minced garlic. But it’s up to your taste and always best to start small and add more later!

    How to make this Vegetarian Potato Soup Recipe

    (1 + 2) Start by sautéing the oil with the onions, carrots, celery, and garlic for about 5 to 7 minutes (or until onions are translucent.) You can do this on sauté mode in your Instant Pot or in a large pot with a lid over the stove.

    Image of process shots to make soup.

    (3 + 4) Add the potatoes, water, and bouillon to the pot. Place the bay leaves on top and return to Instant Pot to pressure cook for 20 minutes.

    Note: If you are cooking on the stove, cook over medium to low heat so you can put the lid on. Cook until potatoes are fork tender (about 25 to 30 minutes.)

    Process shot images to make soup.

    (5 + 6) When cooking completes, use a quick release if you are using your Instant Pot. Then, carefully finish the creamy potato soup using an immersion blender or placing the soup inside a stand blender.

    Process shots to make soup.

    (7 + 8) If using a stand blender, add the soup back to the pot and stir in the half and half and cheese.

    Image of process shots to make soup.

    Viola, the Creamy Potato Soup is ready to go! Serve warm with desired toppings (crushed pistachios are wonderful!)

    Image of staged potato soup.

    Recipe notes + Expert Tips

    • You do not need an Instant Pot to make this recipe, however it may save you some time and sanity! If the stove top is your go-to:
      • Sauté the first ingredients as directed in a large pot with a lid.
      • Follow the next steps in adding the potatoes and bouillon with water and bay leaves, however when returning to heat turn to medium heat and cover with a lid. If it appears to boil over, lower heat.
      • Heat for approximately 25 minutes or until potatoes are fork tender. 
      • Complete remaining instructions as above. 
    • An immersion blender or stand blender will work to create the creamy consistency.
    • Pair this with a delicious WW Cornbread or my Microwave Cornbread, or a simple garden salad with Ranch Dressing to make a complete meal that everyone will enjoy.
    Image of potato soup in a bowl with a spoon.

    FAQs for this Cream of Potato Soup

    What is the difference between different types of potatoes (and the best potato for soup)?

    Potatoes can be separated by basic types (round white, russet, round red, or long white), or more usefully by waxy versus non-waxy.

    Waxy potatoes are relatively high in sugar and low in starch. When cooking, they will hold their shape. Waxy potatoes are best for something like roasted potatoes or potato salad where the shape is important. Examples are Red Bliss and fingerling varieties.

    Non-waxy potatoes are the opposite of waxy, high in starch and lower in sugar. When cooking, they’ll lose their shape and the starch granules will swell. Non-waxy potatoes are best for mashing, baking, and frying; for French fries, the low sugar content will allow them to cook thoroughly before browning too darkly or burning. Examples are Russet, yams, and other sweet potatoes.

    Lastly, there are a few all-purpose varieties that are really good for anything: Yukon gold, red gold, purple majesty, or other red or blue varieties!

    As mentioned above, Russet, Yukon gold, or (now that you know) any non-waxy or all-purpose variety is best for soup since it will be blended and have lots of liquid to absorb.

    Can you tell me more about the nutrition of potatoes?

    Potatoes are more than meets the eye (get it??)!

    They have lots of vitamins and minerals such as vitamin C, B6, potassium, and manganese, as well as being a good source of fiber (this nutritional content can vary depending on the cooking method).

    As a side bonus, they do contain some antioxidants and resistant starch which makes them helpful in regulating blood sugar and cholesterol.

    Lastly, my very favorite things about potatoes are that they are delicious, satisfying, and extremely versatile! They are perfect companions to a well-balanced plate including non-starchy veg and protein. Eaten in the right portion per person, potatoes can be the superstar food they were grown to be!

    Other Potato Recipes You May Enjoy

    • Potatoes in a bowl.
      Oven Roasted Baby Potatoes
    • Healthy Stuffed Sweet Potatoes
    • Breakfast taco overhead shot.
      Roasted Potato Tacos with Eggs
    • Cutting board with black bean burgers.
      Hearty Sweet Potato Black Bean Burgers

    If you try this recipe, would you please do me a favor and leave a star rating in the recipe box and/or comment below! This helps immensely in Google to continue delivering high quality content to you. And please be sure to tag and share what you made with me on social, I love seeing your creations! You can find me here: Instagram – Facebook – Pinterest!

    Image of potato soup in a bowl with salt and pepper.
    Print Recipe
    5 from 7 votes

    Creamy Potato Soup

    A delicious, lightened up version of creamy potato soup packed full of carrots, celery and potatoes, topped with a fun textured twist of crushed pistachios. Naturally gluten-free.
    Prep Time18 minutes mins
    Cook Time27 minutes mins
    Total Time45 minutes mins
    Course: Soup
    Cuisine: American
    Servings: 6 servings
    Calories: 197kcal
    Author: Liz Shaw

    Ingredients

    • 1 tablespoon olive oil
    • 1/2 cup chopped white onion
    • 1 cup chopped carrots
    • 1 cup chopped celery
    • 1 tbsp minced garlic
    • 30 oz white potatoes chopped into 1/4-inch pieces
    • 2 cubes low sodium vegetable bouillon
    • 4 cups water
    • 2 bay leaves
    • 1 cup skim half and half
    • 1/3 cup shredded parmesan cheese
    • ** salt/pepper to taste
    • 1/4 cup chopped pistachios optional garnish

    Instructions

    • To the metal pot of your Instant Pot, add the oil. Then press the saute function and set the timer for 7 minutes. Saute the onions, carrots, celery and garlic until onions are translucent. Press cancel.
    • Add the potatoes to the metal pot and the two bouillon cubes. Pour 4 cups of filtered water over the top, then add the bay leaves. Secure the Instant Pot lid, set the valve to sealing and select the pressure cook function. Set the timer for 20 minutes.
    • When cooking completes, use a quick release. Carefully use an immersion blender here to puree the potato soup together, or transfer to a high powered blender to pulse.
    • If using a stand blender, transfer soup back to the Instant Pot metal pot and stir in the half and half and cheese.
    • Serve warm with an optional pistachios and gluten-free cracker options.
    • Store leftovers in an air tight container in the refrigerator for up to 5 days or freeze for up to 3 months.

    Notes

    If preparing this on the stovetop, complete the preparation steps as follows:
    1. Saute the first ingredients as directed in a large pot with a lid.
    2. Follow the next steps in adding the potatoes and bouillon with water and bay leaves, however when returning to heat turn to medium heat and cover with a lid. If it appears to boil over, lower heat.
    3. Heat for approximately 25 minutes or until potatoes are fork tender. 
    4. Complete remaining instructions as above. 
    • Potatoes: Use whatever type of white potato variety you want! Russet and Yukon gold work great. Or, even swap in a purple and white sweet potato (we’ve done this and it’s delicious.) Check out the FAQ for more info on potato types!
    • An immersion blender or stand blender will work to create the creamy consistency.
    • Pair this with a delicious WW Cornbread or my Microwave Cornbread, or a simple garden salad with Ranch Dressing to make a complete meal that everyone will enjoy.
    • Dairy free/vegan: If you need this to be dairy-free, you can omit the half and half and cheese. It will be delicious but just not super creamy potato soup (more of a broth base.)
      • For some non dairy subs, you can try to use a plant based Parmesan (it may not melt perfectly but you’ll get the flavor) and unsweetened (i.e. no added sugar) oat milk.

    Nutrition

    Calories: 197kcal | Carbohydrates: 33g | Protein: 7g | Fat: 5g | Saturated Fat: 2g | Cholesterol: 7mg | Sodium: 226mg | Potassium: 816mg | Fiber: 4g | Sugar: 5g | Vitamin A: 3704IU | Vitamin C: 31mg | Calcium: 140mg | Iron: 1mg

    Want more Shaw Kitchen recipes? Then sign up here for my 5 Day Stress-Free Meal Plan delivered straight to your inbox!

    Cinnamon Apple Crisp

    July 29, 2021

    Image of apple crisp in a baking dish with forks.

    Looking for a healthy, easy, and nutritious apple crisp recipe? Then this Cinnamon Apple Crisp is for you! Ready in under 45 minutes, it’s the perfect ending to a fall meal that everyone can enjoy. Dairy free and gluten-free, by design, and can be made without added sugar as well!

    Image of apple crisp in a baking dish with forks.
    [feast_advanced_jump_to]

    Why You Need to Make This Easy Apple Crisp Recipe

    If you found yourself with a bag of fresh apples, then this recipe is certainly one you will want to whip up!

    We went apple picking in Julian, California and came home with SO many apples! I knew it was time I updated my Cinnamon Apple Crisp so this beauty finally got a facelift.

    Same delicious flavor, pinky promise!

    This recipe calls for 6 apples so if you came home with more, check out my Healthy Applesauce Muffins or Apple Pie Oatmeal!

    What You Need to Make This Apple Oat Crisp

    Ingredients needed to make apple dessert.

    Ingredient Tips

    • Apples: Swap the apples for what you have on hand. I If using Granny Smith, they have a more tart flavor, so adjust sweetener accordingly (check out the FAQ for more info on apples!)
    • Chopped walnuts: You can purchase pre-chopped walnuts to make it a little easier on yourself, but if you’ve got whole walnuts, instead of chopping with a knife (which can lead to walnut pieces all over your kitchen), you can break them apart by hand. Alternatively, place 2-4 Tbsp at a time in a strong resealable baggie, and roll a rolling pin over top to break into pieces!

    Ingredient Swaps

    • Added sugar: If you want to make this added sugar free, you can swap in date syrup or omit the syrup all together. However, I don’t recommend no sweetener! I actually used a monk fruit maple syrup to keep it more diabetic friendly for my grandpa!
      • Alternatively, if you’re okay with adding the sugar and are looking for an alternative to maple syrup, sub an equal amount of honey (that’s been warmed to make it more fluid) or 1 Tbsp agave syrup (since it’s much sweeter tasting).
    • Walnuts: If you have a nut allergy in the house, feel free to omit and use seeds of choice. Pumpkin and sunflower are excellent additions!
      • If you’re not a walnut fan, pecans are a great sub!
    • Rolled oats: You can sub quick/instant oats if you have them on hand or like your oats less chewy. No steel cut oats here though, they’ll be too hard!
    • Plant based butter: I’ve used non-dairy butter here to keep this recipe vegan and it’s what I keep in my kitchen. Use whatever butter your family keeps!

    How to Make an Apple Crisp with Oats Recipe

    (1) Make sure you have all the Cinnamon Apple Crisp ingredients ready to go! I highly suggest using an apple corer to core the apples, then slice thinly.

    (2) Toss the cinnamon and salt with the apples in a medium bowl.

    (3) Stir in the vanilla, maple syrup, and butter. The toss with the oats.

    Preparation steps for making apple dessert.

    (4 + 5) Add in the crushed walnuts and stir one more time.

    (6) Spread evenly into an 8 x 8-inch baking dish. Bake for 25 minutes, then let carry over cook 10 minutes in the oven.

    Preparation steps to make apple dessert.

    Remove Cinnamon Apple Crisp and serve warm with desired toppings!

    Image of plated apple crisp in a bowl with larger dish next to it.

    Recipe Notes + Expert Tips

    This Cinnamon Apple Crisp recipe is seriously so easy to make! You really can’t screw it up, I swear!

    • When popping in the oven, place on the center rack to make sure the apples and oats cook through evenly.
    • If you don’t have an 8×8 inch baking dish, a 9×9 inch square or round cake pan will work.
    • If you have a large, 9×13 inch baking dish, it can be used, but the cooking time will be shorter. Check after baking for 15 minutes, looking for the apples and oats to be lightly browned, with 10 minutes carry over!

    For what to pair with this crisp, I recommend:

    • If you want to keep this dairy free, top with your desired coconut or soy-based dairy whipped topping or plant-based yogurt.
    • If dairy-free isn’t a necessity, then try a cow’s milk whipped cream or ice cream for dessert, or a skyr or Greek yogurt for breakfast!
    Image of apple crisp with forks.

    FAQs for this Healthy Apple Crisp Recipe

    What are the best apples for apple crisp?

    For this recipe, it’s best to choose apples that are sweet, firm, and have a skin that’s not too thick! Some of my favorite varieties for baking are:
    – Braeburn
    – Fuji
    – Gala
    – Granny Smith (This variety tends to be very tart! I’d recommend mixing with another variety or just adding 2-3 tsp more sweetener to balance it!)
    – Honeycrisp
    – Jonagold
    – Pink Lady (They can sometimes be tart; do a taste test before baking!)
    – Winesap

    With other apple varieties, like Red Delicious or Golden Delicious, they’re great for snacking raw, but may become mealy when baked. It’s best to stick to a more firm type!

    Can this recipe be made in advance?

    Sure! There are a couple options here to do some of the prep in advance:
    – Option 1: Prep and bake the recipe as directed. Store in the refrigerator for up to 5 days and when ready to eat, place in a preheated 375 F degree oven, about 10-15 minutes, until warmed through!
    – Option 2: Prep your apple slices and lightly coat with either 1-2 Tbsp lemon juice or orange juice to prevent browning. Place in an air tight container and store up to 3 days (but the sooner, the better!) Then measure out the following and store in airtight containers: wet ingredients (butter, maple syrup, and vanilla), dry ingredients (cinnamon and salt + oats), and chopped walnuts. The wet ingredients will need to be stored in the refrigerator and melted before use. When you’re ready, stir up all of the ingredients as the recipe directs, and bake!

    Other Apple Dessert Recipes You May Enjoy

    • Image of apples and apple muffins.
      Healthy Applesauce Muffins
    • Apple Pie Walnut Donuts with Vanilla Glaze
    • apple chia cake
      Apple Cinnamon Chia Cake
    • Apple Walnut Muesli - @shawsimpleswaps #glutenfree #muesli #quickfixbreakfast
      Apple Walnut Muesli + 10 Simple Breakfast Ideas

    If you try this recipe, would you please do me a favor and leave a star rating in the recipe box and/or comment below! This helps immensely in Google to continue delivering high quality content to you. And please be sure to tag and share what you made with me on social, I love seeing your creations! You can find me here: Instagram – Facebook – Pinterest!

    Image of apple crisp in a baking dish with forks.
    Print Recipe
    5 from 2 votes

    Cinnamon Apple Crisp

    A delicious taste of fall with warm cinnamon, crisp apples, and nutty walnuts! The perfect addition to a yogurt breakfast or sweet snack!
    Prep Time10 minutes mins
    Cook Time35 minutes mins
    Total Time45 minutes mins
    Course: Dessert
    Cuisine: American
    Servings: 6 servings
    Calories: 235kcal
    Author: Liz Shaw

    Ingredients

    • 6 Jonathan apples washed, cored and thinly sliced
    • 1 tbsp ground cinnamon
    • 1/4 tsp salt
    • 1 tsp pure vanilla extract
    • 2 tbsp maple syrup
    • 2 tbsp melted butter plant based
    • 1 cup rolled oats quick cook
    • 1/2 cup chopped walnuts

    Instructions

    • Preheat oven to 375 degrees F.
    • In a large bowl, toss sliced apples with cinnamon and salt. Mix in the vanilla, maple syrup, melted butter, and rolled oats. Apples should be uniformly coated.
    • Fold in the walnuts, then spread into a greased 8×8-inch baking dish.
    • Bake for 25 minutes. Then turn off oven and let the apples carry over cook for another 10.
    • Remove and serve warm with desired toppings.
    • Store in an airtight container in the fridge and serve within 5 days for best quality. Reheat before serving.

    Notes

    • When popping in the oven, place on the center rack to make sure the apples and oats cook through evenly.
    • If you don’t have an 8×8 inch baking dish, a 9×9 inch square or round cake pan will work.
    • If you have a large, 9×13 inch baking dish, it can be used, but the cooking time will be shorter. Check after baking for 15 minutes, looking for the apples and oats to be lightly browned, with 10 minutes carry over!
    • Apples: Swap the apples for what you have on hand. If using Granny Smith, they have a more tart flavor, so adjust sweetener accordingly (check out the FAQ for more info on apples!)
    • Chopped walnuts: You can purchase pre-chopped walnuts to make it a little easier on yourself, but if you’ve got whole walnuts, instead of chopping with a knife (which can lead to walnut pieces all over your kitchen), you can break them apart by hand. Alternatively, place 2-4 Tbsp at a time in a strong resealable baggie, and roll a rolling pin over top to break into pieces!
      • If you have a nut allergy in the house, feel free to omit and use seeds of choice. Pumpkin and sunflower are excellent additions!
      • If you’re not a walnut fan, pecans are a great sub!
    • Rolled oats: You can sub quick/instant oats if you have them on hand or like your oats less chewy. No steel cut oats here though, they’ll be too hard!
    • Plant based butter: I’ve used non-dairy butter here to keep this recipe vegan and it’s what I keep in my kitchen. Use whatever butter your family keeps!
    • Added sugar: If you want to make this added sugar free, you can swap in date syrup or omit the syrup all together. However, I don’t recommend no sweetener! I actually used a monk fruit maple syrup to keep it more diabetic friendly for my grandpa!

    Nutrition

    Serving: 1 | Calories: 235kcal | Carbohydrates: 33g | Protein: 4g | Fat: 11g | Saturated Fat: 3g | Cholesterol: 10mg | Sodium: 133mg | Potassium: 237mg | Fiber: 6g | Sugar: 17g | Vitamin A: 182IU | Vitamin C: 6mg | Calcium: 44mg | Iron: 1mg

    Want more Shaw Kitchen recipes? Then sign up here for my 5 Day Stress-Free Meal Plan delivered straight to your inbox!

    Instant Pot Pumpkin Chili

    July 19, 2021

    Image of pumpkin chili in a bowl for food photography.

    Feeling like the taste of fall but over the sweet treats? Then whip up this savory Instant Pot Pumpkin Chili! It’s ready in under 30 minutes and has just the right amount of spice to warm you from the inside out!

    Image of pumpkin chili in bowl with cornbread.
    [feast_advanced_jump_to]

    Why you Need to Make This Turkey Pumpkin Chili

    I’ve never looked so forward to fall as I have this year. Like everything else, I blame COVID, and am DYING for a change and something to look forward too!

    Enter, pumpkins, fall, and all the warm comfort filled foods.

    This Instant Pot Pumpkin Chili is perfect for those nights you need something nourishing, healthy, and just damn delicious!

    What You Need to Make this Instant Pot Turkey Chili Recipe

    Image for ingredients for chili.
    * Note the white beans are not included in this image.

    Ingredient Tips

    • Mirepoix: This fancy name for the carrot, celery, onion mix is a common add to many soups and stews! If you find you’re often standing in the kitchen chopping up this mix during cooler seasons, consider batch chopping and freezing. Or, for more convenience, purchase a frozen mirepoix mix (for this recipe, you’d need 2 1/2 cups total)!
    • Pumpkin puree: While purchasing unsweetened canned pumpkin is a great quick option for these muffins, if you’re opting to make your own pumpkin puree (don’t forget to save those seeds for a tasty snack!), check out my Sweet Potato Muffin Recipe as the procedure will be the same! You can mash your pumpkin or pop it in the food processor to make it super smooth!
      • Side note here to be VERY CAREFUL when cutting your pumpkin; se a very sharp knife and give yourself plenty of time!
    • Beans: You can omit the white beans but I highly recommend keeping them in!
    • Ground turkey: Use a lean variety here, 97/3 or 99%.

    Ingredient Swaps

    • Vegetable broth: Be sure to add enough of the vegetable broth! I use a veggie bouillon cube then add 2 cups of water, but feel free sub store bought vegetable or chicken broth.
    • Chiles: Jalapeños can be used in place of Hatch chile, or omitted all together if you are sensitive to spice.
    • Paprika: Swap in smoked paprika for a slightly different flavor profile!
    • Crushed tomatoes: If you have diced canned tomatoes, go ahead and sub them in.
    • Vegan: To make this recipe vegan friendly, double up on the white beans or choose a second variety like black beans or kidney beans!

    How to Make this Recipe for Pumpkin Chili

    (1) Start by sautéing the veggies together in the oil.

    (2 + 3) Add in the turkey and spices, saute until turkey is browned.

    Process shots of how to make instant pot chili.

    (4) Add in the crushed tomatoes, pumpkin puree, and chiles. Stir together and add in the vegetable broth.

    (5) Pressure cook.

    (6) Quick release, then stir in the canned white beans.

    Image of pumpkin chili process shots.

    Then, viola! The recipe is done and ready for you to dive into!

    Image of soup bowl filled with pumpkin chili.

    Recipe Notes + Expert Tips

    • Be sure you don’t burn the turkey or veggies while sautéing them! This could cause a BURN message during pressure cooking if you do.
      • If you notice it did get a little charred, simply add a little more veggie broth and scrape the bottom before continuing on with the recipe.
    • Using the mise en place technique isn’t just for me to show you the ingredients! Before getting started, prepare all of your ingredients so that they’re ready to go!
    • To accompany this pumpkin chili, my hands down favorite option is this Healthy Cornbread recipe. You can also top with a spoonful of Greek yogurt, sour cream or a sprinkling of cheddar cheese.
      • If you’re tight on time, the single serve Microwave Cornbread recipe is also a winner.
    • Seriously, you can’t go wrong with a hearty slice of whole wheat bread in this beauty!
    Spoon with chili on it coming from a bowl of chili.

    FAQs for this Instant Pot Recipe for Chili

    Can you make this chili recipe on the stove top?

    While there are great benefits to having an Instant Pot, yes, you can make this on your stove top!

    Using your largest, heavy-bottomed soup pot, heat the oil over medium heat and follow the directions until the turkey is cooked through. Stir in the broth, pumpkin, and crushed tomatoes.

    Increase to high and bring to a boil. After boiling, cover the pot, reduce the heat to low, and simmer 15-20 minutes until the flavors are all blended together!

    How can I store this chili?

    Chili will last for 5 days when secured in an airtight container in the refrigerator or up to 3 months in the freezer.

    If storing the whole recipe in the freezer, allow the chili to come to nearly room temperature (do not allow to sit out more than two hours). I recommend separating in 2-3 gallon sized bags and lying flat in your freezer. This way, they take up less space and are able to be stacked or stood next to each other.

    Alternatively, if you’re storing single portions, use bags using a similar method mentioned, or you can freeze mason jars. If using jars, only fill 3/4 of the way as the chili will expand upon freezing!

    To enjoy, allow to defrost in the refrigerator at least 12 hours, or defrost in the microwave and then reheat until steaming!

    Other Chili Recipes you May Enjoy

    • Red Lentil Chili in an Acorn Squash is the perfect plant based power bowl that takes just like fall! Gluten free, vegan too!-@shawsimpleswaps
      Red Lentil Chili
    • smoked chili recipe
      Smoked Firehouse Chili
    • Smoked Paprika Sweet Potato Chili - Vegan, Gluten Free @shawsimpleswaps The perfect slow cooker meal to set on low and enjoy in the evening after a long day!
      Smoked Paprika Sweet Potato Chili
    • Chili Cheese Pita Wedges + BBQ Hummus Dip @shawsimpleswaps
      Chili Cheese Pita Wedges + BBQ Hummus Dip

    If you try this recipe, would you please do me a favor and leave a star rating in the recipe box and/or comment below! This helps immensely in Google to continue delivering high quality content to you. And please be sure to tag and share what you made with me on social, I love seeing your creations! You can find me here: Instagram – Facebook – Pinterest!

    Image of pumpkin chili in a bowl for food photography.
    Print Recipe
    5 from 2 votes

    Instant Pot Pumpkin Chili

    A hearty, healthy fall chili recipe ready in under 30 minutes! This Instant Pot Pumpkin Chili recipe is a family favorite the entire crew is sure to love.
    Prep Time10 minutes mins
    Cook Time16 minutes mins
    Total Time26 minutes mins
    Course: Chili
    Cuisine: American
    Servings: 8 servings
    Calories: 179kcal
    Author: Liz Shaw

    Equipment

    • Pressure Cooker

    Ingredients

    • 1 tbsp olive oil
    • 1/2 cup chopped onion
    • 1 cup chopped celery
    • 1 cup chopped carrots
    • 1 tsp minced garlic
    • 2 each Hatch chili peppers seeded and chopped
    • 1 pound lean ground turkey
    • 2 tsps smoked paprika
    • 1 tsp cumin
    • 1/2 tsp black pepper
    • 1 tsp salt
    • 1 1/2 tsps dried rosemary
    • 1 tsp dried sage
    • 2 cups vegetable broth low sodium
    • 15.5 ounce canned pumpkin puree
    • 15.5 ounce canned crushed tomatoes no salt added
    • 15.5 ounce canned white beans

    Instructions

    • Press the saute function on the Instant Pot, and add the oil, onion, carrots, and celery. Saute for 4 minutes, then add the garlic and turkey. Brown the turkey for 4 minutes, then stir in the spices.
    • Press Cancel, then add in the vegetable broth, pumpkin, and crushed tomatoes. Stir. Secure lid, set valve to sealing and select pressure cook. Adjust the time to 8 minutes.
    • When cooking completes, use a quick release to remove the pressure. Stir in the can of beans and serve immediately.
    • Chili will last for 5 days when secured in an airtight container in the refrigerator, or up to 3 months in the freezer.

    Notes

    • Be sure you don’t burn the turkey or veggies while sautéing them! This could cause a BURN message during pressure cooking if you do.
      • If you notice it did get a little charred, simply add a little more veggie broth and scrape the bottom before continuing on with the recipe.
    • Using the mise en place technique isn’t just for me to show you the ingredients! Before getting started, prepare all of your ingredients so that they’re ready to go!
    • To accompany this pumpkin chili, my hands down favorite option is this Healthy Cornbread recipe.
      • If you’re tight on time, the single serve Microwave Cornbread recipe is also a winner.
    • Seriously, you can’t go wrong with a hearty slice of bread in this beauty!
    • Vegetable broth: Be sure to add enough of the vegetable broth! I use a veggie bouillon cube then add 2 cups of water, but feel free sub store bought vegetable or chicken broth.
    • Chiles: Jalapeños can be used in place of Hatch chile, or omitted all together if you are sensitive to spice.
    • Paprika: Swap in smoked paprika for a slightly different flavor profile!
    • Crushed tomatoes: If you have diced canned tomatoes, go ahead and sub them in!

    Nutrition

    Calories: 179kcal | Carbohydrates: 20g | Protein: 18g | Fat: 3g | Saturated Fat: 1g | Cholesterol: 31mg | Sodium: 583mg | Potassium: 644mg | Fiber: 5g | Sugar: 4g | Vitamin A: 11664IU | Vitamin C: 5mg | Calcium: 72mg | Iron: 3mg

    Want more Shaw Kitchen recipes? Then sign up here for my 5 Day Stress-Free Meal Plan delivered straight to your inbox!

    Pomsettia – A Skinny Festive Cocktail

    July 19, 2021

    Looking for a low calorie cocktail (or mocktail) to celebrate the holiday season with? Then I present to you this no added sugar Pomsettia: a blend of 100% pomegranate juice, club soda, and vodka (or not!) to celebrate the holiday season with!

    Pomsettia - A Skinny Festive Cocktail
    [feast_advanced_jump_to]

    Why you Need to Make this Low Calorie Vodka Drink

    Is your mouth watering?

    Mine is too and I’ve been enjoying this beauty for days now!

    The beauty of a Pomsettia is very simple actually, it’s made with ingredients you can PRONOUNCE!

    Yep, no fancy shmancy liquors that we most likely don’t have in our liquor cabinet.

    And, hold the phone, it’s also the feature holiday cocktail in the December issue of Self Magazine this year!

    Pomsettia- A skinny vodka cocktail to enjoy this holiday season (or whenever!) @shawsimpleswaps

    I’m still pinching myself looking at this! It has always been a dream to be featured in a national magazine, and it finally came true! Big thanks to the staff of SELF for making this happen!

    Now, onto this cocktail (or mocktail)!

    What you Need to Make this Easy Cocktail with Vodka (or Not!)

    Pomsettia Cocktail Version

    • 1.5 ounces vodka
    • 2 ounces 100% pomegranate juice
    • 3 ounces club soda
    • 4 ice cubes
    • 4 mint leaves
    • 2 teaspoons pomegranate arils

    Pomsettia Mocktail Version

    • 2 ounces 100% pomegranate juice
    • 4.5 ounces club soda (or sparkling water)
    • 4 ice cubes
    • 4 mint leaves
    • 2 teaspoons pomegranate arils

    Oh shoot! I almost forgot the secret ingredient that saves the day in any of the creations on this site… LOVE!

    Ingredient Tips

    • Pomegranate Juice: Any 100% fruit juice (preferably seasonal, like cranberry) will work in this recipe, just watch out for added sugars!
    • Pomegranate Arils: For an quick option, purchase ready-to-eat pomegranate arils from your refrigerated for frozen sections of the grocery store. Alternatively, to harvest your own arils from fresh pomegranate, check the FAQ below for a detailed how-to!
    • Seltzer/club soda: These carbonated beverages do not include any added sugars or sodium. Do not swap for tonic which does contain sodium!

    Ingredient Swaps

    • Vodka: If you’re not a vodka person but want to make this a cocktail, try gin!
    • Sparkling water/club soda: Flavored sparkling waters, like a cranberry or cherry, are BIG hits with the mocktail version in my house.

    How to Make this Healthy Cocktail

    Literally, just pour and shake and enjoy your Pomsettia!

    Watch this video if you don’t believe me!

    Recipe Notes + Expert Tips

    • Frozen fruit (like wild berries) also adds a bit more sweetness. Subsequently, this drink stays low in calories by avoiding added sugars and can double as the ice!
    • Don’t have a cocktail shaker? No problem! A mason jar is an easy swap or even two pint glasses. Alternatively, you can simply add all of your ingredients to your planned serving glass and give them a spirited stir!
      • On that note, if making for a crowd, simply multiply the recipe 4-6x! Add ice to a large pitcher and layer in the ingredients. Give it a stir and serve!
    • Looking for other ways to use pomegranate? Try my Vegan Broccoli Salad, Pomegranate Apple Smoothie with Butternut Squash, or simply sprinkle arils over yogurt or ice cream for a fruity/floral twist!

    FAQs for this Pomsettia Holiday Cocktail with Vodka

    How do you remove the seeds/arils from a pomegranate?

    While slightly labor intensive, extracting the seeds yourself is very rewarding and gives you an appreciation for what it takes to enjoy pomegranate’s splendor (and is a fun sernsory activity to do with kiddos!)

    Fill a large mixing bowl with cool water. Rinse the outside of your pomegranate and with a large kitchen knife, slice into quarters, halving through the stamen end (the top that pokes out) and then cutting again.

    One quarter at a time, submerge the pomegranate into your water-filled bowl. Gently, but firmly, rub your thumbs along the arils to release from the white pith. A few may break, but don’t worry! If needed, break the pith apart into smaller pieces.

    Keep going until all of the arils are released! They will sink to the bottom of the bowl while the pith floats. As you go, keep removing the pith to make more room for your hands.

    Once all quarters are done, skim off the top of the water to remove any floating pith pieces and strain the arils. All done!

    What does pomegranate taste like?

    If you’ve never had fresh pomegranate before, I highly recommend giving the arils a try! Sweet, slightly tart, and with floral notes, pomegranate has a complex flavor and is so very addicting (not to mention they’re chock full of nutrients, fiber, and even some protein!)

    Oftentimes, you’ll see pomegranate paired with other fruits like blueberries or cherries. It’s important to note that a little goes a long way with pomegranate as it’s higher in natural sugars than other fruits. If you enjoy those fruits, definitely give pomegranate a try!

    How can I enjoy alcohol with health in mind?

    I mention this in my Spicy Skinny Margarita Recipe, but it bears repeating!

    As per the CDC, moderate drinking means limiting intake of alcohol to 2 drinks or less in a day for men and 1 drink or less in a day for women. This is not due to body size but the variance between sexes in how alcohol is metabolized. One drink would be 1.5 ounces or a “shot” of 80-proof (40% alcohol content) distilled spirit. When it comes to alcohol, and food for that matter, be sure to choose something that is delicious and satisfying so that it can be included as part of your lifestyle, if you so choose, and enjoy responsibly!

    Other Healthier Holiday Recipes (and Ideas!) you May Enjoy

    • Vegan Snowball Cookies
    • Spice Up A Traditional Thanksgiving Menu with ALDI @shawsimpleswaps #thanksgiving #ALDILOVE #healthierholidays
      Spice Up A Traditional Thanksgiving Menu with ALDI
    • Cup of hot chocolate with mini marshmallows.
      Instant Pot Hot Chocolate
    • Healthy Holiday Party- How to create a budget friendly holiday experience with ALDI! @shawsimpleswaps #ad
      Healthy Holiday Party Planning 101- ALDI

    If you try this recipe, would you please do me a favor and leave a star rating in the recipe box and/or comment below! This helps immensely in Google to continue delivering high quality content to you. And please be sure to tag and share what you made with me on social, I love seeing your creations! You can find me here: Instagram – Facebook – Pinterest!

    Print Recipe
    5 from 10 votes

    Pomsettia – Skinny Vodka Cocktail

    Pomsettia- the latest and greatest skinny vodka cocktail (or mocktail) to ring in the holiday season.
    Prep Time5 minutes mins
    Total Time5 minutes mins
    Course: Beverage
    Cuisine: American
    Servings: 1 drink
    Calories: 139kcal
    Author: Liz Shaw

    Ingredients

    • 1.5 ounces vodka
    • 2 ounces 100% pomegranate juice
    • 3 ounces club soda
    • 4 ice cubes
    • 4 mint leaves
    • 2 teaspoons pomegranate arils

    Instructions

    • In a cocktail shaker (or a mason jar with a lid), mix vodka, pomegranate juice, and club soda with ice.
    • In the bottom of a festive glass, muddle 3 mint leaves with 1 teaspoon pomegranate arils.
    • Strain Pomsettia mixture into the glass and garnish with a mint leaf and pomegranate arils, if desired.

    Notes

    For the mocktail version, omit vodka and add 1.5 oz more of club soda or flavored sparkling water. 

    Nutrition

    Calories: 139kcal | Carbohydrates: 9g | Sodium: 27mg | Potassium: 121mg | Sugar: 8g | Vitamin A: 170IU | Vitamin C: 2.3mg | Iron: 0.2mg

    Want more Shaw Kitchen recipes? Then sign up here for my 5 Day Stress-Free Meal Plan delivered straight to your inbox!

    Frozen Pumpkin Spice Latte

    July 19, 2021

    Pumpkin Spice Latte image.

    Want to enjoy the taste of fall in frozen form? Then this healthy, no added sugar Frozen Pumpkin Spice Latte is for you! Made with wholesome ingredients, and naturally vegan and gluten free to accommodate dietary needs, you won’t regret adding this to your meal plan this week!

    Image of pumpkin spice latte.
    [feast_advanced_jump_to]

    Why you Need to make this Homemade Pumpkin Spice Latte Recipe

    Bring on the pumpkin!

    When the summer starts winding down at the end of August, the pull for pumpkin flavored food and drinks is strong! This Frozen Pumpkin Spice Latte is the perfect transitional treat, satisfying the desire for pumpkin while keeping you cool!

    This Pumpkin Spice Latte is the perfect blend of pumpkin and coffee to kick start your morning! Pair it with Pumpkin Spice Yogurt or Pumpkin Spiced Nuts for a festive morning!

    Not to mention it clocks in with a guilt-free nutritional profile compared to a Pumpkin Spice Frappuccino which can have 30+ grams of sugar and zero fiber!

    Next time you’re hankering for a frozen fall treat, pull up this frozen coffee recipe!

    What you need to make this Pumpkin Blended Iced Coffee

    Ingredients to make frozen PSL.

    Ingredient Tips

    • Milk: Adding your preferred dairy or non-dairy milk is optional! But, if you want to make this super creamy and delicious, I highly recommend adding in 1/2 cup of your milk of choice (use a nonfat half and half or extra creamy oat milk if you want to make this SUPER creamy!)
    • Pumpkin puree: Make your own or purchase from the store! Either way, make sure it’s unsweetened (and not pumpkin pie filling!) If there’s any excess, portion into 1/2 cups and freeze for up to 6 months. (Look here for tips on making your own puree.)
    • Salt: This recipe doesn’t include added salt, however, if you’re an athlete or have higher sweat losses, add 1/4 tsp of salt to boost the sodium.
    • Protein: Toss in a serving of vanilla protein powder (whey, collagen, or plant based) or 1/2 cup plain Greek yogurt to boost the protein!
    • Vegan: This recipe is naturally vegan friendly, however, be mindful of any swaps you might make.

    Ingredient Swaps

    • Date syrup: Using date syrup keeps this recipe added sugar free. However, if it’s not in your pantry, swap in two pitted dates or your favorite liquid sweetener: maple syrup, agave, honey, or molasses for an extra kick of flavor!
    • Coffee: For those limiting caffeine intake, use a decaf iced coffee in here. In either case, you can brew your own strong hot coffee and chill it, or make cold brew (which is basically coffee concentrate)!
      • To make cold brew, grind enough coffee to yield 3 ounces of coarse grounds. Add to a quart sized jar or pitcher, and fill with water (for easy clean up, put the grounds in a bag like this). Let this mixture sit at room temperature for 12-18 hours and then strain out the grounds. Voila! Store what’s not needed in the fridge and serve over ice!
    • Banana: If you do not like bananas, it is difficult to achieve the creaminess in this recipe without them (the pumpkin and coffee definitely come out stronger!) However, some options include low fat coconut milk (freeze into 6 ice cubes overnight before adding to the blender the next day), 1/2 cup silken tofu, or 1/2 cup oats.
    • Pumpkin Spice: If you haven’t stocked up quite yet this season, use cinnamon and a dash of ginger instead! You could also sub an apple pie spice blend!

    How to make Pumpkin Spice Iced Latte Frozen

    Seriously just toss all the ingredients into a blender, pulse, and enjoy!

    Blended pumpkin spice latte.

    Here’s a little video to show you just how easy this Frozen Pumpkin Spice Latte was to make!

    Recipe Notes + Expert Tips

    • To make perfectly frozen banana, wait until your bananas are fully ripened and yellow. Then, prepare an air tight container or freezer bag, break or cut your banana in half, and add to your container. Pop in the freezer for at least 6 hours or up to 2 weeks!
    • The art of blended beverage making is an underrated skill! My best advice for this frozen latte is to let it blend for longer than you think! Count to a full 30-60 seconds before shutting the blender off. I promise your patience will be rewarded!
    • For extra nutritional boosters, consider adding the following:
      • 1-2 Tbsp flax seeds
      • 1-2 tsp turmeric
      • Top with toasted pumpkin seeds and/or cacao nibs!

    FAQs for this Frozen Coffee Drink Recipe

    What is pumpkin spice?

    Pumpkin spice is simply a blend of warming, seasonal spices that complement pumpkin flavor just so! While it may vary from brand to brand, it generally contains cinnamon, nutmeg, ginger, allspice and/or cloves.

    If you want to make your own and have these spices in hand, I like this recipe.

    Are there any health benefits associated with drinking coffee?

    Research has shown some benefits to drinking coffee!

    Firstly, the caffeine can help boost metabolic rate and (of course) improve energy levels, as well as certain brain functions like memory, mood, and reaction time.

    If you’re drinking decaf, don’t be discouraged! Coffee also contains some riboflavin, pantothenic acid and trace minerals. Furthermore, studies have shown that coffee drinkers have a reduced risk for developing type 2 diabetes, and may have lower risk for neurogenerative disorders and cancers later in life.

    Other Healthy Smoothie Recipes You May Enjoy

    • Green Smoothie For Kids - Tired of making green juices that end up in the trash! Then this recipe is for you! As a newly converted green smoothie fan, I promise you this Green Smoothie For Kids is one that the entire family will enjoy... pink promise! #greensmoothie #greensmoothieforkids #spinachsmoothieforkids #greensmoothierecipes
      Green Smoothie For Kids
    • Pomegranate Apple Smoothie with Butternut Squash @shawsimpleswaps
      Pomegranate Apple Smoothie with Butternut Squash
    • Carrot Cake Smoothie Bowl
    • Picture of white pan with strawberry nice cream inside with crushed golden cake cones and a brown and silver ice cream scoop peaking out the side.
      Strawberry Nice Cream

    If you try this recipe, would you please do me a favor and leave a star rating in the recipe box and/or comment below! This helps immensely in Google to continue delivering high quality content to you. And please be sure to tag and share what you made with me on social, I love seeing your creations! You can find me here: Instagram – Facebook – Pinterest!

    Pumpkin Spice Latte image.
    Print Recipe
    5 from 11 votes

    Frozen Pumpkin Spice Latte

    This frozen pumpkin spice latte is a healthier version of your favorite fall flavor! Made in under 5 minutes it's a sweet treat you all can enjoy!
    Prep Time5 minutes mins
    Total Time5 minutes mins
    Course: Smoothie
    Cuisine: American
    Servings: 1 serving
    Calories: 188kcal
    Author: Liz Shaw

    Ingredients

    • 1 medium frozen banana
    • 1/4 cup pure pumpkin puree
    • 1/2 cup cold brew black coffee
    • 1 tbsp date syrup
    • 1/4 tsp pumpkin pie spice
    • 1/2 cup milk of choice optional

    Instructions

    • Place all ingredients into a blender.
    • Blend for 30 seconds to one minute, or until desired consistency is reached. If desired to have a thinner smoothie, add 1/2 cup of milk of choice then blend one more time.
    • Pour into a chilled glass (or two if you’re sharing) and enjoy!

    Notes

    • To get perfectly frozen banana, wait until your bananas are fully ripened and yellow. Then, prepare an air tight container or freezer bag, break or cut in half, and add to your container. Pop in the freezer for at least 6 hours or up to 2 weeks!
    • The art of blended beverage making is an underrated skill! My best advice for this frozen latte is to let it blend for longer than you think! Count to a full 30-60 seconds before shutting the blender off. I promise your patience will be rewarded!
    • For extra nutritional boosters, consider adding the following:
      • 1-2 Tbsp flax seeds
      • 1-2 tsp turmeric
      • Top with toasted pumpkin seeds and/or cacao nibs!
    • To make cold brew, grind enough coffee to yield 3 ounces of coarse grounds. Add to a quart sized jar or pitcher, and fill with water (for easy clean up, put the grounds in a bag like this). Let this mixture sit at room temperature for 12-18 hours and then strain out the grounds. Voila! Store what’s not needed in the fridge and serve over ice!

    Nutrition

    Serving: 1 | Calories: 188kcal | Carbohydrates: 44g | Protein: 5g | Fat: 2g | Saturated Fat: 1g | Sodium: 170mg | Potassium: 705mg | Fiber: 6g | Vitamin A: 9608IU | Vitamin C: 13mg | Calcium: 166mg | Iron: 1mg

    Want more Shaw Kitchen recipes? Then sign up here for my 5 Day Stress-Free Meal Plan delivered straight to your inbox!

    Pumpkin Breakfast Cookies

    July 19, 2021

    Image of pumpkin breakfast cookies with milk.

    Ready to take your love for pumpkin to a whole new level? Then these low sugar Pumpkin Breakfast Cookies are just for you! Perfect for a grab and go healthy breakfast or snack, they’ll satisfy both toddlers and adults alike!

    Image of 3 breakfast pumpkin cookies in a row.
    [feast_advanced_jump_to]

    Why you need to make these Chocolate Chip Pumpkin Cookies

    Mr. CEO, my certified eating officer and hubby, is OBSESSED with pumpkin.

    Like, so much so, he’ll Google when Trader Joe’s pumpkin products release and let me know rather than the other way around!

    I love his enthusiasm for the season so decided to play on it and create these portable Pumpkin Breakfast Cookies that both he and my toddler could enjoy.

    I swear, while healthy and low in sugar, they are still DAMN DELICIOUS!

    What you need to make this Pumpkin Oatmeal Cookie Recipe

    Ingredient shot of pumpkin breakfast cookies ingredients.

    Ingredient Tips

    • Peanut Butter: Choose a creamy, natural peanut butter that is added sugar and salt free (if you can!) There are enough add-ins here to create exciting texture
    • Gluten free: These Pumpkin Breakfast Cookies are naturally gluten free! To be extra cautious, double check your labels and make sure the oats and chocolate you use are GF certified!
    • Pumpkin puree (as mentioned in my Gluten Free Pumpkin Muffins recipe, but it bears repeating!): While purchasing unsweetened canned pumpkin is a great quick option for these muffins, if you’re opting to make your own pumpkin puree (don’t forget to save those seeds for a tasty snack!), check out my Sweet Potato Muffins as the procedure will be the same! You can mash your pumpkin or pop it in the food processor to make it super smooth!
      • Side note here to be VERY CAREFUL when cutting your pumpkin; se a very sharp knife and give yourself plenty of time!
    • Pumpkin pie spice: You can use a store bought mix or make some yourself with cinnamon, nutmeg, ginger, and cloves.
    • Pumpkin seeds: As much as the pumpkin seeds from your pumpkin are delicious for a snack, they are nut hulled! I recommend saving those for a separate occasion and going with store bought pepitas for your mix in!

    Ingredient Swaps

    • Peanut butter: Swap any nut or seed butter in place of peanut butter, especially for allergies. Sunflower seed butter works great!
    • Chocolate chips: This recipe was developed with the white chocolate and cranberries as the winning combo, but sub in your favorite chocolate, milk, semisweet, or dark, as you wish!
    • Added sugars: If you’d like to keep these free of added sugar, swap in raisins for cranberries (or be sure to use unsweetened dried cranberries) and omit the chocolate.
    • Vegan: Swap in a flax egg and make sure your chocolate chips are vegan!

    How to make these Healthy Pumpkin Cookies

    (1 + 2) Preheat oven. Combine the pumpkin, peanut butter, and egg with the spices.

    (3) Stir in the oats.

    Process shots to make cookies for breakfast with pumpkin.

    (4) Fold in the cranberries, chocolate, and pumpkin seeds.

    (5) Scoop onto a greased baking sheet.

    Process shots for mixing and placing cookie dough on sheet.

    (6 + 7) Using the back of a cup that’s lightly sprayed with cooking spray, gently press down on the dough so it forms a circle. Then, bake!

    Process shots for mixing and placing cookie dough on sheet.

    Viola! They should be perfect like these beauties when finished!

    Holding a single cookie.

    The inside is hearty and filled with texture in these Pumpkin Breakfast Cookies, just take a peak below!

    Cookie with a bite out of it.

    Recipe Notes + Expert Tips

    • If you’d like to jazz these cookies up with an easy drizzle, melt 1/4 white chocolate with 1/2 tsp coconut oil and drizzle over your cookies! Alternatively, for an additional flavor element, mix up 1/3 cup plain Greek yogurt with 3 tablespoons of powdered sugar.
    • These cookies have no leavening agent so they will not spread very much during baking. Keep this in mind and note you can leave as little as a half inch space between cookies.
    • Now, serve these up with a cool glass of your favorite milk or warm cup of coffee or tea. The possibilities are endless!
    Image of pumpkin breakfast cookies with milk.

    FAQs for these Oatmeal Pumpkin Chocolate Chip Cookies

    Can you tell me about the nutrition of these breakfast cookies?

    Let’s break it down, looking at the major ingredients! Firstly, the star of the show: pumpkin! While I have mentioned a bit on pumpkin here, in short, pumpkin is high in nutrients while being low in calories, making it a great starchy veg to keep in your rotation (not to mention, it’s delicious!)

    Next up, natural peanut butter is high mono- and polyunsaturated fats and protein, adding their nutty flavor and satiating powers to these cookies!

    Onto the rolled oats which are a superfood that doesn’t get nearly as much fanfare as it should! Looking at the starches in oats, most are slowly digested, reducing the spike in blood sugar that can accompany other high carbohydrate foods. Further, the resistant starches in oats are prebiotic, acting as food to nurture gut bacteria! On that note, oats provide a significant amount of fiber, mostly soluble, which acts to slow digestion, increase satiety, bulk up digestive products, and assist with lowering cholesterol!

    All-in-all, these cookies are a one stop shop for a filling and satisfying breakfast, full of wholesome ingredients you can feel great about!

    How should I transport these cookies to keep them fresh?

    Firstly, keep in mind that to store these cookies, place them in an airtight container on the counter for 5 days, refrigerate for 10 days, or freeze for up to 3 months for best quality.

    For transportation, I’d recommend either firstly, freezing the cookies overnight and then taking on the road. They should be thawed out nicely within a couple hours! Alternatively, if they were just made and are cooled, place them in a freezable lunch bag or in a lunch box with ice packs, especially if it’s warm outside! While they will structurally hold up, the texture will be much nicer if kept at room temperature or below!

    Other Pumpkin Recipes You May Enjoy

    • Pumpkin Pie Oatmeal @shawsimpleswaps
      Pumpkin Pie Oatmeal
    • Chocolate Pumpkin Cupcakes
    • Image of muffins in the tin.
      Gluten Free Pumpkin Muffins
    • Image of pumpkin chili in a bowl for food photography.
      Instant Pot Pumpkin Chili

    If you try this recipe, would you please do me a favor and leave a star rating in the recipe box and/or comment below! This helps immensely in Google to continue delivering high quality content to you. And please be sure to tag and share what you made with me on social, I love seeing your creations! You can find me here: Instagram – Facebook – Pinterest!

    Image of pumpkin breakfast cookies with milk.
    Print Recipe
    5 from 7 votes

    Pumpkin Breakfast Cookies

    These healthy, low sugar Pumpkin Breakfast Cookies are perfect for a grab and go breakfast or snack. Packed with protein, healthy fats, and vitamin A, they'll satisfy both toddlers and adults alike!
    Prep Time5 minutes mins
    Cook Time12 minutes mins
    3 minutes mins
    Total Time20 minutes mins
    Course: Breakfast
    Cuisine: American
    Servings: 12 cookies
    Calories: 113kcal
    Author: Liz Shaw

    Ingredients

    • 1/2 cup pumpkin puree
    • 1 large egg
    • 1/3 cup natural peanut butter
    • 1 tsp pumpkin pie spice
    • 1/4 tsp salt
    • 1 cup rolled oats
    • 1/4 cup dried cranberries
    • 1/4 cup pumpkin seeds
    • 1/4 cup white chocolate chips

    Instructions

    • Preheat oven to 350 degrees F. To a large bowl, mix the pumpkin puree, egg, peanut butter, pumpkin pie spice, and salt together.
    • Mix in the oats, then fold in the cranberries, white chocolate and pumpkin seeds.
    • Portion the dough using a 1-ounce scoop onto a baking sheet sprayed with cooking spray. Spray the bottom of a circular jar with cooking spray, then gently press the dough so it forms a circle.
    • Bake for 12 minutes or until tops are golden. Remove from oven and let cool 5 minutes before enjoying.
    • Store in an airtight container on the counter for 5 days, refrigerate for 10 days, or freeze for up to 3 months for best quality.

    Notes

    • If you’d like to jazz these cookies up with an easy drizzle, melt 1/4 white chocolate with 1/2 tsp coconut oil and drizzle over your cookies! Alternatively, for an additional flavor element, mix up 1/3 cup plain Greek yogurt with 3 tablespoons of powdered sugar.
    • These cookies have no leavening agent so they will not spread very much during baking. Keep this in mind and note you can leave as little as a half inch space between cookies.
    • Peanut Butter: Choose a creamy, natural peanut butter that is added sugar and salt free (if you can!) There are enough add-ins here to create exciting texture.
      • Swap any nut or seed butter in place of peanut butter, especially for allergies. Sunflower seed butter works great!
    • Gluten free: These Pumpkin Breakfast Cookies are naturally gluten free! To be extra cautious, double check your labels and make sure the oats and chocolate you use are GF certified!
    • Pumpkin puree (as mentioned in my Gluten Free Pumpkin Muffins recipe, but it bears repeating!): While purchasing unsweetened canned pumpkin is a great quick option for these muffins, if you’re opting to make your own pumpkin puree (don’t forget to save those seeds for a tasty snack!), check out my Sweet Potato Muffins as the procedure will be the same! You can mash your pumpkin or pop it in the food processor to make it super smooth!
      • Side note here to be VERY CAREFUL when cutting your pumpkin; se a very sharp knife and give yourself plenty of time!
    • Chocolate chips: This recipe was developed with the white chocolate and cranberries as the winning combo, but sub in your favorite chocolate, milk, semisweet, or dark, as you wish!
    • Added sugars: If you’d like to keep these free of added sugar, swap in raisins for cranberries (or be sure to use unsweetened dried cranberries) and omit the chocolate.
    • Vegan: Swap in a flax egg and make sure your chocolate chips are vegan

    Nutrition

    Calories: 113kcal | Carbohydrates: 11g | Protein: 4g | Fat: 6g | Saturated Fat: 2g | Cholesterol: 16mg | Sodium: 92mg | Potassium: 119mg | Fiber: 2g | Sugar: 5g | Vitamin A: 1611IU | Vitamin C: 1mg | Calcium: 20mg | Iron: 1mg

    Want more Shaw Kitchen recipes? Then sign up here for my 5 Day Stress-Free Meal Plan delivered straight to your inbox!

    Whole Wheat Chocolate Chip Muffins

    July 14, 2021

    Image of 6 muffins in the muffin tin.

    Once you bite into these Whole Wheat Chocolate Chip Muffins, I promise you’ll never want to buy a coffee shop muffin again! Made with simple, wholesome ingredients, these are the type of muffin you’ll come back to time and time again. Enjoy!

    Image of 6 muffins in the muffin tin.
    [feast_advanced_jump_to]

    Why you Need to Make these Healthy Chocolate Chip Muffins

    I’m a fan of muffins (I’ve made them with sweet potato, blueberries (also gluten free), pumpkin, banana, and more!). There’s a bit of nostalgia I have with them and it stems from those GIANT Costco muffins my mom used to buy as a kid.

    As much as I loved them, I don’t love how they make me feel a hour or two later (read sugar crash!)

    These Healthy Whole Wheat Chocolate Chip Muffins are the answer to my childhood dreams but meet my adult health standards lol!

    I hope you enjoy them as much as we do!

    What you need to make this Homemade Chocolate Chip Muffin recipe

    Image of ingredients needed to make chocolate chip muffins.

    Ingredient Tips

    • Applesauce: Use unsweetened applesauce as the fruit itself is sweet enough!
    • Chocolate: Depending on what type of chocolate you like, chop up your favorite bar or use chocolate chips. Feel free to mix and match!
    • Greek yogurt: Plain Greek yogurt was used when developing this recipe. If you have a flavor like vanilla on hand, you can use it, however, note that there are added sugars. To compensate for this, remove a tablespoon of granulated sugar and either reduce the vanilla extract by half or remove.
    • White whole wheat flour: A different variety of wheat is used to produce a lighter colored flour and keep your muffins brighter, but still remain whole wheat! Regular whole wheat flour can be used here, just note the color will be darker.

    Ingredient Swaps

    • Gluten Free: Swap gluten-free flour (like a one-to-one baking blend) in place of the white whole wheat flour.
    • Vegan: Use a plant-based yogurt and milk with dairy-free chocolate chips to keep them dairy-free, and add organic sugar and a flax egg to make your muffins vegan friendly!

    How to Make Chocolate Chip Muffins

    (1) Preheat oven to 375 degrees F. Start by whisking your flour with the baking powder, baking soda, and salt.

    (2 + 3) Whisk the egg in large bowl, then stir in the yogurt, applesauce, vanilla, sugar, and milk.

    Image of process steps to make whole wheat chocolate chip muffins.

    (4 + 5 + 6) Mix the dry ingredients into the wet.

    Image of process steps to make chocolate chip muffins.

    (7 + 8) Stir in the chocolate pieces until uniformly mixed.

    (9) Line a muffin tin with muffin liners then evenly fill them with the batter. Place in the oven and bake for 18 to 22 minutes (tops should be golden brown.)

    Image of process steps to make muffins.

    When muffins are done baking, if desired, melt additional chocolate and drizzle over the top!

    Image of dozen muffins.

    Recipe Notes + Expert Tips

    • To make mini muffins, use a mini ice cream scoop or rounded tablespoon to drop batter into a silicon mini muffin tray like this. (Not sponsored, just allows for super easy clean up!) Bake at the same temperature for 10-14 minutes.
    • Using this Whole Wheat Chocolate Chip Muffin base, feel free to switch up the add-ins! Recreate your favorite bakery muffin at home by:
      • Cinnamon Raisin: Add 2 tsp ground cinnamon to the flour and swap 1/3 cup raisins for the chocolate. You can also use an unsweetened cinnamon applesauce!
      • Pumpkin Spice: Stir in 2 tsp of pumpkin pie spice to the flour. Then swap pumpkin puree for the applesauce (feel free to keep the chocolate chips!)
      • Lemon Poppy Seed: Stir in 1 Tbsp of lemon juice, 1 Tbsp lemon zest, and 2 Tbsp poppy seeds to the wet ingredients.
    • Serve these with a cup of coffee for the perfect morning pick me up!
    Image of muffins and coffee.

    FAQs for this Easy Healthy Breakfast Muffin Recipe

    What makes these muffins healthy? Are they healthy enough to serve to kids?

    There are a few “healthy upgrades” made in this recipe which make them better for you! They include: using whole wheat flour, subbing Greek yogurt for butter/oil, and lowering the refined sugar by subbing in applesauce.

    Compared to a traditional chocolate chip muffin recipe, this one contains about one third less calories, twice as much fiber, one third less sugar, and only one gram of fat compared to over 10 grams/serving!

    With all of the above mentioned, whole heartedly, yes! These muffins are great for children as part of a well balanced, wholesome diet!

    How can I store these muffins?

    Store in an air tight container for up to 5 days on the counter, 10 days in the fridge, or 3 months in the freezer for best quality.

    How do I choose a healthyish chocolate to use in these muffins?

    There is so much chocolate out there these days! There are many brands that are vegan and/or dairy free, soy free, and lower in sugar (see dark chocolate varieties), as well as fair trade, sustainable, and non GMO.

    What really matters when making a decision in the seemingly endless baking isle, is following what you feel is best for you and your family! I won’t list all of the different brands here but if it means a lot to you, take a few minutes to visit a few of the brand websites and see what they’re all about! Ultimately, when you feel you’re making the most informed decision, that will make the end product that much more delicious!

    Other Muffin Recipes You May Enjoy

    • Image of apples and apple muffins.
      Healthy Applesauce Muffins
    • Image of fresh blueberry muffins.
      Fresh Blueberry Muffins
    • Image of muffins in the tin.
      Gluten Free Pumpkin Muffins
    • Staged shot of healthy muffins.
      Sweet Potato Muffin Recipe

    If you try this recipe, would you please do me a favor and leave a star rating in the recipe box and/or comment below! This helps immensely in Google to continue delivering high quality content to you. And please be sure to tag and share what you made with me on social, I love seeing your creations! You can find me here: Instagram – Facebook – Pinterest!

    Image of 6 muffins in the muffin tin.
    Print Recipe
    5 from 9 votes

    Whole Wheat Chocolate Chip Muffins

    Once you bite into these Whole Wheat Chocolate Chip Muffins I promise you'll never want to buy a coffee shop muffin again! Made with simple, wholesome ingredients these are the type of muffin you'll come back to time and time again.
    Prep Time10 minutes mins
    Cook Time18 minutes mins
    Total Time28 minutes mins
    Course: Breakfast
    Cuisine: American
    Servings: 12 muffins
    Calories: 92kcal
    Author: Liz Shaw

    Ingredients

    • 1 1/2 cups white whole wheat flour
    • 1 teaspoon baking powder
    • 1/2 teaspoon baking soda
    • 1/2 teaspoon sea salt
    • 1 large egg
    • 3/4 cup milk of choice
    • 1/2 cup Greek Yogurt
    • 1/2 cup applesauce unsweetened
    • 1 teaspoon vanilla extract
    • 1/3 cup granulated sugar
    • 1/3 cup chopped chocolate pieces

    Instructions

    • Preheat oven to 375 degrees F.
    • In a small bowl, combine the flour, baking powder, baking soda, and salt.
    • To a large bowl, whisk the egg. Mix in the sugar, milk, Greek yogurt, applesauce and vanilla extract. Set aside.
    • Slowly add the dry ingredients into the wet, stirring until all is well combined.
    • Add in the chocolate pieces.
    • Line a muffin tin with 12 liners and portion batter evenly amongst them. Bake for 18 to 22 minutes until lightly browned.
    • Remove and let cool slightly before eating.
    • Store in an air tight container for up to 5 days on the counter, 10 days in the fridge, or 3 months in the freezer for best quality.

    Notes

    • Applesauce: Use unsweetened applesauce as the fruit itself is sweet enough!
    • Chocolate: Depending on what type of chocolate you like, chop up your favorite bar or use chocolate chips. Feel free to mix and match!
    • Greek yogurt: Plain Greek yogurt was used when developing this recipe. If you have a flavor like vanilla on hand, you can use it, however, note that there are added sugars. To compensate for this, remove a tablespoon of granulated sugar and either reduce the vanilla extract by half or remove.
    • White whole wheat flour: A different variety of wheat is used to produce a lighter colored flour and keep your muffins brighter, but still remain whole wheat! Regular whole wheat flour can be used here, just note the color will be darker.
    • Gluten Free: Swap gluten-free flour (like a one-to-one baking blend) in place of the white whole wheat flour.
    • Vegan: Use a plant-based yogurt and milk with dairy-free chocolate chips to keep them dairy-free, and add organic sugar and a flax egg to make your muffins vegan friendly!
    • To make mini muffins, use a mini ice cream scoop or rounded tablespoon to drop batter into a silicon mini muffin tray like this (not sponsored, just allows for super easy clean up!) Bake at the same temperature for 10-14 minutes.
    • Using this Whole Wheat Chocolate Chip Muffin base, feel free to switch up the add-ins and recreate your favorite bakery muffin at home:
      • Cinnamon Raisin: Add 2 tsp ground cinnamon to the flour (you can also use an unsweetened cinnamon applesauce), and swap 1/3 cup raisins for the chocolate.
      • Pumpkin Spice: Stir in 2 tsp of pumpkin pie spice to the flour, then swap pumpkin puree for the applesauce (feel free to keep the chocolate chips!)
      • Lemon Poppy Seed: Stir in 1 Tbsp of lemon juice, 1 Tbsp lemon zest, and 2 Tbsp poppy seeds to the wet ingredients.
    • Serve these with a cup of coffee for the perfect morning pick me up!

      Nutrition

      Calories: 92kcal | Carbohydrates: 18g | Protein: 4g | Fat: 1g | Saturated Fat: 1g | Cholesterol: 14mg | Sodium: 158mg | Potassium: 98mg | Fiber: 2g | Sugar: 8g | Vitamin A: 51IU | Vitamin C: 1mg | Calcium: 54mg | Iron: 1mg

      Healthy Applesauce Muffins

      July 14, 2021

      Image of apples and apple muffins.

      Need a satisfying snack or healthy breakfast that the entire family can enjoy? Then these Healthy Applesauce Muffins are for you! Sweetened with fruit and spiced with cinnamon, these natural muffins need to be in your kitchen this week, too!

      Image of apple muffins.
      [feast_advanced_jump_to]

      Why you Need to Make these Oatmeal Muffins with Applesauce

      Apple picking in 90 degrees weather in Southern California is not typically how I picture apple picking, but nonetheless we make the hour drive every year and enjoy every second!

      If you’re in the San Diego area, I highly recommend making a trip out to Julian to enjoy the family friendly activity (COVID compliant too!) of apple picking!

      For just $20, you can take home nearly 5 pounds of apples and lots and lots of memories!

      The best part, you get to make your new favorite recipe with applesauce: Healthy Applesauce Muffins!

      What you Need to Make this Healthy Breakfast Muffin Recipe

      Image of ingredients to make applesauce muffins.

      Ingredient Tips

      • Date Syrup: Using this fruit-derived syrup (plus apple sauce) makes these muffins refined sugar free! The flavor is more similar to molasses which makes it perfect for this fall recipe. For more ways to use it up, check out my Chickpea Cookie Dough and Gingerbread Cookies!
      • Apples: Apples vary in sweetness! Choose a variety like Gala or Fuji with a little more sweet than tartness to keep the flavor of this recipe.
      • Oats: Use the quick cooking, rolled oats. This creates a more uniform texture that kids will be sure to enjoy, too!

      Ingredient Swaps

      • Date Syrup: While I highly recommend giving it a try, if you don’t have date syrup you can sub in brown sugar or maple syrup. Note, this will not be added sugar free.
      • Gluten Free: You can sub in a gluten-free flour like almond or coconut for the whole wheat flour if you want to make this gluten-free. Be sure your oats are certified gluten free as well!
      • Vegan: Use your favorite plant based milk and a flax egg to keep these muffins vegan friendly.
      • Spices: We love the cinnamon and ginger flavor combo but if you keep apple pie spice on hand, it usually contains some combination of cinnamon, nutmeg, cardamom, allspice, and/or cloves. Feel free to sub what you have, just make sure it totals 1 1/2 tsp (and keep the nutmeg and/or cloves to 1/4 tsp max as they can be very strong!)

      How to make this Applesauce Oatmeal Muffin Recipe

      (1 + 2) Combine all dry ingredients together in a medium bowl.

      (3) Mix the wet ingredients into a larger bowl.

      Image of preparation steps to make healthy applesauce muffins.

      (4) Because the date syrup is dark, the batter will look dark!

      (5) Stir the dry ingredients into the wet.

      (6) Fold in the chopped and diced apples.

      Image of process steps to make applesauce muffins.

      (7) Portion into 12 muffin tin liners.

      (8) Top each with a thin slice apple cutout (if desired!) Place into the oven to bake.

      (9) Remove and let cool 10 minutes before serving.

      Image of process steps to make muffins.

      Then, viola! Homemade Healthy Applesauce Muffins are yours to enjoy!

      Image of apples and apple muffins.

      Recipe Notes + Expert Tips

      Trust me, there are very few things you can do to mess up this recipe! It’s literally the easiest thing to make. Here’s a few tips to ensure you get the golden delicious muffin you want, every time!

      • Due to the batter being dark, it will be difficult to tell doneness by looking for browning. Check your muffins by poking a toothpick into the center of a muffin situated near the center of the muffin pan. If it comes out clean, they’re done!
      • If you want to make this a full breakfast meal, I highly recommend pairing this with a cup of Pumpkin Spice Yogurt!
      • For serving, accompanying with coffee for the adults (or chai tea) is a delicious choice!

      FAQs for These Healthy Muffins with Applesauce

      Does an apple a day really keep the doctor away?

      This proverb that’s gotten passed down from your parents (and probably their parents) absolutely has it’s place! There are many things to be mindful of when enjoying a balanced diet but for now, let’s talk apple nutrition!

      Apples are nutrient dense foods, meaning they have high nutrient content (vitamins like vitamin C, minerals like potassium, fiber, etc.) for a relatively low amount of calories. Apples are also a very accessible fruit as they’re widely available across the country and have thousands of varieties with different taste and texture attributes.

      So, including apples as part of a healthy diet, and even baked into your favorite goodies, can definitely bring one a step closer to staving off chronic diseases! As with most fruits and veggies, whole foods are preferred so when possible, try to reach for whole apples as opposed to apple juice, dried apple snacks, or apple flavored gummies/candies (although they have their place, too!)

      Can this muffin recipe be used to make a bread?

      Sure! If you’d rather have a bread to slice up, follow the procedure as directed and pour into a parchment lined or lightly greased loaf pan. Note the cooking time will be longer, 40-50 minutes at 350 degrees F, but you can use the same method to check for doneness (a toothpick to the center).

      Also note that this recipe does make 12 single serve muffins, so note that the portion sizes may be more difficult to monitor when slicing a bread!

      For a quick frosting, if desired, look no further than the yogurt-based frosting used for my Sweet Potato Muffins, by whisking together 1/3 cup plain Greek yogurt with 3 tablespoons of powdered sugar!

      Other Healthy Apple Recipes You May Enjoy

      • Image of apple crisp in a baking dish with forks.
        Cinnamon Apple Crisp
      • apple chia cake
        Apple Cinnamon Chia Cake
      • Apple Pie Oatmeal
      • Pomegranate Apple Smoothie with Butternut Squash @shawsimpleswaps
        Pomegranate Apple Smoothie with Butternut Squash

      If you try this recipe, would you please do me a favor and leave a star rating in the recipe box and/or comment below! This helps immensely in Google to continue delivering high quality content to you. And please be sure to tag and share what you made with me on social, I love seeing your creations! You can find me here: Instagram – Facebook – Pinterest!

      Image of apples and apple muffins.
      Print Recipe
      5 from 1 vote

      Healthy Applesauce Muffins

      Need a satisfying snack that the entire family can enjoy? Then these Healthy Applesauce Muffins are for you! Sweetened with fruit and spiced with cinnamon, these natural muffins need to be in your kitchen this week too!
      Prep Time5 minutes mins
      Cook Time28 minutes mins
      Total Time33 minutes mins
      Course: Breakfast
      Cuisine: American
      Servings: 12 muffins
      Calories: 122kcal
      Author: Liz Shaw

      Ingredients

      • 1 cup white whole wheat flour
      • 1 cup rolled oats quick cook
      • 1 tsp baking powder
      • 1/2 tsp baking soda
      • 1 tsp ground cinnamon
      • 1/2 tsp ground ginger
      • 1/8 tsp salt
      • 1/3 cup date syrup
      • 1 cup unsweetened applesauce
      • 1 tsp pure vanilla extract
      • 1/2 cup milk of choice
      • 2 tbsp vegetable oil
      • 1 large egg
      • 2 small Jonathan apples finely chopped

      Instructions

      • Preheat oven to 350 degrees F.
      • Combine the flour, oats, baking powder, baking soda, cinnamon, ginger, and salt in a medium bowl.
      • To a larger bowl, combine the date syrup, applesauce, vanilla, milk, oil, and egg. Whisk together.
      • Slowly fold the dry into the wet ingredients. Stir in the chopped apples.
      • Fill a 12-cup muffin pan with liners. Portion batter evenly into muffin liners. Top each muffin with an apple cut out if desired for garnish. I use my daughters mini veggie cutters for this!
      • Bake muffins for 28 minutes.
      • Remove and let cool for 10 minutes before serving. Store in an airtight container in the fridge for 7 days, or freeze for up to 3 months.

      Notes

      • Apples: Apples vary in sweetness! Choose a variety like Gala or Fuji with a little more sweet than tartness to keep the flavor of this recipe.
      • Oats: Use the quick cooking, rolled oats. This creates a more uniform texture that kids will be sure to enjoy, too!
      • Date Syrup: While I highly recommend giving it a try, if you don’t have date syrup you can sub in brown sugar or maple syrup. Note, this will not be added sugar free.
      • Gluten Free: You can sub in a gluten-free flour like almond or coconut for the whole wheat flour if you want to make this gluten-free. Be sure your oats are certified gluten free as well!
      • Vegan: Use your favorite plant based milk and a flax egg to keep these muffins vegan friendly.
      • Spices: We love the cinnamon and ginger flavor combo but if you keep apple pie spice on hand, it usually contains some combination of cinnamon, nutmeg, cardamom, allspice, and/or cloves. Feel free to sub what you have, just make sure it totals 1 1/2 tsp (and keep the nutmeg and/or cloves to 1/4 tsp max as they can be very strong!)
      • Due to the batter being dark, it will be difficult to tell doneness by looking for browning. Check your muffins by poking a toothpick into the center of a muffin situated near the center of the muffin pan. If it comes out clean, they’re done!
      • If you want to make this a full breakfast meal, I highly recommend pairing this with a cup of Pumpkin Spice Yogurt!
      • For serving, accompanying with coffee for the adults (or chai tea) is a delicious choice!

      Nutrition

      Calories: 122kcal | Carbohydrates: 21g | Protein: 3g | Fat: 4g | Saturated Fat: 2g | Cholesterol: 16mg | Sodium: 98mg | Potassium: 152mg | Fiber: 3g | Vitamin A: 42IU | Vitamin C: 1mg | Calcium: 48mg | Iron: 1mg

      Want more Shaw Kitchen recipes? Then sign up here for my 5 Day Stress-Free Meal Plan delivered straight to your inbox!

      Homemade Fig Jam

      July 14, 2021

      Image of 3 jars of homemade jam in a row.
      • Share
      • Yummly

      The search is over for a delicious, low added sugar spread to add to your morning toast! This Homemade Fig Jam with Chia Seeds is an omega-packed way to start your day!

      Image of 3 jars of homemade jam in a row.
      [feast_advanced_jump_to]

      Why you Need to Makes this Homemade Jam Recipe with Figs

      Are you a fig fan?

      That’s a big yay over here! Figs are a naturally sweet powerhouse, meaning they’re the perfect fruit to use to make a deliciously sweet jam!

      Plus, this fresh fig jam is perfect on its own, but also a lovely addition to a spiced up gourmet cheese board!

      Is this jam healthy?

      Yes, absolutely!

      Not only is this recipe low in added sugar (or added sugar free), but it’s also packed with two superfoods: figs and chia seeds!

      Chia seeds have fiber too (yes, this is a fiber packed jam!) in addition to heart-healthy omega fats.

      Image of fresh figs.

      What you need to make this Fresh Fig Recipe

      Note card with ingredients listed and a picture of a cut fig.

      Ingredient Tips

      • Figs: Fresh figs ripen quickly (and are in season during June and August; more info on how to select figs here), so it’s best to buy them and use them in a day or two. But then again, if you have a plethora of figs, you can always whip up this delicious jam and freeze the extras to enjoy in fall!
      • Apple Juice: Be sure to use 100% apple juice that is free of added sugars!
      • Chia Seeds: Black or white chia seeds work for this recipe!
      • Cane sugar: Adding sugar is totally optional and depends on your preference for a more or less sweet jam.

      Ingredient Swaps

      • Vegan: To make this recipe vegan friendly, if you do add cane sugar, buying organic ensures it is a vegan product. You can also use coconut sugar or agave.
      • Apple Juice: If you like to get apple cider from your fresh fruit stand in season, go ahead and sub it in. However, ask your vendor if their cider is pasteurized. If not, before adding the 1/2 cup of cider to the boiled figs, bring to 160 degrees F (and maintain for one minute) in the microwave or on the stovetop to minimize pathogen potential!

      How to make Fig Jam with Fresh Fig:

      Start with the basics for this Homemade Fig Jam!

      Image of process of making fig jam.

      Slice figs in half, then assemble the other 3 ingredients! Yes, it’s that simple!

      Add figs, apple juice, and sugar to your Instant Pot or pot of boiling water.

      Image of process of making fig jam.

      After cooking, process in a blender or use an immersion blender to create a smooth consistency. Add in chia seeds. Then prepare the mason jars for canning!

      Recipe Notes + Expert Tips

      • The key to making fig jam is allowing yourself the patience to wait until it sets to enjoy it! Okay, and lots of love and a few simple kitchen tools (i.e., a medium stove-top pot, a blender or immersion blender, a whisk, or just an Instant Pot and a blender!)
        • If you’re wondering what an immersion blender is, it’s a simple handheld blender you can use inside the pot to prevent burning yourself from transferring a hot item to the actual blender. (But, you don’t need one to make this recipe! Your blender will work just fine!)
        • You will also want glass jars and metal lids so you can store the jam for safe keeping (and eating!) later!
      • The key to making a figgy jam that spreads and holds like a pectin based preserve or jam is to use those chia seeds.
      • Chia seeds when placed in liquid form a gel like consistency, helping the fig spread like a traditional store-bought jam or jelly.
        • Just look at the way the fig spread so perfectly on this toast!
      • Wondering what to serve this healthy jam on that’s not plain toast? Here are some ideas:
        • French Toast Bagels
        • Cornbread Muffins
        • Brown Sugar Tea Cookies
      Image of homemade fig jam on toast.

      This recipe is simple, delicious and pure, just what you want in a homemade goody.

      FAQs for this Fig Jam Recipe

      What are the health benefits of figs?

      Figs are nutrient dense, containing a wide variety of nutrients such as fiber, potassium, vitamin B6, manganese, pantothenic acid and copper. They’re a super food to indulge in, especially when they’re in season.

      When fresh, they’re very low in calories at only 30 calories per small fig. So if you’ve never had them before, give them a taste!

      Can this recipe be made with dried figs?

      Truthfully, I have not tried it! However, if it’s not fresh fig season and you’re adamant about making this homemade jam, I’d use 8 ounces of dried figs and follow the procedure as described. Avoid adding any additional sweetener as the sugars get concentrated when dried.

      Also, for dried figs, I’d be careful to make sure there are no added sugars. Oftentimes, Black Mission figs get treated with a sugar coating after drying so check those labels and other varieties like Turkish figs!

      Other Spread and Dip Recipes You May Enjoy

      • A rich, creamy chocolate dessert dip made with the essential ingredients you likely have on hand! This Sweet Hummus Recipe is the perfect snack or party dip! The beauty of this baby is you can make it all in the blender, aka, no mess clean up! #desserthummus #desserthummusrecipe #healthydesserthummus #desserthummushealthyrecipe #desserthummuschocolate
        Sweet Hummus Recipe
      • Goat Cheese, Walnut and Date Appetizer with Autumn Glory Apples - Shaw's Simple Swaps A simple 5 minute snack that comes together in no time! @shawsimpleswaps #glutenfree #simplesnacks #shawkitchen #healthyeats
        Goat Cheese, Walnut and Date Appetizer with Autumn Glory Apples
      • Sugar Free Chocolate Spread
        Sugar Free Chocolate Spread

      If you try this recipe, would you please do me a favor and leave a star rating in the recipe box and/or comment below! This helps immensely in Google to continue delivering high quality content to you. And please be sure to tag and share what you made with me on social, I love seeing your creations! You can find me here: Instagram – Facebook – Pinterest!

      Image of 3 jars of homemade jam in a row.
      Print Recipe
      5 from 8 votes

      Homemade Fig Jam with Chia Seeds

      Savor the flavor of fresh figs by making a Homemade Fig Jam. Bonus, it’s perfect to pair on those sammies for back to school lunches!
      Prep Time25 minutes mins
      Cook Time20 minutes mins
      Total Time45 minutes mins
      Course: Breakfast
      Cuisine: American
      Servings: 16 servings
      Calories: 42kcal
      Author: Liz Shaw

      Ingredients

      • 8 medium figs 12 ounces, halved
      • 1 cup + 1/2 cup 100% pure apple juice divided
      • 3 tablespoons chia seeds
      • 2 tbsp cane sugar optional

      Instructions

      • In a medium saucepan, bring 1 cup apple juice to a boil and add in fresh figs.
      • Boil for 15 minutes, covered.
      • Remove from heat and let sit 5 minutes.
      • Using your immersion blender (or carefully with a regular blender), puree figs, using caution not to splatter the hot liquid onto your skin.
      • Pour pureed figs into a medium bowl or large mason jar with a lid. Add in the 1/2 cup apple juice, chia seeds, and sugar. Stir together with a spatula or shake mason jar vigorously with a lid. Refrigerate for a minimum of 4 hours.
      • Store jam in the refrigerator and use within 10 days for best quality.
      • Freeze extra jam for up to one month. Use defrosted jam within 7 days for best quality.

      Notes

      • To Prepare In the Instant Pot: Add figs and apple juice to the metal inner pot of the Instant Pot. Select pressure cook, set timer to 3 minutes, and secure lid and sealing valve. Let naturally release for 5 minutes, then use quick release. Continue with steps above to blend the figs and adding the remaining ingredients. 
      • To Can: Follow proper canning procedures, including sterilizing glass jars and sealing the jars. Use within 3 months of canning, and within 14 days of opening. 
      • Figs: Fresh figs ripen quickly (and are in season during June and August; more info on how to select figs here), so it’s best to buy them and use them in a day or two. But then again, if you have a plethora of figs, you can always whip up this delicious jam and freeze the extras to enjoy in fall!
      • Apple Juice: Be sure to use 100% apple juice that is free of added sugars!
      • Chia Seeds: Black or white chia seeds work for this recipe!
      • Cane sugar: Adding sugar is totally optional and depends on your preference for a more or less sweet jam.

        Nutrition

        Calories: 42kcal | Carbohydrates: 9g | Protein: 1g | Fat: 1g | Saturated Fat: 1g | Sodium: 1mg | Potassium: 83mg | Fiber: 2g | Sugar: -24g | Vitamin A: 36IU | Vitamin C: 1mg | Calcium: 24mg | Iron: 1mg

        Want more Shaw Kitchen recipes? Then sign up here for my 5 Day Stress-Free Meal Plan delivered straight to your inbox!

        • Share
        • Yummly

        Gluten Free Blueberry Muffins

        July 14, 2021

        Image of GF muffins.

        Looking for that bakery muffin that hits all the right spots? Then these Gluten Free Blueberry Muffins is just for you. With no added sugar and lower in saturated fat than your average muffin, you can feel good about enjoying this with your coffee or serving it to your littles as part of a balanced meal plan!

        Image of blueberry muffins in a muffin tin.
        [feast_advanced_jump_to]

        Why you need to make this Gluten Free Muffin Recipe

        Perfect to make during meal prep over the weekend so you can grab and enjoy all week long, these Gluten Free Blueberry Muffins are sure to please your entire crew (and don’t forget to check out my Gluten Free Pumpkin Muffins and Southwestern Egg Frittatas for other gluten free breakfast options!)

        With less than 10 ingredients which are likely already on hand, these blueberry muffins come together in no time. Not only that, but this gluten free muffin recipe is easily adaptable to accommodate multiple dietary requirements, so they’re the ideals recipe for guests!

        What you need to make these Oatmeal Blueberry Muffins

        Image of ingredients labeled needed to make blueberry muffins.

        Ingredient Tips

        • Rolled Oats: To make oat flour, simply pulse rolled oats until flour like consistency is achieved in a blender or food processor (store in an airtight container for 3 months at room temperature or 6 months in the fridge or freezer).
          • While I like using oat flour because you can make it very inexpensively, you can also use 50-50 split of almond flour and oat flour for a lower carb option.
          • SPECIAL NOTE FOR THOSE WITH CELIAC DISEASE: Ensure your rolled oats are certified gluten free as some products are at risk for cross contamination. Read those labels!
        • Applesauce: The natural sugars in applesauce, plus the blueberries, provide enough sweetness to keep these blueberry muffins added sugar free, so definitely get an unsweetened variety! If you like a little spice, try to an unsweetened cinnamon variety.

        Ingredient Swaps

        • Nut or Seed Butter: Swap in peanut, sunflower, or your preferred nut or seed butter for almond butter in this recipe. I love almond for the taste but depending on your preference and/or dietary needs, go for what’s in your kitchen! If purchasing, check the labels for a low sugar/no added sugar option and a low sodium/no added salt option if it applies to you!
          • Also, sub the almond garnish on top for your seeds of choice!
        • Almond Extract: If almond flavor is not your thing or is an allergen, just add vanilla extract!
        • Frozen Blueberries: Making these blueberry muffins with frozen blueberries is a simple way to use freezer staples, however, if you have fresh on hand, it’s okay to use them!
        • Vegan: Use whichever non-dairy milk you prefer and a flax egg!

        How to make these Healthy Blueberry Muffins

        (1) Preheat oven to 375 degrees F. Start by mixing the wet ingredients in a large bowl. Whisk together the almond butter, applesauce, egg, milk, and almond extract.

        (2) Using the same bowl, add the oats, baking soda, powder, and salt. Mix until combined.

        Image of process steps to make muffins.

        (3) Fold in the frozen blueberries.

        (4) Portion into 9 muffin liners in a muffin tin. Bake for 18 to 20 minutes (or until tops are browned and wooden toothpick when inserted comes out clean.)

        Process shots to make muffins.

        If desired (and not serving to young, beginner eaters), add chopped almonds to the top of muffins before baking for a little garnish!

        Muffin batter in tins before baking.

        Let cool a few minutes before enjoying!

        Holding a blueberry muffin up close.

        Recipe notes + Expert Tips

        • This Gluten Free Blueberry Muffins recipe is SO simple, I wanted to keep it to one bowl so you don’t have to spend a ton of timing cleaning up! You’re welcome!
        • These taste perfect with a cup of tea or coffee, or a glass of milk for your little ones!
        • I also recommend crumbling up and serving over a cup of Greek yogurt for a protein packed breakfast or snack!

        FAQ for these Easy Blueberry Muffins

        How can I store these muffins?

        As mentioned, these are great for meal prep and can be stored a number of ways (always in an airtight container):
        1) On the counter for up to 3 days.
        2) In the refrigerator for up to 10 days.
        3) In the freezer for up to 3 months (heat for 30-45 seconds in the microwave to defrost).

        Can I replace the blueberries with another fruit?

        Blueberries are abundant in fiber, vitamins, minerals, and antioxidants, however, if you’re looking for a change, go ahead and swap out blueberries with any of the following: chopped strawberries, raspberries, blackberries, chopped cherries, chopped peaches, or chopped plums.

        What does it mean to be gluten free?

        Gluten is a protein found in wheat, barley, rye and sometimes oats (be sure yours are certified GF to avoid risk of cross contamination). For those with the autoimmune condition celiac disease, gluten causes damage to the lining of the intestines leading to a range of gastrointestinal symptoms.

        There has also been research in the past few years regarding gluten sensitivity or intolerance which causes similar symptoms to celiac’s but without the intestinal damage. The only way to treat these conditions is to follow a gluten free diet, ensuring that symptoms cannot occur. If you find you are having any gastrointestinal distress after consuming gluten-containing products, speak to your gastroenterologist!

        Other Gluten Free Baking Recipes you may enjoy

        • Image of muffins in the tin.
          Gluten Free Pumpkin Muffins
        • GF Cookies staged shot.
          Gluten Free Gingerbread Cookies
        • These Gluten Free Vegan Cookies are perfect for those looking for a small batch, easy and healthy recipe to whip up in under 30 minutes! Perfect for a crowd or a secret stash for yourself. Low in added sugar and super moist! #vegancookierecipe #glutenfreechocolatevcookie #healthycookierecipe #glutenfreecookies
          Gluten Free Vegan Cookies
        • Gluten Free Brownie Recipe - A delicious, blender brownie recipe that's naturally gluten free, dairy free, artificial sugar free and actually delicious. No sponge like tasting brownies here! This pecan flour base will have your entire crowd asking for more! #glutenfreebrownies #brownierecipe #blenderbrownies #healthydesserts #dairyfreebrownies
          Gluten Free Brownie Recipe

        If you try this recipe, would you please do me a favor and leave a star rating in the recipe box and/or comment below! This helps immensely in Google to continue delivering high quality content to you. And please be sure to tag and share what you made with me on social, I love seeing your creations! You can find me here: Instagram – Facebook – Pinterest!

        Image of blueberry muffins in a muffin tin.
        Print Recipe
        5 from 3 votes

        Gluten Free Blueberry Muffins

        Looking for that bakery muffin that hits all the right spots? Then this Gluten Free Blueberry Muffins is just for you. Lower in sugar and saturated fat than your average muffin, you can feel good about enjoying this with your coffee or serving it to your littles as part of a balanced meal plan!
        Prep Time10 minutes mins
        Cook Time18 minutes mins
        Total Time28 minutes mins
        Course: Breakfast
        Cuisine: American
        Servings: 9 servings
        Calories: 163kcal
        Author: Liz Shaw

        Ingredients

        • 1/2 cup almond butter or peanut or seed butter
        • 1/2 cup milk
        • 1/2 cup unsweetened applesauce
        • 1 large egg
        • 1 tsp almond extract
        • 1 1/2 cups rolled oats pulsed
        • 1/2 tsp baking soda
        • 1 tsp baking powder
        • 1/4 tsp salt
        • 1 cup frozen blueberries

        Instructions

        • Preheat oven to 375 degrees F.
        • In a large bowl, whisk together the almond butter, milk, applesauce, egg, and almond extract until combined.
        • Stir the oat flour, baking soda, powder, and salt into the wet mixture until uniformly combined.
        • Evenly distribute batter into 9 muffin liners. Bake for 18 minutes or until tops are golden brown and wooden toothpick when inserted comes out clean. Let cool 5 minutes before enjoying.
        • Store muffins in an airtight container on the counter for 3 to 5 days, in the refrigerator for 7 to 10 days, or freeze for up to 3 months for best quality.

        Notes

        Here are a few modifications you can make to suit your families needs:
        • For nut allergies, swap sunflower seed butter for the almond butter and vanilla extract for almond extract. Omit the almonds on top and garnish with seeds of choice.
        • If you have fresh blueberries, feel free to use those in this recipe in place of frozen.
        • While I like using oat flour because you can make it very inexpensively by pulsing old fashioned oats, you can also use 50-50 split of almond flour and oat flour for a lower carb option.
        • To make oat flour, simply pulse rolled oats until flour like consistency is achieved in a blender or food processor.

        Nutrition

        Calories: 163kcal | Carbohydrates: 16g | Protein: 6g | Fat: 9g | Saturated Fat: 1g | Cholesterol: 21mg | Sodium: 163mg | Potassium: 239mg | Fiber: 3g | Sugar: 4g | Vitamin A: 39IU | Vitamin C: 2mg | Calcium: 99mg | Iron: 1mg

        Want more Shaw Kitchen recipes? Then sign up here for my 5 Day Stress-Free Meal Plan delivered straight to your inbox!

        Gluten Free Pumpkin Muffins

        July 12, 2021

        Image of muffins in the tin.

        Looking to enjoy a pumpkin muffin on a gluten-free diet? Then these delicious, low sugar Gluten Free Pumpkin Muffins are just for you. Perfect for breakfast or a quick snack, you’ll feel the taste of fall as soon as you bite in!

        Vertical image of pumpkin muffins.
        [feast_advanced_jump_to]

        Why you Need to Make this Pumpkin Muffin Recipe

        The perfect addition to your menu this fall! Try these Gluten Free Pumpkin Muffins and I promise, even the pickiest toddler will be pleased!

        The pumpkin in these gluten free muffins keeps them moist and satisfying, alongside hearty oats, and warming spices for that traditional autumnal flavor. The pumpkin also adds a special nutrition boost and is worth incorporating into your seasonal spread!

        What You Need to Make these Healthy Pumpkin Muffins

        Image of ingredients to make muffins with pumpkin.

        Ingredient Tips

        • Customize with Add-ins:
          • Add in cranberries or favorite dried fruit for a fun twist!
          • For a slightly more robust flavor, add in 1/2 teaspoon of nutmeg.
          • Add in 3 Tbsp dark chocolate chips for a little extra sweetness!
          • For a little extra protein, add in a full serving of your favorite unflavored protein powder. Note that this might make the muffins a little more dense!
        • Pumpkin Puree: While purchasing unsweetened canned pumpkin is a great quick option for these muffins, if you’re opting to make your own pumpkin puree (don’t forget to save those seeds for a tasty snack!), check out my Sweet Potato Muffin Recipe as the procedure will be the same! You can mash your pumpkin or pop it in the food processor to make it super smooth!
          • Side note here to be VERY CAREFUL when cutting your pumpkin; se a very sharp knife and give yourself plenty of time!
        • Pumpkin Pie Spice: You can either buy a pre-made spice mix or if you like to keep your spices separate, here’s a recipe for this spice mix! If you love this flavor combo as much as me, try it in a Frozen Pumpkin Spice Latte, Pumpkin Spice Greek Yogurt, or on Pumpkin Pie Spiced Nuts!

        Ingredient Swaps

        • Oat Flour: This recipe was developed with oat flour but should still work well with an all purpose gluten free flour blend.
        • Sugar: Omit brown sugar and opt for 1/3 cup of date syrup if trying to make these added refined sugar free.
        • Oil: Any neutral baking oils can be used in this recipe like vegetable, canola, avocado oil, or even light extra virgin olive oil.
        • Vegan: Substitute your favorite non-dairy alternative and to remove the egg, you can add a flax egg. However, note that this will increase the density of these muffins!

        How to Make this Gluten free Muffin Recipe

        (1 + 2) Preheat the oven. Combine the dry ingredients together in a small bowl.

        (3) Combine the remaining ingredients (except the pumpkin seeds if using as garnish) in a large bowl.

        Process shots to make muffins with pumpkin.

        (4 + 5) Whisk the dry ingredients into the wet.

        (6) Evenly distribute batter into muffin liners. Top with pumpkin seeds before baking for garnish. Omit if chocking hazard for your toddler.

        Process shots of making pumpkin muffins.

        Pull out of the oven and relish in the beauty of these Gluten Free Pumpkin Muffins!

        Image of muffins in the tin.

        Seriously, they are the perfect taste of fall!

        Holding a single muffin with pumpkin seeds on top.

        Recipe Notes + Expert Tips

        • If you have CELAIC DISEASE, double check the labels on your oats and ensure they are certified gluten free!
        • To make sure you get the same consistent quality every time, combine the baking agents and flour in a separate bowl. The pumpkin puree is a bit thick so making this a one bowl recipe may result in a product a little off in the rise.
        • To make these muffins into a gluten free pumpkin bread, prepare the batter as mentioned then pour into to a parchment-lined or greased bread pan. Bake at 375 degrees F for 35-40 minutes or until a toothpick inserted in the center comes out clean. Allow to cool in the bread pan for 10 minutes, elevated on a cooling rack. Remove and cool for an additional 10 minutes before slicing.
        Image of pumpkin muffins styled.

        FAQ for these Easy Pumpkin Muffins

        What are the nutritional benefits of pumpkin?

        Similar to sweet potatoes, pumpkins are packed with vitamins and minerals such as beta-carotene (which converts to vitamin A in the body), vitamin C, and other antioxidants.

        Compared to sweet potato, 1 cup of pumpkin clocks in at about a third less calories while still containing plenty of those nutrients mentioned. While sweet potato does provide an impressive nutrient profile, if you’re looking for another fall starch to incorporate into your diet, pumpkin is a great option!

        Does it matter what kind of pumpkin I use?

        When purchasing canned pumpkin, there are likely a few different varieties included in a single can. These pumpkins are processed together to achieve uniform flavor every time you purchase. This is very useful to bakers who want that consistency each season (and is also SUPER convenient)!

        If you are planning to make your own pumpkin puree, check out this guide for more information but basically, look for smaller, sugar pumpkin varieties! They’ll be your best bet for achieving that classic pumpkin flavor.

        Also, if you have extra pumpkin puree, place in a container and pop in the freezer for future use!

        Other Healthy Muffin Recipes you May Enjoy

        • Image of apples and apple muffins.
          Healthy Applesauce Muffins
        • Image of 6 muffins in the muffin tin.
          Whole Wheat Chocolate Chip Muffins
        • Muffins in muffin tin with grey background for food photography styling.
          Banana Bread Muffins with Chocolate
        • Image of GF muffins.
          Gluten Free Blueberry Muffins

        If you try this recipe, would you please do me a favor and leave a star rating in the recipe box and/or comment below! This helps immensely in Google to continue delivering high quality content to you. And please be sure to tag and share what you made with me on social, I love seeing your creations! You can find me here: Instagram – Facebook – Pinterest!

        Image of pumpkin muffins styled.
        Print Recipe
        5 from 3 votes

        Gluten Free Pumpkin Muffins

        Looking to enjoy a pumpkin muffin on a gluten-free diet? Then these delicious, low sugar Gluten Free Pumpkin Muffins are just for you. Perfect for breakfast or a quick snack, you'll feel the taste of fall as soon as you bite in!
        Prep Time10 minutes mins
        Cook Time18 minutes mins
        Total Time28 minutes mins
        Course: Breakfast
        Cuisine: American
        Servings: 9 muffins
        Calories: 106kcal
        Author: Liz Shaw

        Ingredients

        • 1 1/2 cups rolled oats pulsed
        • 1 tsp baking powder
        • 1/2 tsp baking soda
        • 1 tsp pumpkin pie spice
        • 1/4 tsp salt
        • 1 large egg
        • 1 cup pumpkin puree
        • 2 tbsp vegetable oil
        • 1 tsp vanilla extract
        • 1/2 cup milk
        • 1/3 cup brown sugar
        • 1/4 cup pumpkin seeds optional

        Instructions

        • Preheat oven to 375 degrees F.
        • To a small bowl, combine oat flour, baking powder, baking soda, pumpkin pie spice, and salt. Set aside.
        • To a large bowl, add the egg, pumpkin puree, oil, vanilla, milk, and brown sugar. Mix thoroughly together.
        • Mix the dry ingredients into the wet.
        • Line 9-muffin cups with baking liners. Evenly distribute the batter into the muffin liners and top if desired with pumpkin seeds. Bake for 18 minutes or until tops are lightly browned.
        • Remove from oven and let cool before enjoying.
        • Store muffins in an airtight container on the counter for 3 to 5 days, in the refrigerator for 7 to 10 days, or freeze for up to 3 months for best quality.

        Notes

        • Customize with Add-ins:
          • Add in cranberries or favorite dried fruit for a fun twist!
          • For a slightly more robust flavor, add in 1/2 teaspoon of nutmeg.
          • Add in 3 Tbsp dark chocolate chips for a little extra sweetness!
          • For a little extra protein, add in a full serving of your favorite unflavored protein powder. Note that this might make the muffins a little more dense!
        • If you have CELAIC DISEASE, double check the labels on your oats and ensure they are certified gluten free!
        • To make sure you get the same consistent quality every time, combine the baking agents and flour in a separate bowl. The pumpkin puree is a bit thick so making this a one bowl recipe may result in a product a little off in the rise.
        • To make these muffins into a gluten free pumpkin bread, prepare the batter as mentioned then pour into to a parchment-lined or greased bread pan. Bake at 375 degrees F for 35-40 minutes or until a toothpick inserted in the center comes out clean. Allow to cool in the bread pan for 10 minutes, elevated on a cooling rack. Remove and cool for an additional 10 minutes before slicing.

        Nutrition

        Calories: 106kcal | Carbohydrates: 15g | Protein: 3g | Fat: 4g | Saturated Fat: 2g | Cholesterol: 16mg | Sodium: 124mg | Potassium: 145mg | Fiber: 2g | Sugar: 7g | Vitamin A: 3200IU | Vitamin C: 1mg | Calcium: 50mg | Iron: 1mg

        Want more Shaw Kitchen recipes? Then sign up here for my 5 Day Stress-Free Meal Plan delivered straight to your inbox!

        Sweet Potato Muffin Recipe

        July 9, 2021

        Staged shot of healthy muffins.

        Looking for a healthy sweet treat to serve your entire family? Then this lower sugar Sweet Potato Muffin Recipe is for you. Sweetened with sweet potatoes and filled with wholesome ingredients, you won’t regret adding this into your meal prep routine!

        Sweet potato chia chocolate breakfast cupcakes in a muffin tin with yogurt glaze drizzled on top.
        [feast_advanced_jump_to]

        Why you need to make these Sweet Potato Muffins

        I am a HUGE fan of sweet potatoes! Whether savory, like Sweet Potato Chili, or sweet like Sweet Potato Pancakes, they’re deeply satisfying and full of awesome nutrition!

        What’s better than elevating a favorite comfort food recipe like chocolate chip muffins? The ingredients used are probably already in your pantry, come together in a blink, and support your healthy lifestyle by allowing you to enjoy the best of this breakfast treat (with the added nutrient boost)! What are you waiting for– let’s get baking!

        What you need to make these muffins with sweet potato

        White marble backdrop with ingredients to make muffins on top.

        Ingredient Tips

        • Sweet Potato: The easiest way to prep your sweet potato for this cake is either steaming or boiling (alternatively, you can purchase canned pureed sweet potato). Start by scrubbing the outside of your medium-sized sweet potato to remove any dirt, then peel. Next, chop into 1 inch cubes. When done, your sweet potato should yield very easily to the pressure of a fork and you can mash away!
          • Option 1: Place sweet potato a microwave safe bowl and add 2 tablespoons of water. Cover with a plate and microwave on high for 5 minutes. Carefully remove the lid, stir, and place back in the microwave for 3-5 minutes.
          • Option 2: Set up your basket steamer. Add an inch or two of water to the pot you’re using so that it’s just below the basket. Place the heat on high. Once boiling, add your sweet potato to the basket. Steam for 10-15 minutes.
          • Option 3: Place your chopped sweet potato in a small saucepan and cover with room temperature water until about 1 inch over the sweet potato. Bring the water to a boil and maintain for 15-20 minutes.
        • Flour: I used a mix of whole wheat and AP flour for this recipe since I wanted to keep the cake light and fluffy; sometimes using whole wheat alone can weigh cakes down!

        Ingredient Swaps

        • Chocolate Chips: I like using semisweet or dark chocolate chips for this recipe!
        • Sugar: To reduce the sugar in this Sweet Potato Chia Chocolate Breakfast Cake recipe, here are a few options:
          • Replace chocolate chips with cacao nibs.
          • Omit brown sugar and use 1/3 cup date syrup.
          • For a maple flavor, add 1/4 cup pure monk fruit maple syrup in place of brown sugar.
        • Gluten Free: If you’d like to make these gluten free, feel free to use oat flour (pulsed rolled oats) in place of the whole wheat and AP flour.
        • Vegan: For a vegan option, use a non-dairy milk, flax egg, organic sugar, and dairy free chips!

        How to make this Low Sugar Sweet Potato Muffin Recipe

        (1 + 2) Preheat oven and mix the wet ingredients together in a large bowl.

        Process shots to making sweet potato cake.

        (3 + 4) Add the flours, baking agents, and salt to the wet ingredients. Whisk together.

        Process shots to making sweet potato cake.

        (5 + 6) Fold in the chocolate chips and chia seeds.

        Process shots to making sweet potato cake.

        (7) Fill either your 9-inch pie pan or 9 muffin liners evenly with the batter. Bake for 18-22 minutes for muffins or 28 minutes for the pie shape.

        (8) Remove and let cool.

        Process shots to making sweet potato cake.

        It works well with a 9-inch pie shape….and the muffins!

        Single shot of muffin.

        Recipe notes + Expert Tips

        Let’s keep things simple (we need more simple right?!)

        • I did NOT notice a difference when I tried making this Sweet Potato Chia Chocolate Breakfast Cake first by mixing the flours and baking agents in their own bowl, then combining into the wet ingredients (i.e., the muffin method of baking). Read- let’s save ourselves a dish and make it in one bowl!
        • If desired, frost with a yogurt-powdered sugar glaze! Simply make this by whisking 1/3 cup plain Greek yogurt with 3 tablespoons of powdered sugar.
        • You’ll know the muffins or cake is done when a toothpick comes out clean!

        FAQ for this Sweet Potato Breakfast Recipe

        What are the nutritional benefits of sweet potato?

        Sweet potatoes are a super nutritious food containing antioxidants (like anthocyanins), fiber, and beta-carotene (which is converted to vitamin A in the body). These set of properties come together to improve gut health, support tissues that are exposed to the environment, like skin, lungs, and intestinal lining, mediate immune response, and help with vision. Sweet potatoes are one of those “super foods” that are important to incorporate into a healthy diet as they, like many other fruits and vegetables, provide significant benefits to multiple body systems!

        Why chia seeds?

        While chia seeds are an impressive food on their own, loaded with fiber, protein, and a slew of vitamins and minerals, it’s their omega-3 content which is especially meaningful in this recipe! Vitamin A (which, as mentioned, comes from beta-carotene) is a fat soluble vitamin so when paired with fat-containing foods, it’s absorption is optimized. These two “super foods” are quite the dynamic duo!

        What can I pair this with to create a balanced breakfast?

        Ideally, a balanced meal will include a source of protein, some fat, and carbohydrates which includes fiber. A serving of this cake provides carbohydrate, fiber, and a small amount of fat, so to balance this out, we need to include some more protein and fat! I’d suggest:
        – a cup of 2% Greek yogurt
        – two eggs (optional: scrambled with veggies)
        – a tofu scramble with veggies
        – smoothie: 8 oz milk with half a scoop of protein powder or 2 Tbsp peanut butter and berries or banana

        Other Sweet Potato Recipes you may enjoy

        • Image of 3 sweet potato breakfast parfaits lined up in a row.
          Sweet Potato Breakfast Parfait
        • Filling, satisfying, and simple to make, this Healthy Shepherds Pie with Sweet Potato is the perfect family friendly meal. Easy to swap with ingredients you have on hand, and perfect for leftovers, you won't regret making this tonight. Plus, this recipe freezes great for a freezer friendly meal to pull out anytime.
          Healthy Shepherds Pie with Sweet Potato
        • Honey Flax Sweet Potato Cookies - @shawsimpleswaps a healthier alternative to satisfy your sweet tooth for under 100 calories! #cookie #healthycookie
          Honey Flax Sweet Potato Cookies
        • Cutting board with black bean burgers.
          Hearty Sweet Potato Black Bean Burgers

        If you try this recipe, would you please do me a favor and leave a star rating in the recipe box and/or comment below! This helps immensely in Google to continue delivering high quality content to you. And please be sure to tag and share what you made with me on social, I love seeing your creations! You can find me here: Instagram – Facebook – Pinterest!

        Staged shot of healthy muffins.
        Print Recipe
        5 from 5 votes

        Sweet Potato Chia Chocolate Breakfast Cake

        Delicious, nutritious and so easy to make, this Sweet Potato Chia Chocolate Breakfast Cake (or cupcakes) will win over your entire crew! Perfect for a morning snack or sweet treat at night!
        Prep Time10 minutes mins
        Cook Time22 minutes mins
        Total Time1 hour hr 32 minutes mins
        Course: Breakfast
        Cuisine: American
        Servings: 9 servings
        Calories: 193kcal
        Author: Liz Shaw

        Ingredients

        • 1 cup mashed sweet potatoes
        • 1/3 cup brown sugar
        • 1 large egg
        • 2 tbsp vegetable oil
        • 1 tsp vanilla extract
        • 1 cup milk
        • 1 cup whole wheat flour
        • 1/2 cup all purpose flour
        • 1 tsp baking powder
        • 1/2 tsp baking soda
        • 1/4 tsp salt
        • 3 tbsps chocolate chips
        • 2 tbsps chia seeds

        Instructions

        • Preheat oven to 375 degrees F.
        • Begin by mixing sweet potatoes, brown sugar, egg, oil, vanilla, and milk in a large bowl.
        • Once combined, add in the flours, baking powder, baking soda, and salt. Continue to mix.
        • Fold in the chia seeds and chocolate chips.
        • Line a 12-cup muffin tin with liners, or spray an 9-inch pie pan with cooking spray. Evenly distribute batter into muffin tins or pour directly into pan.
        • Bake muffins for 22 minutes, or until tops are lightly browned and wooden toothpick when inserted comes out clean. For the pie pan shape, bake for 28 minutes.
        • Let cool 5 minutes to firm up, then cut and enjoy warm! Store in an airtight container on the counter for 4 days, in the fridge for 7, or freeze for up to 3 months!

        Notes

        • I did NOT notice a difference when I tried making this Sweet Potato Chia Chocolate Breakfast Cake first by mixing the flours and baking agents in their own bowl, then combining into the wet ingredients (i.e., the muffin method of baking). Read- let’s save ourselves a dish and make it in one bowl!
        • If desired, frost with a yogurt-powdered sugar glaze! Simply make this by whisking 1/3 cup plain Greek yogurt with 3 tablespoons of powdered sugar.
        • You’ll know the muffins or cake is done when a toothpick comes out clean!
        • Sweet Potato: The easiest way to prep your sweet potato for this cake is either steaming or boiling (alternatively, you can purchase canned pureed sweet potato). Start by scrubbing the outside of your medium-sized sweet potato to remove any dirt, then peel. Next, chop into 1 inch cubes. When done, your sweet potato should yield very easily to the pressure of a fork and you can mash away!
          • Option 1: Place sweet potato a microwave safe bowl and add 2 tablespoons of water. Cover with a plate and microwave on high for 5 minutes. Carefully remove the lid, stir, and place back in the microwave for 3-5 minutes.
          • Option 2: Set up your basket steamer. Add an inch or two of water to the pot you’re using so that it’s just below the basket. Place the heat on high. Once boiling, add your sweet potato to the basket. Steam for 10-15 minutes.
          • Option 3: Place your chopped sweet potato in a small saucepan and cover with room temperature water until about 1 inch over the sweet potato. Bring the water to a boil and maintain for 15-20 minutes.

        Nutrition

        Serving: 1 | Calories: 193kcal | Carbohydrates: 31g | Protein: 4g | Fat: 6g | Saturated Fat: 4g | Cholesterol: 21mg | Sodium: 194mg | Potassium: 191mg | Fiber: 3g | Sugar: 7g | Vitamin A: 2138IU | Vitamin C: 1mg | Calcium: 99mg | Iron: 1mg

        Want more Shaw Kitchen recipes? Then sign up here for my 5 Day Stress-Free Meal Plan delivered straight to your inbox!

        Tomato Soup Pasta

        July 9, 2021

        Tomato Soup Pasta with Kale is a simple, vegan dish that the entire family can enjoy. Make It from scratch or simple swap some time with using a canned soup. Either way, the end product is delicious! You'll also find suggestions to modify for a gluten-free diet and high protein soup. #tomatosoup #healthytomatosoup #vegansouprecipes

        If you’re looking to add a little variety to a traditional tomato soup, this is the recipe for you! Tomato Soup Pasta is naturally vegan and can easily be made gluten-free, whole 30 and protein packed!

        Tomato Soup Pasta with Kale is a simple, vegan dish that the entire family can enjoy. Make It from scratch or simple swap some time with using a canned soup. Either way, the end product is delicious! You'll also find suggestions to modify for a gluten-free diet and high protein soup.  #tomatosoup #healthytomatosoup #vegansouprecipes
        [feast_advanced_jump_to]

        Why you need to make this Homemade Tomato Soup with Pasta

        This beauty came to be after I was having a hard time deciding what to make on a cold winter day not too long ago. Now, I will admit, this recipe also came about because I was tight on time!

        You see, my friend Alex has a great Pomodoro Sauce over Pasta recipe in Fresh Italian Cooking. I knew the simplicity of this recipe was something I wanted to recreate with what I had on hand.

        So, with a box of tomato soup in hand, pasta and lots of love (and kale), I entered the kitchen. With only one pot and many happy bellies around, I knew this had instantly become a winner.

        I promise, healthy eating has never tasted so good! Plus, this recipe is comforting, delicious and filling. Oh, and of course kid-friendly too.

        The wait is over, now let’s dive in!

        Tomato Soup Pasta with Kale is a simple, vegan dish that the entire family can enjoy. Make It from scratch or simple swap some time with using a canned soup. Either way, the end product is delicious! You'll also find suggestions to modify for a gluten-free diet and high protein soup. #tomatosoup #healthytomatosoup #vegansouprecipes

        What you Need to Make this Easy Recipe for Tomato Soup Pasta

        Ingredient Tips

        • Pantry Raid: This is the perfect recipe to turn to when you’re stuck at home due to rain, snow, etc. or if you simply didn’t get a chance to grocery shop! Remember to keep this bunch of ingredients on hand!
        • Refrigerator Raid: This is also a great recipe to throw in whatever leftover veggie you may have in your refrigerator awaiting a destination: bell pepper, carrot, or zucchini could make a guest appearance in this simple soup!
        • Garlic: Don’t have fresh? One clove of garlic can always be replaced with 1/2 tsp garlic powder; just add it in with the diced tomatoes.
        • Vegetable Broth: Since this recipe only requires 2 cups, portion out the two cups left and store in the freezer (in 1 cup portions) to be used as needed!

        Ingredient Swaps

        • Gluten Free: You can simply replace the noodles with your favorite gluten-free brand of pasta, or sub 3/4 cup of brown rice, to accommodate your gluten-free guests. Some favorites for this soup include the ALDI LiveGFree brand of pastas as well as the Ancient Harvest options. (Pssst, if you like rice, you’ll probably love this Fried Rice too!)
        • Tomatoes: Crushed or sauce will work here as well! Really, use up whatever you have on hand.
        • Broth: This recipe was developed with a vegetarian option in mind, but if you have chicken or mushroom broth on hand, they would work perfectly!
        • Kale: Sub any greens you have available: spinach, arugula, or chard would be great options, as well as using frozen varieties if that’s what ya got! Just defrost and squeeze out the excess liquid before adding into the soup.
        • Italian Seasoning: Swap one or all of the following if you don’t keep Italian seasoning on hand: dried oregano, thyme, basil, or rosemary.
        Tomato Soup Pasta with Kale is a simple, vegan dish that the entire family can enjoy. Make It from scratch or simple swap some time with using a canned soup. Either way, the end product is delicious! You'll also find suggestions to modify for a gluten-free diet and high protein soup. #tomatosoup #healthytomatosoup #vegansouprecipes

        How to make this Tomato Pasta Recipe

        (1) Heat olive oil over medium heat and sauté onions and garlic until translucent (4 minutes).

        (2) Stir in tomatoes, red pepper flakes, Italian seasoning, and broth. Cover and simmer over medium heat for 15 minutes.

        (3) Add vinegar and sugar. Blend with an immersion blender until pureed.

        (4) Over medium heat, stirring constantly, add pasta and cook until al dente (10 minutes).

        (5) Stir in kale and cook 5 more minutes.

        (6) Remove from heat and portion into bowls. Serve with a side of fresh salad and top with shaved parmesan! Enjoy!

        Recipe Notes + Expert Tips

        • Don’t have an immersion blender? No problem! A regular blender works just fine but there are a few things to keep in mind:
          • CAUTION: Do not fill the blender all the way! Only fill about halfway as hot liquids will expand. If you over-fill your blender, this is dangerous and may cause a hot blender explosion in your kitchen!
          • Since this will need to be done in batches, you will need a second vessel. So, grab an extra large mixing bowl and when one batch is done, pour the blended soup there. Once your last batch is in the blender, carefully pour the contents from the mixing bowl back into your large pot. Now your last batch of blended soup can enter the pot and the recipe can continue!

        FAQs

        How can I save time making this soup?

        That’s easy! Just purchase a pre-made tomato soup (about 4 cups worth) and add 2 cups of water to the soup so you get about 6 cups of liquid in the pot.

        Is this soup healthy?

        Well, if you believe in superfoods, then this soup is definitely filled with them and most certainly can be added to your healthy recipe category! Not only do you get plenty of antioxidants (hello lycopene) from the tomatoes in this recipe, but you’ll also get a decent amount of fiber from the kale and if you opt for it, bean pasta. Plus, cooked tomatoes actually have more antioxidants than raw tomatoes, meaning you’re getting the most nutritional bang for your bite! If you are following a low-sodium diet, I will advise you to be mindful of the salt addition and look for low to no sodium tomato products if making the soup from scratch.

        Can you make tomato soup pasta higher in protein too?

        Yes, you definitely can! To keep the soup vegan, you can swap in a bean based pasta (bonus they’re often gluten-free too) to amp up the protein. A traditional bean pasta like Banza brand has over 15 grams of protein per serving, making the dish well over 20 grams. You could also add a can of white beans or red kidney beans (more on beans here). But, if you’re trying to lower your carbohydrate intake and don’t mind if the soup remains vegan or not, you can simply add one pound of lean ground turkey to the soup. This will provide over 20 grams of protein per serving!

        Other Soup Recipes you May Enjoy If You liked this Spaghetti Soup Twist

        • Image of potato soup in a bowl with salt and pepper.
          Creamy Potato Soup
        • Chicken Taco Soup - The Instant Pot Shaw Kitchen Debut! @shawsimpleswaps #instantpot #glutenfree #whole30 #paleo #wholefoods
          Chicken Taco Soup – Instant Pot Debut!
        • Heirloom Bean Soup with Spinach
          Heirloom Bean and Spinach Soup
        • Image of pumpkin chili in a bowl for food photography.
          Instant Pot Pumpkin Chili

        If you try this recipe, would you please do me a favor and leave a star rating in the recipe box and/or comment below! This helps immensely in Google to continue delivering high quality content to you. And please be sure to tag and share what you made with me on social, I love seeing your creations! You can find me here: Instagram – Facebook – Pinterest!

        Tomato Soup Pasta with Kale is a simple, vegan dish that the entire family can enjoy. Make It from scratch or simple swap some time with using a canned soup. Either way, the end product is delicious! You'll also find suggestions to modify for a gluten-free diet and high protein soup. #tomatosoup #healthytomatosoup #vegansouprecipes
        Print Recipe
        4.75 from 12 votes

        Tomato Soup Pasta with Kale

        Tomato Soup Pasta with Kale is a simple, vegan dish that the entire family can enjoy. Make It from scratch or simple swap some time with using a canned soup. Either way, the end product is delicious! You'll also find suggestions to modify for a gluten-free diet and high protein soup. #tomatosoup #healthytomatosoup #vegansouprecipes
        Prep Time5 minutes mins
        Cook Time30 minutes mins
        Total Time35 minutes mins
        Course: Soup
        Cuisine: American
        Servings: 6 servings
        Calories: 252kcal
        Author: Liz Shaw

        Ingredients

        • 1 tablespoon extra-virgin olive oil
        • 1/2 medium onion chopped
        • 1 clove garlic minced
        • 2 tablespoons tomato paste
        • 1 can diced tomatoes, no salt added 28 ounce can
        • 1/4 teaspoon crushed red pepper flakes
        • 1 teaspoon Italian seasoning
        • 2 cups low sodium vegetable broth
        • 1 tablespoon red wine vinegar
        • 2 teaspoons brown sugar
        • 12 ounces high protein spaghetti or alternative pasta of choice
        • 2 cups baby kale chopped
        • salt/pepper to taste

        Instructions

        • In a large pot over medium heat, add the olive oil and saute the onions and garlic until translucent (about 4 minutes).
        • Stir in the tomatoes, red pepper, Italian seasoning, and vegetable broth. Cover pot and let ingredients simmer together over medium heat for 15 minutes.
        • Remove lid and carefully add in the vinegar and brown sugar. Using an immersion blender, puree the soup together. Add in the dry pasta, maintain the medium heat and cook according to package instructions (usually about 10 minutes). Stir continuously throughout the cooking so pasta does not stick to the bottom.
        • When pasta is al dente, stir in the kale and let cook 5 minutes longer.
        • Remove from heat and portion tomato soup pasta into bowls. Serve with a fresh garden salad and optional shaved parmesan on top!

        Notes

        • Don’t have an immersion blender? No problem! A regular blender works just fine but there are a few things to keep in mind:
          • CAUTION: Do not fill the blender all the way! Only fill about halfway as hot liquids will expand. If you over-fill your blender, this is dangerous and may cause a hot blender explosion in your kitchen!
          • Since this will need to be done in batches, you will need a second vessel. So, grab an extra large mixing bowl and when one batch is done, pour the blended soup there. Once your last batch is in the blender, carefully pour the contents from the mixing bowl back into your large pot. Now your last batch of blended soup can enter the pot and the recipe can continue!
        • Tight on time? Scratch the tomato soup making and use a premade tomato soup with 1 cup of water added to it. I like Pacific Foods Tomato Basil Soup!

        Nutrition

        Calories: 252kcal | Carbohydrates: 44g | Protein: 19g | Fat: 6g | Saturated Fat: 1g | Polyunsaturated Fat: 1g | Monounsaturated Fat: 2g | Sodium: 372mg | Potassium: 315mg | Fiber: 1g | Sugar: 5g | Vitamin A: 2565IU | Vitamin C: 35mg | Calcium: 66mg | Iron: 1mg

        Want more Shaw Kitchen recipes? Then sign up here for my 5 Day Stress-Free Meal Plan delivered straight to your inbox!

        Baked Cinnamon Rolls with Date Filling

        July 9, 2021

        Brown Cinnamon Rolls in a white baking dish with a brown date filling peaking out.

        Love a good cinnamon roll but don’t love the sugar coma after? Then these healthier Baked Cinnamon Rolls with Date Filling are perfect for you! Yeast comes to the rescue to help makes these rolls nice and fluffy, while the natural sugars in dates combine with just a tad of brown sugar to make these Baked Cinnamon Rolls with Date Filling a true delight!

        Brown Cinnamon Rolls in a white baking dish with a brown date filling peaking out.
        [feast_advanced_jump_to]

        Why you need to make these Homemade Cinnamon Rolls

        These rolls need to be part of your next brunch spread! I can’t get enough of breakfast and while we’re usually more inclined towards savory starts à la Southwestern Egg Frittatas, Pesto Breakfast Sandwich, or California Breakfast Burritos, sometimes a sweet option is needed to really hit the spot!

        With 1/3 less added sugar than most store bought cinnamon rolls (and if made with whole wheat flour provide a boost of fiber), whipped dates make up the sweet filling along with coffee to highlight their nutty, rich flavor! These from scratch rolls are sure to please!

        What You Need to Make this Healthier Cinnamon Roll Recipe

        White tile backdrop with black text boxes on top of glass bowls holding ingredients. Flours, egg, dates, coffee, spices, and sugar are presented.

        Ingredient Tips

        • Cold brew: Strong coffee is needed for this recipe to get the best flavor! To make cold brew, grind enough coffee to yield 3 oz, add to a quart sized jar or pitcher, and fill with water (for easy clean up, put the grounds in a bag like this). Let this mixture sit at room temperature for 12-18 hours and then strain out the grounds. Voila! Store what’s not needed in the fridge and serve over ice!
          • Alternatively, brew some strong hot coffee or espresso!
        • Brown sugar: I’ve also added a touch of brown sugar (not pictured) for those who prefer a bit more sweetness!
        • Date Filling: To make the date filling super smooth, the dates need to be rehydrated. Don’t skip the step of heating the dates and coffee together! Allow to sit for up to 10 minutes.

        Ingredient Swaps

        • Flour: You can use white whole wheat flour for an added nutrition boost, but bread flour does make a difference to the fluff factor! Or, try a 50-50 blend of each.
        • Pitted dates: They are the easiest to work with! You can find them at most markets, any variety will do. If you can only find dates with pits, just use your fingers to pry open the dates and pick them out!
        • Vegan: Use your favorite dairy free alternatives and they’ll work just as well (including subbing a flax egg, recipe here, for the chicken egg)!
        • Sugar: If you’d like to, coconut sugar would be okay in this recipe!

        How to Make Cinnamon Rolls

        Cinnamon Roll Dough:

        Step #1:

        Start by heating the milk and letting it sit with the yeast and sugar mixed.

        Steps #2 to 4:

        Whisk in the egg after 5 minutes, then stir in the flour of choice until combined.

        Note: You can use the whisk attachment and complete these steps in the stand mixer as well, if you prefer.

        Steps #5 to 6:

        Transfer dough to a stand mixer and using the dough hook attachment, knead for 8 minutes. Allow dough to rise in a covered glass bowl for at least an hour at this point in a warm place.

        Process shot collage with steps to make cinnamon rolls. Steps 1 - 4 show yeast mixing with flour, egg, and sugar, then steps 5 and 6 show the dough kneaded.

        While dough is rising, make the date filling.

        Date Filling for Cinnamon Rolls

        Steps #7 to 8:

        Heat the dates and coffee in the microwave, then process in a high powered blender or food processor.

        Steps #9 and 10:

        Then, add in the cinnamon, some vanilla, brown sugar, and butter. Process until smooth.

        Four image collage with brown dates showing how to process them in a blender to create a date paste.

        Once dough has risen, begin making the Baked Cinnamon Rolls.

        Steps #11 to 13:

        Roll out the dough on a flour surface, punching it down a few times. Use a rolling pin and lots of flour to prevent it from sticking to create a rectangle shape.

        Steps #14 to 16:

        Spread the date paste over the dough, then roll tightly into a long cylinder.

        Six image collage showing how to roll out dough,  then spread dark date paste on top and roll into a cylinder to slice.

        Step #17: Slice the rolls and place in a grease baking dish. Let rise again another 10 minutes or so. Preheat the oven. Then, set in the oven and bake for 25 minutes at 375 degrees F.

        Cinnamon Roll Cream Cheese Frosting:

        Steps #18 and 19:

        While rolls are baking, make the frosting by whisking together the remaining vanilla, cream cheese, and powdered sugar.

        Steps #20 and 21:

        When baking completes, remove from oven and let cool 5 minutes before frosting.

        Final 5 steps in a collage format showing how to slice dough, make cream cheese white frosting in a grey stand mixer, and frost baked rolls.

        Enjoy warm!!!

        Brown Cinnamon Rolls in a white baking dish with a brown date filling peaking out and white frosting on top.

        Recipe Notes + Expert Tips

        • Do not over-knead the dough! Put on low-medium (level 2) and knead for 8 minutes until combined. To test, poke a finger in the dough; it should spring back!
        • To add a bit more pizzaz, you can sprinkle a few teaspoons of mini chocolate chips and/or toasted nuts on top of the date filling when you slather it out on the dough. The coffee and chocolate combo is great!
        • You can also sprinkle a tad more cinnamon and brown sugar over the date glaze before you roll if you want a strong flavor to come through (and more sugar lol!)
        • When cutting the dough into rounds, to get each bun to be about the same size, start by making scores in the dough before cutting! Score the log into thirds, then 2 scores in each segment. Once you have 9 equal(ish) pieces, go ahead and cut! I like using a serrated knife, but anything sharp will do.
        • If you aren’t into the powdered sugar frosting, feel free to make a traditional butter based frosting.
        White tile backdrop with one cinnamon roll outside the white pan sliced open with a gold fork.

        FAQs for These Cinnamon Rolls from Scratch

        Can I make these cinnamon rolls ahead of time?

        Yes, these rolls can be made the evening before you plan to serve. After transferring the raw cut rolls to the baking dish, place in the refrigerator overnight to have a slow second rise. In the morning, allow to sit on the counter at room temperature for about 20 minutes before popping into a preheated oven, following the directions as advised!

        If looking to prepare WAY ahead of time, go ahead and prepare the recipe exactly as directed, baking off the rolls. Once out of the oven, allow the rolls to cool, cut into individual servings, and stash in a freezer safe bag, in the freezer, for up to 3 months. As for the icing, it can be prepared separately on the day you plan to serve (my recommendation) or made in advance and stored in the freezer. When ready to eat, reheat an individual roll, with or without frosting, in the microwave or preheated toaster oven!

        What type of yeast should I use in this recipe?

        This recipe uses active dry yeast. Instant yeast can be used, just follow the package directions for use (2 1/4 tsp). If you have fresh yeast, follow the same directions as this recipe, using 4 1/2 tsp of fresh yeast!

        Can these rolls be made gluten free?

        I have not tried it myself but if you’re going to try it, I’d use 1-to-1 all purpose gluten free flour. If you do try it, let me know how it goes in the comments!

        Other Healthier Baking Recipes You May Enjoy

        • Muffins in muffin tin with grey background for food photography styling.
          Banana Bread Muffins with Chocolate
        • Three slices of pumpkin bread stacked on a piece of brown paper.
          Healthy Pumpkin Bread with Chocolate Chunks
        • Image of apples and apple muffins.
          Healthy Applesauce Muffins
        • Staged shot of healthy muffins.
          Sweet Potato Muffin Recipe

        If you try this recipe, would you please do me a favor and leave a star rating in the recipe box and/or comment below! This helps immensely in Google to continue delivering high quality content to you. And please be sure to tag and share what you made with me on social, I love seeing your creations! You can find me here: Instagram – Facebook – Pinterest!

        Brown Cinnamon Rolls in a white baking dish with a brown date filling peaking out.
        Print Recipe
        5 from 5 votes

        Baked Cinnamon Rolls with Date Filling

        These healthier Baked Cinnamon Rolls with Date Filling are a fun twist on your traditional breakfast sweet. Lower in added sugar than your traditional roll but still big on flavor, you won't taste the difference!
        Prep Time2 hours hrs
        Cook Time26 minutes mins
        Total Time2 hours hrs 26 minutes mins
        Course: Breakfast
        Cuisine: American
        Servings: 9 rolls
        Calories: 275kcal
        Author: Liz Shaw

        Ingredients

        • 1 cup warm milk about 110*F
        • 2 1/2 teaspoons yeast
        • 1 teaspoon cane sugar
        • 1 large egg
        • 2 1/2 cups bread flour
        • 1/4 teaspoon salt
        • 1 1/2 ounces cold brew coffee or alternatively, coffee liquor
        • 10-12 each dates about 3/4 cup
        • 1 tablespoon ground cinnamon
        • 2 teaspoons vanilla extract divided
        • 2 tablespoons brown sugar optional
        • 3 tablespoons butter
        • 1/2 cup softened cream cheese
        • 1 cup powdered sugar

        Instructions

        • Heat 1 cup of milk in a microwave safe dish for 35 to 40 seconds. Milk temperature should be about 110 degrees F.
        • Remove and add yeast and cane sugar to the milk; whisk together.
        • Let sit for 5 minutes.
        • Add the milk into your stand mixer, then attach the whisk attachment. Whisk the egg into the milk, then add the bread flour and salt in. Mix on low speed until combined. If dough is very sticky, add a tablespoon or two more of flour.
        • Note, if not using a stand mixer, mix together until combined with a wooden spoon.
        • Switch the stand mixer attachment to the dough hook and set to a low speed. Allow the machine to knead the dough for 8 minutes (if you do not have a stand mixer, you can manually knead the dough, but make sure to do so for at least 10 minutes then.)
        • Once dough has been kneaded, spray a larger glass bowl with cooking spray and place dough inside. Cover with a towel and let rise in a warm spot for 1 to 2 hours.
        • While dough is rising, make date paste. Heat coffee and dates in a microwave safe dish for 25 to 30 seconds. Add to a food processor or high powered blender with the cinnamon, 1 1/2 teaspoons of vanilla extract, brown sugar, and the butter. Pulse until smooth, scraping down the sides as you go. Set aside.
        • Remove dough from glass bowl and punch it down. Then, remove and set on a floured surface to roll out.
        • Gently push down dough and begin to roll into a large rectangle using your rolling pin. Be sure to flip dough to help you roll it out without ripping. You may also need to and a little extra flour so it doesn’t stick!
        • Once you get the dough to about 1/2-1/4-inch thick, slather the date filling all over the dough surface, leaving about 1/4-inch from the sides.
        • Roll the dough tightly, lengthwise, until you have a long, rectangle formed.
        • Using a sharp knife, cut the dough into 9 rolls.
        • Spray with non-stick spray a square baking dish (an 8×8-inch pan will work), then gently transfer the cut rolls to the dish. Cover again with a towel and let rise one more time for about 5 to 10 minutes. While rising, preheat the oven to 375 degrees F.
        • Bake for 24 to 26 minutes, or until lightly browned on top.
        • Remove and let cool on a wired rack in the pan.
        • While cooling, mix remaining 1/2 teaspoon of vanilla with cream cheese and powdered sugar.
        • Slather the frosting on top of the rolls once they've cooled about 5 minutes post-baking and enjoy warm!

        Notes

        • Cinnamon rolls will keep in an airtight container in the fridge for 5 days.
        • If freezing, recommend to omit the frosting and make when ready to enjoy. Rolls will last in the freezer for up to 3 months. 
        • To add a bit more pizzaz, you can sprinkle a few teaspoons of mini chocolate chips on top of the date filling when you slather it out on the dough. The coffee and chocolate combo is great!
        • You can also sprinkle a tad more cinnamon and brown sugar over the date glaze before you roll if you want a strong flavor to come through (and more sugar lol!)
        • If you aren’t into the powdered sugar frosting, feel free to make a traditional butter based frosting.
        • Yeast: This recipe uses active dry yeast. Instant yeast can be subbed, just follow the package directions for use (2 1/4 tsp). If you have fresh yeast, follow the same directions as this recipe, using 4 1/2 tsp of fresh yeast!
        • Vegan: Use your favorite dairy free alternatives and they’ll work just as well (including subbing a flax egg, recipe here, for the chicken egg)!
        • Flour: You can use white whole wheat flour for an added nutrition boost, but bread flour does make a difference to the fluff factor! Or, try a 50-50 blend of each.

        Nutrition

        Calories: 275kcal | Carbohydrates: 44g | Protein: 8g | Fat: 7g | Saturated Fat: 2g | Trans Fat: 1g | Cholesterol: 28mg | Sodium: 194mg | Potassium: 167mg | Fiber: 2g | Sugar: 15g | Vitamin A: 331IU | Vitamin C: 1mg | Calcium: 74mg | Iron: 1mg

        Dairy Free Carrot Cake Cookies

        June 30, 2021

        Picture of white backdrop with carrot cake cookies staggered on top.

        Soft and chewy, these Dairy Free Carrot Cake Cookies are a wonderful addition to your cookie jar! Filled with wholesome oats, walnuts, carrots, raisins, and lots of love, your entire crew will love the fun twist on the classic cookie. Plus, each cookie packs 2 grams of fiber and 3 grams of protein, making the perfect snack with a coffee or cup of milk of choice!

        Picture of white backdrop with carrot cake cookies staggered on top.
        [feast_advanced_jump_to]

        Why you need to make this Cake Cookie Recipe

        There are few things I love more than a good cookie and well, I love cake too! These Carrot Cake Cookies were born because I wanted something portable to enjoy the flavors of spring while nursing a newborn or running after a high energy toddler.

        So, this cookie fits that bill! Also, it can easily be enjoyed with a cup of joe or tea in a much quieter, simpler atmosphere too!

        Your choice… enjoy!

        Ingredients for Carrot Cake Cookies: What You Need

        Image of lined paper with ingredients listed for cookies.

        *Remember you can also print the recipe card below too if easier for you!

        White marble backdrop with carrot cake cookies in rows and one in the center with a bite out of it.

        Ingredient Tips

        • Carrot Style: Shredded carrots can be store bought, however, if you have carrots in your refrigerator awaiting usage, go ahead and grate them yourself by hand. Use a box grater or food processor with the grating attachment (not the S-blade!).
        • Oats: Only use old fashioned rolled oats for this recipe! Unfortunately, instant or steel cut will not give the chewy texture these cake cookies need!

        Ingredient Swaps

        • Dairy: This recipe was developed to be dairy free but if that’s not a requirement for you and yours, feel free to use regular butter.
        • Flour Options: If needing a gluten free option, use a gluten free flour (such as sorghum or 1-to-1 all purpose replacement) in place of all purpose. Alternatively, if you have it on hand and want to increase the fiber content, swap whole wheat flour in place for all purpose.
        • Other Add-ins: Omit walnuts and coconut for any allergies. Seeds can replace the nuts and add a great crunch, for example, pumpkin seeds or sunflower seeds.

        How to make These Carrot Cookies

        Here are a few things to help make these cookies perfect every time:

        • Firstly, beat the wet ingredients in a large bowl together. Note if you are using a dairy free butter as I have, sometimes they beat differently than a standard butter. Do not worry! The cookies will still hold together when you form them despite the dough looking a tad different.
        • Secondly, in a separate bowl, mix the flours and dry ingredients together, then combine into the wet ingredients.
        • Then, fold in the “fun!” Carrots, raisins, coconut, and walnuts are a nutritious and delicious addition to these cookies.
        White marble backdrop with single cookie on top with one bite out of it.

        Recipe Notes + Expert Tips

        • When shaping into cookies, note the dough will appear a little coarse. Do not worry, nor add any more liquid. As soon as you begin to portion them out and shape them, they will hold together and bake wonderfully.
        • Enjoy or save in an airtight container for up to 7 days best consistency, or freeze for up to 3 months.
        Cookies lined on a baking sheet.

        FAQs for this recipe for Carrot Cake Cookies

        Do you have a recipe for a cream cheese frosting?

        Sure do (it’s featured in my Baked Cinnamon Rolls with Date Filling)! It’ll be 1/2 c softened cream cheese (use dairy free alternative if needed), 1/2 tsp vanilla extract, and 1 cup powdered sugar. Mix together carefully, adding the powdered sugar 1-2 Tbsp at a time to avoid a powdery explosion (and to check periodically for desired sweetness).

        It seems like there’s a lot of sugar in these cookies. What’s the deal?

        I cover the use of added sugars in my 21 Day Added Sugar Challenge post, however, let’s be real: this is a cake cookie recipe! There are some great added benefits to this recipe like the oats, carrots, walnuts, and coconut (unsweetened). If we do the math, each cookie would contain about 2.5 tsp of added sugar.

        It is recommended that men consume no more than 9 tsp of added sugar per day, while women and children consume no more than 6 tsp per day. So, as it stands, enjoying one, or even two, of these cookies falls neatly below these guidelines and supports MY philosophy of enjoying all foods in moderation and as part of a healthy diet!

        White marble backdrop with single cookie on top with one bite out of it.

        Other Dairy Free Desserts You May Enjoy

        • These Gluten Free Vegan Cookies are perfect for those looking for a small batch, easy and healthy recipe to whip up in under 30 minutes! Perfect for a crowd or a secret stash for yourself. Low in added sugar and super moist! #vegancookierecipe #glutenfreechocolatevcookie #healthycookierecipe #glutenfreecookies
          Gluten Free Vegan Cookies
        • Mango Banana Sorbet - No Added Sugar @shawsimpleswaps
          Mango Banana Sorbet – No Added Sugar
        • Vegan Snowball Cookies
        • White marble backdrop with single glass jar filled with chocolate cookie dough and mini chocolate chips on top with a tiny spoon sticking out.
          Chickpea Cookie Dough

        If you try this recipe, would you please do me a favor and leave a star rating in the recipe box and/or comment below! This helps immensely in Google to continue delivering high quality content to you. And please be sure to tag and share what you made with me on social, I love seeing your creations! You can find me here: Instagram – Facebook – Pinterest!

        Picture of white backdrop with carrot cake cookies staggered on top.
        Print Recipe
        4.75 from 8 votes

        Dairy Free Carrot Cake Cookies

        The perfect carrot cake taste in cookie form! These Dairy Free Carrot Cake Cookies are slightly sweet with a coconutty taste the entire crew will love.
        Prep Time10 minutes mins
        Cook Time15 minutes mins
        Total Time25 minutes mins
        Course: Dessert
        Cuisine: American
        Servings: 14 cookies
        Calories: 186kcal
        Author: Liz Shaw

        Ingredients

        • 1/3 cup plant based butter softened
        • 1/2 cup brown sugar
        • 1/4 cup cane sugar
        • 1 teaspoon vanilla extract
        • 1 large egg
        • 1 1/4 cups all purpose flour
        • 1 cup old-fashioned rolled oats
        • 1 teaspoon baking powder
        • 1 teaspoon ground cinnamon
        • 1/2 teaspoon salt
        • 1 cup shredded and finely chopped carrots
        • 1/3 cup shredded coconut divided
        • 1/3 cup chopped walnuts
        • 1/4 cup raisins
        • 1/4 cup powdered sugar optional
        • 1-2 tbsp almond milk

        Instructions

        • Preheat oven to 350 degrees F.
        • In a large bowl with a hand mixer, beat the softened butter, sugars, vanilla extract, and the egg. In a separate bowl, mix the flour, oats, baking powder, cinnamon and salt. Combine the dry ingredients into the wet and mix using the hand mixer until well combined.
        • Fold in the carrots, 1/4 cup shredded coconut, raisins, and walnuts with a spatula. Note, the dough will be a little coarse but will hold together when you portion with a 1-ounce scoop.
        • Spray a baking sheet (or two depending on the size of cookie you prefer) with cooking spray. Using a 1-ounce scoop, portion out the dough and use your hands to form into a circular cookie shape. Place on the baking sheet and repeat until all dough is used.
        • Bake for 14 to 16 minutes, or until lightly browned on top.
        • Remove from oven and let the cookies cool for 10 minutes before serving.
        • If desired, drizzle the cookies with a glaze made with the powdered sugar and milk mixed together. Garnish with 1-2 tbsp shredded coconut.

        Video

        Notes

        • When shaping into cookies, note the dough will appear a little coarse. Do not worry, nor add any more liquid. As soon as you begin to portion them out and shape them, they will hold together and bake wonderfully.
        • Enjoy or save in an airtight container for up to 7 days best consistency, or freeze for up to 3 months.

        Nutrition

        Serving: 1 | Calories: 186kcal | Carbohydrates: 28g | Protein: 3g | Fat: 7g | Saturated Fat: 4g | Trans Fat: 1g | Cholesterol: 12mg | Sodium: 138mg | Potassium: 137mg | Fiber: 2g | Sugar: 13g | Vitamin A: 1397IU | Vitamin C: 1mg | Calcium: 33mg | Iron: 1mg

        Want more Shaw Kitchen recipes? Then sign up here for my 5 Day Stress-Free Meal Plan delivered straight to your inbox!

        Chickpea Cookie Dough

        June 30, 2021

        White marble backdrop with single glass jar filled with chocolate cookie dough and mini chocolate chips on top with a tiny spoon sticking out.

        This Chickpea Cookie Dough recipe is unlike anything you’ve ever had before! Filled with wholesome ingredients but equally as satisfying as your store bought Nestle Tollhouse cookie dough (and totally safe to consume), it’s a recipe you can get behind serving to your entire family (morning, noon, and night!) Plus, it’s so easy to customize for holidays and bring some good-for-you cheer to the dessert table!

        White backdrop with light brown chickpea cookie dough with rainbow sprinkles on top.
        [feast_advanced_jump_to]

        Why you need to make these Chickpea Cookie Dough Bites

        A recipe that both kids and adults will enjoy, this Chickpea Cookie Dough is soon to be a family-favorite!

        While the kid-friendly version is packed with fiber and healthy fats, the protein-packed version is pumped up with a little protein powder to really satisfy and satiate that mid-afternoon sweet craving!

        This recipe tastes great on it’s own, but it’s also delicious when mixed into the Strawberry Nice Cream for kids or added to the Chocolate Chip Cookie Dough Blizzard for adults!

        What You Need to Make this Recipe for Healthy Edible Cookie Dough

        White backdrop with clear glass bowls of ingredients on top with text overlay. Ingredient bowls are filled with chickpeas, date syrup, nut butter, spices, and chocolate chips.

        * Note this image only includes the base ingredients. Scroll down to see the additional ingredients required for the kid-friendly and adult-friendly versions!

        Ingredient Tips

        • Peanut Butter (or whichever nut/seed butter you use): It’s best to go for a no sugar added option here. There will be plenty of sweetness from the date syrup and brown sugar! Natural style or otherwise is okay!
        • Chickpeas: Use canned chickpeas to save time! Simply drain and rinse to decrease the sodium content (or buy no salt added chickpeas; still drain and rinse!)

        Ingredient Swaps

        • Date Syrup: If you don’t have date syrup, you can sub in honey or maple syrup, or adjust the brown sugar. Just note if you do these swaps it will increase the added sugar content of this treat. (And check out the FAQ below for more information on date syrup!)
        • Nut butter: Feel free to swap your favorite nut or seed butter instead of peanut butter!
        • Kid-friendly version: Swap in whatever desired topping of choice! Finely crushed freeze-dried fruit, like strawberries, adds a fun pink color to the dough.
        • Whey protein (protein-packed version): I like to make this with a chocolate or whey protein isolate, however you can also use a different protein flavor. I have not tried this with plant protein (like pea, hemp, soy, or a blend), but if you do try it, let me know in the comments!
          • If you’d like this version to be able to slice, then add 2 to 4 Tbsps of oat or almond flour to the base. 

        How to Make this Chickpea Cookie Dough Recipe

        Steps 1 + 2:

        Start by processing the “base ingredients” in a high powered blender or food processor until smooth. These include the chickpeas, vanilla, salt, nut butter, and date syrup.

        Two image collage with process shots to make chickpea cookie dough. Image 1 is a blender with chickpeas, nut butter, and date syrup, image 2 is the pureed ingredients together in the blender. It is a medium brown color.

        To Make the Kid-Friendly Chickpea Cookie Dough:

        Steps 1 – 3:

        Mix half the “base recipe” with oat flour and sprinkles until well combined.

        Step 4:

        Press dough onto parchment paper into a loaf pan. Set in the freeze for at least 30 minutes before slicing.

        Four image collage with process shots. First image is three glass bowls filled with cocoa powder, sprinkles and oat flour. The second and third are the ingredients mixed together, and the fourth is the dough pushed down into a white baking dish.

        When ready to enjoy, remove from freezer and slice! Store leftovers in an air tight container in the freezer with parchment paper layered in between rows for ease of removing them in the future!

        White backdrop with glass container holding sprinkled cookie dough pieces cut.

        To Make the Protein-Packed Chickpea Cookie Dough:

        Steps 1 -3:

        Combine the other half of the “base recipe” with whey protein and chocolate chips until combined.

        Step 4:

        You can either share a larger pan, like an 8×8-inch pan, and freeze with the kid-friendly version. But, be aware, this version is a bit softer because of the whey protein, meaning it will not hold as well in bite sized pieces unless you add 3 tablespoons or so of oat or almond flour.

        Four image collage with process shots. First image is three glass bowls filled with cocoa powder, chocolate chips and whey protein. The second and third are the ingredients mixed together, and the fourth is the dough pushed down into a white baking dish.

        I recommend just storing it either one of the following two ways for ease (and without having to modify the recipe!)

        • Portion into bite-sized teaspoon balls and freeze in an airtight container for easy “Chickpea Cookie Dough Bites” to grab and go!
        • Store in a mason jar with a sealed lid in the fridge and enjoy a teaspoon here and there!
        White marble backdrop with single glass jar filled with chocolate cookie dough and mini chocolate chips on top with a tiny spoon sticking out.

        Recipe Notes + Expert Tips

        It’s pretty hard to mess up this recipe! But, if you’re finding any of the following situations happening, modify as recommended below!

        • If the dough is too “sticky”
          • Add 1 tablespoon of oat or almond flour at time until desired consistency achieved. Do not add raw wheat or white flour (that is not considered safe for consumption without cooking.)
        • If the dough is too “hard”
          • Add 1 teaspoon of milk at a time until desired consistency achieved.

        If all else fails, just eat it with a spoon! I promise you won’t be disappointed!

        White marble backdrop with single glass jar filled with chocolate cookie dough and mini chocolate chips on top with a tiny spoon sticking out.

        FAQs for this No Bake Cookie Dough

        What is date syrup?

        Date syrup is made from dates that are boiled, blended, strained, and evaporated to produce a thick, caramel-like sweetener. It’s claimed to have a lower glycemic index (measure of how much a food increases blood sugar when metabolized) than table sugar and contains more antioxidants and minerals than sugar, honey, or maple syrup.

        It is less sweet tasting than the conventional sweeteners mentioned here, but provides just enough sweetness with the extra nutrition punch! As mentioned, if you’re unable to find it near you, you can search online for some reputable producers or simply sub out for a little less of another liquid sweetener you have on hand.

        I am not a fan of chickpeas. Will any other beans work?

        Yes! While the taste of chickpeas is undetectable due to the syrup, vanilla, and add-ins, if chickpeas are not on hand, white beans will work just as well! They’re mild in flavor and have a strong constitution! I have used black beans for my Sweet Hummus Recipe, so black beans may work here, however, I would probably only use with a chocolate flavored whey protein as the very dark color could be off-putting without that flavor! If you do try it, let me know in the comments!

        Can this cookie dough be baked?

        Unfortunately, no. There is not enough of a binder in this recipe to make baking work! It may be possible to doctor this recipe to make it baking-friendly by adding more nut butter and some baking powder, but I have not tested this myself! In any case, if you’d like a texture that lends itself more to a “bite” as opposed to by-the-spoonful, do follow my recommendation to add some almond or oat flour before freezing!

        Other Healthy Sweet Treats You May Enjoy

        • Image of chocolate chip cookie dough bars.
          Chocolate Chip Cookie Dough Bars
        • A rich, creamy chocolate dessert dip made with the essential ingredients you likely have on hand! This Sweet Hummus Recipe is the perfect snack or party dip! The beauty of this baby is you can make it all in the blender, aka, no mess clean up! #desserthummus #desserthummusrecipe #healthydesserthummus #desserthummushealthyrecipe #desserthummuschocolate
          Sweet Hummus Recipe
        • No Added Sugar Chocolate Pudding - a simple recipe to satisfy a sweet tooth with no added sugar! #noaddedsugardessert #sugarfreedessert #healthypudding #chocolatepuddingrecipe
          No Added Sugar Chocolate Pudding
        • Gluten Free Brownie Recipe - A delicious, blender brownie recipe that's naturally gluten free, dairy free, artificial sugar free and actually delicious. No sponge like tasting brownies here! This pecan flour base will have your entire crowd asking for more! #glutenfreebrownies #brownierecipe #blenderbrownies #healthydesserts #dairyfreebrownies
          Gluten Free Brownie Recipe

        If you try this recipe, would you please do me a favor and leave a star rating in the recipe box and/or comment below! This helps immensely in Google to continue delivering high quality content to you. And please be sure to tag and share what you made with me on social, I love seeing your creations! You can find me here: Instagram – Facebook – Pinterest!

        White marble backdrop with single glass jar filled with chocolate cookie dough and mini chocolate chips on top with a tiny spoon sticking out.
        Print Recipe
        5 from 2 votes

        Chickpea Cookie Dough

        This Chickpea Cookie Dough is a healthy, low sugar but totally delicious sweet treat adults and kids will go crazy for!
        Prep Time5 minutes mins
        Cook Time0 minutes mins
        30 minutes mins
        Total Time35 minutes mins
        Course: Dessert
        Cuisine: American
        Servings: 36 servings
        Calories: 33kcal
        Author: Liz Shaw

        Ingredients

        Base Recipe

        • 15 ounce canned chickpeas rinsed and drained
        • 2 tsps vanilla extract
        • 1/4 tsp salt
        • 2 tbsps nut butter
        • 1/3 cup date syrup

        Kid-Friendly Version

        • 1/3 cup old fashioned oats pulsed into a flour
        • 3 tbsp rainbow sprinkles

        Protein Packed Version

        • 1/3 cup whey protein isolate
        • 1/4 cup mini chocolate chips

        Instructions

        To make the base

        • Combine chickpeas, vanilla, salt, nut butter, and date syrup in a food processor or blender. Process until smooth, wiping down the sides with a spatula between pulses. Separate the base evenly into two medium bowls.

        To make the kid-friendly version

        • Add the pulsed oats (or oat or almond flour) to the base and mix sprinkles in. Press into an 8×8-inch baking dish covered in parchment paper.
        • Set the baking dish in the freezer for at least 30 minutes to harden up. Remove slice the cookie dough into bite-sized pieces. The kid-friendly version is easier to slice without it being to sticky once it starts to soften outside the fridge.
        • Place in a zip lock container with parchment paper between pieces and store in the freezer for up to 1 to 2 months.

        To make the protein packed version

        • To the other half of the base, mix in the whey protein powder and chocolate chips until smooth. This dough is a bit softer because of the whey protein so it will not "slice" like the kid-friendly version as well. I recommend freezing in teaspoon size balls if you prefer to have bite-sized pieces, or storing in the fridge in sealed container and portioning out a teaspoon as desired!
        • This recipe will keep in the fridge for up to 7 days, or frozen for up to 1 to 2 months.

        Notes

        • Chickpeas: Use canned chickpeas to save time! Simply drain and rinse to decrease the sodium content (or buy no salt added chickpeas; still drain and rinse!)
        • Date Syrup: If you don’t have date syrup, you can sub in honey or maple syrup, or adjust the brown sugar. Just note if you do these swaps it will increase the added sugar content of this treat. (And check out the FAQ below for more information on date syrup!)
        Kid-Friendly Version
        • Feel free to swap in whatever desired topping of choice! Finely crushed freeze-dried fruit, like strawberries, adds a fun pink color to the dough.
        • If desire is nut-free, feel free to sub in a seed butter for the base ingredients. It’s best to go for a no sugar added option here. There will be plenty of sweetness from the date syrup and brown sugar! Natural style or otherwise is okay!
        Protein-Packed Version 
        • I like to make this with a chocolate or whey protein isolate, however you can also use a different protein flavor! I have not tried this with a plant based protein. 
        • If you’d like this version to be able to slice, then add 2 to 4 Tbsps of oat or almond flour to the base. 
        •  

        Nutrition

        Calories: 33kcal | Carbohydrates: 5g | Protein: 2g | Fat: 1g | Saturated Fat: 1g | Trans Fat: 1g | Cholesterol: 2mg | Sodium: 52mg | Potassium: 32mg | Fiber: 1g | Sugar: 3g | Vitamin A: 7IU | Vitamin C: 1mg | Calcium: 10mg | Iron: 1mg

        Chocolate Chip Cookie Dough Blizzard

        June 30, 2021

        White tile with two glasses filled with white ice cream and stuffed with vegan chickpea chocolate chip cookie dough.

        If you like the DQ Blizzard or McFlurry style of sweet treats, then you’re going to love this healthier Chocolate Chip Cookie Dough Blizzard made at home! Plus, it literally comes together in a flash with just a few staple ingredients!

        White tile with two glasses filled with white ice cream and stuffed with vegan chickpea chocolate chip cookie dough.
        [feast_advanced_jump_to]

        Why you need to make this Chocolate Chip Cookie Dough Ice Cream Recipe

        Satisfy that sweet tooth with a good-for-you treat! This Healthier Chocolate Chip Cookie Dough Blizzard, filled with fiber and protein, is the perfect way to “have your cake and eat it too”!

        If you’ve not yet tried my Chickpea Cookie Dough, then what are you waiting for?! The edible chocolate chip cookie dough is the base for this blizzard!

        What You Need to Make this Recipe for a Copycat

        Cookie Dough Ingredients

        White backdrop with clear glass bowls of ingredients on top with text overlay. Ingredient bowls are filled with chickpeas, date syrup, nut butter, spices, and chocolate chips.

        Now, to “make” the ice cream that goes with this, you can do a few things!

        My current favorite is the easiest (and makes this taste as close to the “real deal” as possible):

        • Buy a few plain, vanilla, ice cream sundaes from McDonald’s and keep them in your freezer. When craving a blizzard, portion out half an ice cream and mix with your pre-made cookie dough for a 5-minute Chocolate Chip Cookie Dough Blizzard!

        Another option!

        You can also just buy a lightened up vanilla ice cream. I like the Slow Churned Half the Fat variety of vanilla ice cream sold in many markets. Portion out 2/3 cup serving to mix with your cookie dough!

        And last but not least, for my non-traditional ice cream lovers (aka, my people who like the “nice cream” trend with blended frozen fruit and milk of choice), try:

        • Blending 1 frozen banana with 1/4 cup milk and 2 tablespoons vanilla whey protein powder. Then, add globs of cookie dough on top!

        Whichever you choose, I promise it’ll be delicious!

        White tile with two glasses filled with white ice cream and stuffed with vegan chickpea chocolate chip cookie dough.

        Ingredient Tips

        • Chickpeas: Use canned beans for this edible cookie dough or if you only keep dried beans, be sure to soak and cook according to package directions in order to make the dough super smooth!
        • Toppings: The beauty of making this blizzard at home is that you can add whatever toppings you prefer! Nuts, seeds, peanut butter chips, etc., would be extra tasty options to add different flavors and textures!

        Ingredient Swaps

        • Non-dairy: There are so many awesome non-dairy (and lactose-free if still able to enjoy milk products) options available these days, you’re sure to find something that works! Since the cookie-dough is already dairy-free (if you have dairy-free chips), a simple swap for your preferred frozen treat makes this recipe allergen or intolerance friendly!
        • Nut butter: As mentioned in the original cookie dough post, any nut or seed butter is able to be used in this recipe!

        How to Make this Recipe

        After you decide which ice cream to go with, then simply portion into a glass or bowl, and add 1/4 cup of small chunks of the Chickpea Cookie Dough into it!

        MIX, MIX, MIX!

        You can then top with additional mini chocolate chips too if you’d like!

        White tile with one glass filled with white ice cream and stuffed with vegan chickpea chocolate chip cookie dough.

        Recipe Notes + Expert Tips

        • Let your ice cream sit on the counter for 10-20 minutes before prepping your blizzard and mixing! It will still be delicious, but if you want that mixed-in, texture-mashup, make sure the ice cream is soft.
        • Be sure to pick a glass or jar that large enough! When you go ahead and mix things up, you don’t end up with a big old mess!
        • If you’re interested in making it more “Blizzard-y”, go ahead and pop some of the ice cream in a blender with the cookie dough. Then, top your blitz treat with more cookie dough!

        FAQs about this Chocolate Chip Cookie Dough Blizzard

        What is date syrup?

        Since you’ve read through the Chickpea Cookie Dough recipe you may have already had this questioned answered, but if not, here it is again for your reference: Date syrup is made from dates that are boiled, blended, strained, and evaporated to produce a thick, caramel-like sweetener.

        It’s claimed to have a lower glycemic index (measure of how much a food increases blood sugar when metabolized) than table sugar and contains more antioxidants and minerals than sugar, honey, or maple syrup. It is less sweet tasting than the conventional sweeteners mentioned here, but provides just enough sweetness with the extra nutrition punch! As mentioned, if you’re unable to find it near you, you can search online for some reputable producers or simply sub out for a little less of another liquid sweetener you have on hand.

        Can I use something other than ice cream as a base?

        Sure! Yogurt or frozen yogurt could be an option, also, you could more simply pair the cookie dough bites with a tall glass of your favorite dairy or non-dairy milk!

        Other Cold Low Sugar Treats You May Enjoy

        • Picture of white pan with strawberry nice cream inside with crushed golden cake cones and a brown and silver ice cream scoop peaking out the side.
          Strawberry Nice Cream
        • Pumpkin Spice Latte image.
          Frozen Pumpkin Spice Latte
        • Carrot Cake Smoothie Bowl
        • Cacao and Date Delight Smoothie + Anti-Aging Smoothie Cookbook Review
          Cacao and Date Delight Smoothie

        If you try this recipe, would you please do me a favor and leave a star rating in the recipe box and/or comment below! This helps immensely in Google to continue delivering high quality content to you. And please be sure to tag and share what you made with me on social, I love seeing your creations! You can find me here: Instagram – Facebook – Pinterest!

        White tile with two glasses filled with white ice cream and stuffed with vegan chickpea chocolate chip cookie dough.
        Print Recipe
        5 from 4 votes

        Chocolate Chip Cookie Dough Blizzard

        If you like the DQ Blizzard or McFlurry style of sweet treats, then you're going to love this healthier Chocolate Chip Cookie Dough Blizzard made from home! Plus, it literally comes together in a flash with just a few staple ingredients!
        Prep Time1 hour hr 5 minutes mins
        Cook Time0 minutes mins
        0 minutes mins
        Total Time1 hour hr 5 minutes mins
        Course: Dessert
        Cuisine: American
        Servings: 2 servings
        Calories: 329kcal
        Author: Liz Shaw

        Ingredients

        • 1/4 cup Chickpea Cookie Dough protein packed version
        • 1 1/3 cups reduced fat vanilla ice cream
        • 1/4 cup mini chocolate chips

        Instructions

        • Prepare the Chickpea Cookie Dough as instructed. Place the protein-packed version into the freezer in small bite-sized balls to mix into the ice cream for at least 60 minutes if it was stored in the fridge.
        • When ready to assemble blizzard, crumble cookie dough and place in the bottom of a dish.
        • Add 2/3 cup pint of preferred ice cream to the dish. Mix the cookie dough into the ice cream until evenly combined.
        • Serve immediately and top with chocolate chips and extra cookie dough if desired.

        Notes

        • While it’s always tough to wait, let your ice cream sit on the counter for 10-20 minutes before prepping your blizzard and mixing! It will still be delicious, but if you want that mixed-in, texture-mashup, make sure the ice cream is soft!
        • Non-dairy: There are so many awesome non-dairy (and lactose-free if still able to enjoy milk products) options available these days, you’re sure to find something that works! Since the cookie-dough is already dairy-free (if you have dairy-free chips), a simple swap for your preferred frozen treat makes this recipe allergen or intolerance friendly!
        • Nut butter: As mentioned in the original cookie dough post, any nut or seed butter is able to be used in this recipe!

          Nutrition

          Calories: 329kcal | Carbohydrates: 51g | Protein: 8g | Fat: 11g | Saturated Fat: 6g | Trans Fat: 1g | Cholesterol: 31mg | Sodium: 92mg | Potassium: 270mg | Fiber: 2g | Sugar: 15g | Vitamin A: 510IU | Vitamin C: 2mg | Calcium: 199mg | Iron: 1mg

          Creamy Sausage Casserole with Tomatoes

          June 30, 2021

          White backdrop with casserole dish filled with creamy white sauce, sausage, and tomatoes with cooked spinach.

          If you’ve been on the hunt for a delicious low-carb casserole that fits the bill in flavor and nutrition, then you’ve landed in the right place. This Creamy Sausage Casserole with Tomatoes is packed with veggies and filled with protein to leave you feeling satisfied and satiated. Make it your own by pairing this sausage recipe with a salad, veggie pasta, or classic spaghetti and toasted bread… your choice!

          White backdrop with casserole dish filled with creamy white sauce, sausage, and tomatoes with cooked spinach.
          [feast_advanced_jump_to]

          Why you need to make this Casserole with Sausage Recipe

          Have you seen the viral TikTok feta pasta trend? If you haven’t, definitely take a moment and do a quick Google search of it. It’s amazing to see how such simple ingredients tossed together for a one pan meal went viral overnight!

          Nonetheless, it definitely caught my attention! After trying a few different versions and sharing then with my Instagram following, I knew this baked cream cheese meal with sausage was the winner, and I had to share here with you too!

          I will admit, I’m not a HUGE pasta fan (although if you’re looking for a shoo-in, creamy pasta recipe, my Healthy Turkey Tetrazzini definitely fits that bill). I much prefer the veggies, creamy sauce, and protein to the noodle. And… I LOVE bread and would much rather get my carbs in by dipping my crusty slice into a casserole!

          Not to worry! Whatever your preference is (low carb or higher carb) you can make this your own by adding a pile of pasta into your bowl before serving up this Creamy Sausage Casserole with Tomatoes!

          What You Need to Make this Recipe for Sausage Casserole with Cream Cheese

          White backdrop with ingredient bowls containing spinach, sausage, spices, and cheese to make casserole with black labels.

          Ingredient Tips

          • Tomatoes: Use grape or cherry tomatoes here! Large tomatoes chopped into pieces won’t have quite the same effect.
          • Sausage: You can use any precooked sausage links, i.e., pork, beef, turkey, or vegetarian/vegan, in this recipe. Sausage with sweet Italian flavors, or hot Italian sausage if you like heat, would be delicious!
          • Herbs and spices: In addition to using Italian sausages, you could really turn this recipe into an Italian sausage casserole by sprinkling some dried oregano and parsley over all the ingredients before tossing together!

          Ingredient Swaps

          • Spinach: Baby spinach can be replaced with baby kale (or regular kale, chopped with stems removed). You can also use frozen spinach in a pinch; make sure the spinach is defrosted and squeezed to remove as much water as possible.
          • Cream cheese: If needing a dairy free alternative, dairy free cream cheese can be used (note the cheese may cook a tad differently depending on what it’s made from.)
          • Veggies: Feel free to volumize with more veggies (and a great way to use up any that may be taking up space in you refrigerator drawers!). Chopped peppers, zucchini, broccoli, or green beans work wonderfully in here, too!

          How to Make this Sausage Baked with Cream Cheese

          Begin by preheating the oven to 425 degrees F.

          Step 1:

          Firstly, drizzle 1 Tbsp of the olive oil over the bottom of a large casserole dish. Then toss the onions, garlic, tomatoes, and sausages together. Sprinkle the Italian seasoning on top.

          White casserole dish with tomatoes, sausage, and spices.

          Step 2:

          Create a well in the center, add the cream cheese, the drizzle remaining olive oil on top.

          Step 3:

          Bake the casserole for 35 to 40 minutes, or until top is lightly browned.

          Baked cream cheese casserole with tomatoes and chicken sausage.

          Step 4:

          When ready, remove from oven. Carefully mix in the spinach until fully combined with the tomatoes and sausage.

          Bed of spinach with spatula mixing it into casserole dish.

          Step 5:

          Lastly, let sit 5 minutes for the spinach to wilt, then serve your Creamy Sausage Casserole with Tomatoes warm!

          White backdrop with casserole dish filled with creamy white sauce, sausage, and tomatoes with cooked spinach.

          Recipe Notes + Expert Tips

          • Any leftovers can be transferred to an airtight container and stored in the refrigerator for up to 5 days. I do not recommend freezing this dish!
          • As mentioned, this recipe was inspired by the baked feta trend. If you’d rather give that a try, sub in your favorite light feta and follow the same procedure! Note, this won’t be as creamy but the does soften up and can be broken apart and mixed with the veggies!
          • To increase the carbohydrates in this recipe, feel free to:
            • Serve with crusty bread:
          White backdrop with casserole dish filled with creamy white sauce, sausage, and tomatoes with cooked spinach and sliced bread.
          • Or pair with a whole grain or chickpea (for gluten free friends) pasta!
          White bowl with pasta and casserole on top and sliced bread on the side.

          FAQs for this Creamy Casserole with Sausage

          Can I make this casserole recipe in advance?

          Yes! Follow the procedure as directed, then allow to cool slightly before stashing in the refrigerator. When getting ready to serve, bake for 20-30 minutes in a preheated 425 degrees Fahrenheit oven until the whole casserole is cooked through!

          Note that cooling and reheating after this prep ahead/cook later method is not recommended. For food safety reasons, it leaves more opportunities for pathogens during cooling/reheating and also, the taste and texture may become altered with repeated cooling and reheating.

          Are processed meats unhealthy?

          My philosophy is that there is a place for any and all foods you enjoy as party of a healthy diet! I answered this more fully in my post a few years ago, so check out Diet Tips to Improve Heart Health- Try This Versus That. To summarize, we do want to be mindful of saturated fats and sodium in our diets.

          However, if foods that are higher in these constituents are eaten every-once-in-a-while and are chosen smartly, there is no reason to totally remove them from your diet! For example, when choosing a store bought sausage for this casserole recipe, try to look for something like Bilinski’s Organic Chicken Sausage. I am not sponsored by them but if you take a look at the ingredients, it’s a very short list with no mystery ingredients, and has much less sodium than other options. Eat well and in moderation!

          Other Casserole Style Recipes You May Enjoy

          • Not Your Mama’s Enchilada Casserole @shawsimpleswaps
            Vegan Enchilada Casserole
          • Healthy Tuna Noodle Casserole is a simple, low-carb main meal the entire family will enjoy! Relive the homemade classic, made healthier! Can easily be made gluten-free as well. #tunanoodlecasserole #healthycasserole #seafood2xweek #tunarecipes
            Healthy Tuna Noodle Casserole
          • Serving of casserole in a bowl next to a skillet.
            Cheeseburger Tater Tot Casserole
          • Image of lasagna in a 8x8-inch pan.
            Dairy Free Lasagna

          If you try this recipe, would you please do me a favor and leave a star rating in the recipe box and/or comment below! This helps immensely in Google to continue delivering high quality content to you. And please be sure to tag and share what you made with me on social, I love seeing your creations! You can find me here: Instagram – Facebook – Pinterest!

          White backdrop with casserole dish filled with creamy white sauce, sausage, and tomatoes with cooked spinach.
          Print Recipe
          5 from 3 votes

          Creamy Sausage Casserole with Tomatoes

          This Creamy Sausage Casserole with Tomatoes is packed with veggies and filled with protein to leave you feeling satisfied and satiated.
          Prep Time5 minutes mins
          Cook Time40 minutes mins
          Total Time45 minutes mins
          Course: Dinner
          Cuisine: American
          Servings: 5 servings
          Calories: 320kcal
          Author: Liz Shaw

          Ingredients

          • 3 tbsp olive oil divided
          • 2 tsps minced garlic
          • 1/3 cup chopped onion
          • 1 1/2 cups grape tomatoes
          • 4 each chicken sausages thinly sliced
          • 1 tsp Italian seasoning
          • 8 ounce light cream cheese
          • 4 cups spinach
          • salt/pepper to taste

          Instructions

          • Preheat oven to 425 degrees F.
          • To a large casserole or baking dish (about 9 x13-inch), drizzle 1 tbsp of the olive oil on the bottom. Add the onion, garlic, tomatoes, and chicken sausage, then sprinkle the Italian seasoning on top and mix it all together. Create a well in the center and place the cream cheese in it.
          • Drizzle remaining olive oil on top and place in the oven for 35 to 40 minutes. When top of the cream cheese is lightly browned and tomatoes have blistered, remove from oven and add the spinach. Mix the spinach and cream cheese into the other ingredients until uniformly combined. Let sit 5 minutes to allow spinach to wilt.
          • Serve warm over pasta, with sliced bread, or a side salad for a lower carb option. Add salt/pepper to taste.

          Notes

          • Any leftovers can be transferred to an airtight container and stored in the refrigerator for up to 5 days. I do not recommend freezing this dish!
          • As mentioned, this recipe was inspired by the baked feta trend. If you’d rather give that a try, sub in your favorite light feta for the cream cheese, and follow the same procedure! Note, this won’t create the creamy sauce that the cream cheese does, but once the feta is baked, it does soften up and can be broken apart and mixed with the veggies!
          • To increase the carbohydrates in this recipe, feel free to serve with crusty bread or pair with a whole grain or chickpea (for gluten free friends) pasta!

          Nutrition

          Calories: 320kcal | Carbohydrates: 11g | Protein: 15g | Fat: 25g | Saturated Fat: 7g | Cholesterol: 73mg | Sodium: 931mg | Potassium: 373mg | Fiber: 1g | Sugar: 5g | Vitamin A: 3120IU | Vitamin C: 15mg | Calcium: 104mg | Iron: 2mg

          Want more Shaw Kitchen recipes? Then sign up here for my 5 Day Stress-Free Meal Plan delivered straight to your inbox!

          Chocolate Peanut Butter Cookies

          June 30, 2021

          Cookie with chocolate drizzle on silver baking sheet with a bite out of it.

          Cozy up with these delicious, lower sugar Chocolate Peanut Butter Cookies for just under 100 calories each! Big on flavor and filled with natural ingredients, this recipe is the perfect way to satisfy that sweet tooth when your craving a chocolate peanut butter cup! Highly recommend storing them in the freezer for a treat on a hot summer day, too!

          Image of 6 chocolate cookies on a baking sheet with chocolate glaze.
          [feast_advanced_jump_to]

          Why you Need to Make these Chocolate Cookies with Peanut Butter

          Always craving something sweet? That is pretty much the MO in the Shaw Kitchen and why I’m always thinking of ways to satisfy our sweet tooth while getting in a little bit of nutrition, too (it’s the dietitian in me!)

          While I’ve got plenty of no added sugar recipes (like my Dessert Nachos or Almond Butter Fudge), I knew these needed just a tad to really seal the deal, appeasing both my Reese’s loving husband and toddler.

          The verdict: a crowd pleaser for all!

          What You Need to Make this Chocolate Chip Peanut Butter Cookies Recipe

          White marble tile with flour, egg, cocoa powder, chocolate chips and peanut butter in small glass bowls with green text overlay to demonstrate cookie recipe ingredients.

          Ingredient Tips

          • Whole wheat or white whole wheat flour: To increase the nutrient density, use a w hole wheat variety of flour as opposed to all purpose flour.
          • Dark chocolate: Dark cocoa powder and chocolate chips have more antioxidants, so aim for the dark! Do not substitute Dutch process cocoa here.
          • Peanut butter: Choose a natural peanut butter without any added sugar. Creamy or crunchy will work depending on your texture preference!

          Ingredient Swaps

          • Alternative flours: If needing a gluten free option, I haven’t tried these cookies with almond flour or 1-to-1 gluten free all purpose flour, but they may work too!
          • Nut and seed butters: If needing to forego peanuts, almond butter, sunflower seed butter, or any nut/seed butter of choice can be used! Again, just make sure there’s no added sugar.
          • Sugar swaps: I did use refined sugar while developing this recipe but using coconut sugar or date sugar should not be a problem. If considering a non-nutritive sugar, be sure to read my post on Natural Sugar Substitutes and make an informed decision for you and yours!
          • Vegan: To make these cookies vegan, use your favorite dairy free chocolate chips and milk, swap out the egg for a flax egg (directions in my Gluten Free Brownie Recipe), and make sure your sugar is vegan certified (you can find out more information here).

          How to Make this Chocolate Peanut Butter Cookies Recipe

          Steps 1 + 2: Preheat oven and cream the peanut butter, sugar, egg, and vanilla together.

          Two collage image with #1 being the egg, pb, and sugar in a glass bowl with red spatula, second being the hand mixer whisks with the dough attached to it.

          Step 3: Mix the flour and baking soda together, then add to the creamed peanut butter and sugar mixture with the cocoa powder and salt. Mix in the milk.

          Step 4: The mixture will be coarse and crumbly (DO NOT WORRY!) Because this recipe uses nut butter as the butter base, this is the case. They will still hold together! Stir in the mini chocolate chips here.

          Two collage image with #4 being the creamed batter with the flour added, then #4 being the crumbly, coarse end result with chocolate chips added.

          Step 5: Portion dough into 30 equal cookies and place on a baking sheet lightly sprayed with cooking spray or on parchment paper. Bake for 8 to 10 minutes.

          Step 6: Remove and let cool for 10 minutes. Then, melt additional chocolate in 15 second intervals in a microwave safe bowl then drizzle over the top of finished cookies.

          Two image process collage shot with #5 being the cookie balls on a silver baking sheet with rack underneath, #6 being the finished cookie on a silver baking sheet with the chocolate glaze on top.

          Let glaze cool then take a bite of your labor of love!

          Baked cookies on silver baking sheet with chocolate glaze over the top.

          Recipe Notes + Expert Tips

          • Saying this again about the coarse, crumbly “dough”: Do not freak out! This is totally normal. If you’re having a hard time at all getting the cookies to stick together, just heat 2 tablespoons more of nut or seed butter until melted and mix it into the dough.
          • These taste the BEST straight from the freezer. Plus, they’ll last (as long as you don’t eat them all!) for up to 3+ months. You should store them regardless in the refrigerator so the chocolate on top doesn’t melt!
          • Do not use a “nut powder” like peanut powder in here, you need the oil from the nut or seed butter to help hold them together.
          Cookie with chocolate drizzle on silver baking sheet with a bite out of it.

          FAQs

          Can these cookies be made as a no bake dessert?

          While this recipe was not developed this way, I think it’s certainly possible! Substitute the egg with a flax egg (recipe above) and either use almond flour, oat flour, or bake your whole wheat flour on a clean sheet pan at 350 degrees Fahrenheit for about 5 minutes before cooling and mixing up the batter as directed (for food safety reasons). You may need to add more nut butter. Then, roll into balls and store in the refrigerator if planning to consume within a few days or freezer for a few weeks!

          I’d like to increase the fiber, do you have any suggestions?

          Yes! A great way to add fiber AND healthy healthy omega-3s is with chia seeds (I do love chia, as evidenced by my Sweet Potato Chia Chocolate Breakfast Cake, Homemade Cranberry Chia Jam, and Apple Cinnamon Chia Cake!)

          My recommendation here would be to fold in 1/2-2/3 cup of chia seeds to the batter after creaming the nut butter and sugar, before adding the dry ingredients! And, for extra crunch you could always sprinkle some on top of the glazed cookies .

          Other Chocolate Recipes You May Enjoy

          • Chocolate Cake Mix Cookie Cake - Reese's Copycat @shawsimpleswaps #simpledesserts #valentinesday #chocolatepeanutbutter #cookiecake #cakemixcookie
            Chocolate Cake Mix Cookie Cake
          • Static image of almond butter protein bars.
            Almond Butter Protein Bar
          • Gluten Free Brownie Recipe - A delicious, blender brownie recipe that's naturally gluten free, dairy free, artificial sugar free and actually delicious. No sponge like tasting brownies here! This pecan flour base will have your entire crowd asking for more! #glutenfreebrownies #brownierecipe #blenderbrownies #healthydesserts #dairyfreebrownies
            Gluten Free Brownie Recipe
          • White tile background with chocolate cake slice coming out of a round cake with two gold forks.
            Death By Chocolate Cake Recipe

          If you try this recipe, would you please do me a favor and leave a star rating in the recipe box and/or comment below! This helps immensely in Google to continue delivering high quality content to you. And please be sure to tag and share what you made with me on social, I love seeing your creations! You can find me here: Instagram – Facebook – Pinterest!

          Baked cookies on silver baking sheet with chocolate glaze over the top.
          Print Recipe
          4.25 from 8 votes

          Chocolate Peanut Butter Cookies

          The perfect combination of chocolate and peanut butter are in these Chocolate Peanut Butter Cookies. An all time classic cookie lightened up with all the delicious flavor!
          Prep Time12 minutes mins
          Cook Time10 minutes mins
          0 minutes mins
          Total Time22 minutes mins
          Course: Dessert
          Cuisine: American
          Servings: 30 servings
          Calories: 96kcal
          Author: Liz Shaw

          Ingredients

          • 1 cup peanut butter melted
          • 1/2 cup cane sugar
          • 1 large egg
          • 1 tsp vanilla extract
          • 1 1/2 cups white whole wheat flour
          • 1 tsp baking soda
          • 1/3 cup cocoa powder
          • 1/4 tsp salt
          • 3 tbsps milk
          • 1/2 cup mini chocolate chips divided

          Instructions

          • Preheat oven to 350 degrees F.
          • In a medium bowl, use a hand mixer and beat together peanut butter, sugar, egg, and vanilla extract.
          • In a smaller bowl, mix together the flour and baking soda.
          • Mix the flour, cocoa powder, and salt into wet ingredients. Once combined, add in 1/4 cup of the mini chocolate chips. Note, batter will be coarse and crumbly (see notes above.) Do not worry!
          • Grab a 1-ounce serving scoop and portion cookie dough into small cookies (about 30) on baking sheets lightly sprayed with cooking spray or lined with parchment paper.
          • Bake for 8 to 10 minutes until cookie are soft and moist (almost like a spring when you touch them!).
          • Remove from oven, cool for 10 minutes. Melt remaining 1/4 cup mini chocolate chips in a microwave safe dish in 15-second intervals. Drizzle over the top and let cool!
          • Enjoy!

          Notes

          • A quick note on the dough. It will be coarse (i.e. see photo below.) This is totally normal. If you’re having a hard time at all getting the cookies to stick together, just heat 2 tablespoons more of nut or seed butter until melted and mix it into the dough.
          Image of cocoa peanut butter cookie dough with mini chocolate chips on top against a white backdrop.


          • These taste the BEST straight from the freezer. Plus, they’ll last (as long as you don’t eat them all!) for up to 3+ months. You should store them regardless in the refrigerator so the chocolate on top doesn’t melt!
          • Do not use a “nut powder” like peanut powder in here, you need the oil from the nut or seed butter to help hold them together.
          • Sub almond, cashew, or sunflower seed butter for your preferred spread of choice.
          • Sub gluten-free all-purpose flour blend for white whole wheat, if needed.

          Nutrition

          Serving: 1 | Calories: 96kcal | Carbohydrates: 11g | Protein: 3g | Fat: 5g | Saturated Fat: 1g | Cholesterol: 6mg | Sodium: 101mg | Potassium: 79mg | Fiber: 1g | Sugar: 5g | Vitamin A: 12IU | Calcium: 13mg | Iron: 1mg

          Want more Shaw Kitchen recipes? Then sign up here for my 5 Day Stress-Free Meal Plan delivered straight to your inbox!

          Death By Chocolate Cake Recipe

          June 30, 2021

          White tile background with chocolate cake slice coming out of a round cake with two gold forks.

          Satisfy your chocolate craving with this healthy, homemade delight! This Death By Chocolate Cake Recipe is a crowd pleasing treat that even the chocolate purist will enjoy! Swapped with two produce picks that deliver a moist, decadent cake while boosting the nutrition, no one will ever know this cake is actually good for them, too!

          White tile background with chocolate cake slice coming out of a round cake with two gold forks.
          [feast_advanced_jump_to]

          Why you need to make this Healthier Chocolate Cake Recipe

          I love chocolate cake, but don’t love the 2750 calories and 54 grams of saturated fat found in a standard slice at chains like Claim Jumper (for my west coasters), or 1450 calories and 29 grams of saturated fat in Linda’s chocolate cake at The Cheesecake Factory. I you agree with me, then this healthier Death By Chocolate Cake Recipe is for you! It caps out at only 280 calories per slice, and less than 7 grams of saturated fat!

          What You Need to Make this Death by Chocolate Cake Recipe

          For the chocolate cake:

          White tile backdrop with glass bowls including ingredients to make death by chocolate cake with black labels on top.

          Chocolate frosting recipe:

          White tile backdrop with avocado, cocoa powder, sugar, milk, and chocolate chips on white tile backdrop with black labels.

          Ingredient Tips

          • Cocoa powder: For a deeper flavor, use dark chocolate cocoa powder or Dutch process cocoa powder, if it’s on hand!
          • Sugar: To lower the added sugar, you can reduce the amount to 2/3 cup without impacting the quality! Then, for the frosting, add the powdered sugar slowly and check for taste after passing the halfway mark.
          • Zucchini: To make sure your zucchini seamlessly blends into your cake, be sure to finely grate using the small or medium holes on your box grater.

          Ingredient Swaps

          • Milk: Sub in milk of choice; we use a low-fat milk but you’re welcome to use any variety, dairy or not, that you keep in your fridge!
          • Avocado: If you are not a fan of avocado in desserts, or are a frosting purist, feel free to sub with butter of choice.
          • Granulated Sugar: You can sub any granulated sugar you have on hand such as coconut or date sugar (I haven’t tried these myself but they should do!)
          • Vegetable Oil: If you keep canola, sunflower, or grapeseed oil on hand, these can easily be swapped in for vegetable oil.
          • Vanilla Extract: For a fun twist, replace the vanilla extract with half the amount of almond extract (so 1/2 tsp almond extract in both the cake and frosting; almond extract is more potent!), and top your cake with slivered almonds!

          How to Make this Moist Chocolate Cake Recipe

          Steps #1 through 4:

          Begin by preheating your oven to 350 degrees F. Shred your zucchini, then add the cider vinegar to the milk and let sit while you start the cake.

          Whisk the flours, baking powder/soda, salt, and cocoa powder together.

          Whisk in the oil, eggs, and one teaspoon of vanilla. Stir in the milk and vinegar mixture.

          Four picture collage with steps to make chocolate cake, including glass bowl with cocoa powder and flours, then egg being whisked in, then adding the milk, then the thick chocolate cake batter.

          Steps #5 and 6:

          Fold the zucchini into the cake batter, then pour mix into cake pan (or pans) of choice. Bake.

          Steps #7 and 8:

          While cake is baking, make the frosting by mixing all ingredients (including remaining vanilla) in a bowl until combined.

          Remove cake from oven and let cool.

          Four picture collage of making cake, with zucchini being stirred into chocolate cake batter, then glass bowl with two beaters with whipped chocolate topping, then final baked cake.

          Steps #9 through 11:

          Once cooled (about 5 to 10 minutes), frost cake and top with optional chocolate chips!

          Three picture collage showing how to frost chocolate cake with beaters covered in chocolate frosting then a knife on top of the chocolate cake.

          Slice and enjoy!

          White tile background with chocolate cake slice coming out of a round cake with two gold forks.

          Recipe Notes + Expert Tips

          • You cannot taste the zucchini in here, I promise! But, it adds a layer of moisture to the cake that really brings a lovely texture. Do not skip it!
          • You can use an all-purpose flour or gluten-free baking blend in place of whole wheat. Or, for a balance, try a 50-50 split of all-purpose and whole wheat!
          • Speaking of flour, DO NOT PACK INTO THE MEASURING CUPS! It’s very important that the flour is kept nice and light, especially for whole wheat flour, so use the spoon and sweep method to fill your measuring cups!
          • Top with your desired garnishes; we love mini chocolate chips but crushed walnuts or mixed berries would also be great!
          White tile background with chocolate cake slice coming out of a round cake with two gold forks.

          FAQs for this Healthier Cake Recipe

          Could I make this into a layer cake? What about cupcakes?

          Yes! One option is to bake as directed and once cooled, go ahead and cut across the middle horizontally to create two halves (I’ve heard unflavored floss does the trick). Then add frosting to the open face of the bottom layer, top with the other half, and finish decorating as desired! Alternatively, you could us Use two small 6-inch springform pans lined with parchment paper. Bake for 25 to 30 minutes, or until wooden pick comes out clean when inserted in the center. Then layer those two rounds!

          For another baking variation that yields individual cupcakes, prepare the batter as directed, but instead of the cake pan, grease or line a 12 cup cupcake tray. Fill the cups about halfway full, yielding 12-15 cupcakes. Then bake at the same temperature suggested for 10-15 minutes until a wooden toothpick comes out clean!

          I love the taste that coffee adds to chocolate recipes. Can coffee be used anywhere here?

          I haven’t tried it myself, but you could try substituting freshly brewed and cooled coffee for the milk that’s called for. The cake will have less protein and may require adding a little bit of extra oil (around a teaspoon). If you do try it, please let me know in the comments!

          Alternatively, you could add 1 tsp of espresso powder to the batter and 1/4 tsp to the frosting. Just be mindful if serving to children and go for a decaffeinated espresso powder.

          Other Chocolate Dessert Recipes You May Enjoy

          • Chocolate Cake Mix Cookie Cake - Reese's Copycat @shawsimpleswaps #simpledesserts #valentinesday #chocolatepeanutbutter #cookiecake #cakemixcookie
            Chocolate Cake Mix Cookie Cake
          • Cookie with chocolate drizzle on silver baking sheet with a bite out of it.
            Chocolate Peanut Butter Cookies
          • Cup of hot chocolate with mini marshmallows.
            Instant Pot Hot Chocolate
          • Image of chocolate chip cookie dough bars.
            Chocolate Chip Cookie Dough Bars

          If you try this recipe, would you please do me a favor and leave a star rating in the recipe box and/or comment below! This helps immensely in Google to continue delivering high quality content to you. And please be sure to tag and share what you made with me on social, I love seeing your creations! You can find me here: Instagram – Facebook – Pinterest!

          White tile background with chocolate cake slice coming out of a round cake with two gold forks.
          Print Recipe
          4.50 from 12 votes

          Death By Chocolate Cake Recipe

          A rich, chocolatey treat filled with love (and a few veggies, too!)
          Prep Time15 minutes mins
          Cook Time35 minutes mins
          Total Time50 minutes mins
          Course: Desserts
          Cuisine: American
          Servings: 10 servings
          Calories: 274kcal
          Author: Liz Shaw

          Ingredients

          • 1 ½ cups 1 medium zucchini, 5 ounces approximately zucchini
          • ⅔ cup milk
          • 1 teaspoon apple cider vinegar
          • 1 ⅔ cups white whole wheat flour sifted
          • ⅔ cup cocoa powder dark for a richer flavor
          • 1 ½ teaspoons baking soda
          • ½ teaspoon baking powder
          • ¼ teaspoon kosher salt
          • 1 cup granulated sugar
          • ⅓ cup vegetable oil
          • 2 teaspoons vanilla extract
          • 2 large eggs

          Frosting

          • 1/2 each avocado
          • 1/2 cup powdered sugar
          • 2 ½ tablespoons cocoa powder dark for a richer flavor
          • 2 tablespoons milk

          Instructions

          • Preheat oven to 350 degrees F. Coat an 8-inch spring form pan with cooking spray.
          • Peel and shred the zucchini into a small bowl. Set aside.
          • Combine milk and apple cider vinegar in a bowl, set aside for 10 minutes. Combine flour, cocoa powder, baking soda, baking powder and salt in a medium bowl. Set aside.
          • In a large bowl, add the sugar, oil, vanilla and eggs. Whisk together until thoroughly combined. Add milk and vinegar mixture to the bowl with the sugar and stir. Gently fold in the zucchini. Add remaining flour dry mixture, stirring until combined.
          • Pour the batter into the prepared pan. Place in the oven and bake for 30 to 35 minutes, or until a toothpick comes out clean from the center.
          • Remove from oven and let the pan cool on a wire rack.
          • In a small bowl using a hand mixer on medium speed, blend avocado until smooth. On low speed, mix in the powdered sugar, cocoa powder and milk. Continue to mix until smooth and incorporated. Set aside.
          • Once cake has cooled, frost cake and garnish with chopped nuts.
          • Variation: Use two small 6-inch springform pans lined with parchment paper. Bake for 25 to 30 minutes, or until wooden pick comes out clean when inserted in the center.
          • Storage: Place in an airtight container in the refrigerator for up to 5 days. Freezer for up to 4 months.

          Notes

          • Avocados are a great alternative in baking to replace butter. They have the creamy, smooth consistency of a butter but are filled with heart healthy fats!  However, if you are more a frosting purist, you can still use an avocado oil based butter to prepare this.
          • You cannot taste the zucchini in here, I promise! But, it adds a layer of moisture to the cake that really brings a lovely texture. Do not skip it!
          • You can use an all-purpose flour or gluten-free baking blend in place of whole wheat. Or, for a balance, try a 50-50 split of all-purpose and whole wheat!
          • Speaking of flour, DO NOT PACK INTO THE MEASURING CUPS! It’s very important that the flour is kept nice and light, especially for whole wheat flour, so use the spoon and sweep method to fill your measuring cups!
          • Top with your desired garnishes; we love mini chocolate chips but crushed walnuts or mixed berries would also be great!

          Nutrition

          Calories: 274kcal | Carbohydrates: 46g | Protein: 6g | Fat: 10g | Saturated Fat: 7g | Trans Fat: 1g | Cholesterol: 38mg | Sodium: 248mg | Potassium: 241mg | Fiber: 5g | Sugar: 20g | Vitamin A: 128IU | Vitamin C: 3mg | Calcium: 63mg | Iron: 2mg

          Instant Pot Sloppy Joes

          June 30, 2021

          Plated sloppy joes recipe.

          Craving that comfort classic dish you grew up on in childhood? Then this easy Instant Pot Sloppy Joes recipe is for you! Made in under 15 minutes in your Instant Pot, you’ll be shocked at how much time you’ll have to do all the other things on your list! Plus, this recipe includes a special ingredient swap to boost the nutrition while lowering the traditional sugar found in your standard Joe!

          Plated sloppy joes recipe.
          [feast_advanced_jump_to]

          Why you need to make this Homemade Sloppy Joes Recipe

          Nothing quite says comfort food like a Sloppy Joe! These turkey sloppy joes can be modified in a number of ways to suit you and your family’s needs, but know that which ever way you turn, the inclusion of protein and veggies will keep you and yours totally satisfied! These Instant Pot Sloppy Joes are a step above the rest thanks to the beauty (and time saving hack) of cooking them in the Instant Pot (or pressure cooker!)

          If you have yet to break in your Instant Pot, this recipe will be a great way to get your feet wet (or check out my Instant Pot Recipes for New Users for more ideas). Once you try it out, you’ll be hooked on the simplicity and ease of clean up!

          What you need to make this Healthy Sloppy Joes recipe

          Ingredients to make Healthy Instant Pot Sloppy Joes.

          * Note the image above includes vegetable bouillon. The recipe card below indicates vegetable broth (which was made from this bouillon).

          Ingredient Tips

          • Ground Turkey: We are using lean ground turkey for these Instant Pot Sloppy Joes which means at least 93% lean, 7% fat or higher (the most lean being 99% lean, 1% fat). If you’re able to, get yourself a family pack, 2-4 lbs depending on your grocery store. Set aside 1 lb for this recipe and portion out the rest into 1 lb servings to freeze and thaw later!
          • Riced Cauliflower: While this is an easy find in the grocery store these days and is an awesome time-saver, if you don’t have it on hand, no problem! Grab yourself a medium sized cauliflower; prep by rinsing, cutting in half, and breaking off the florets. Blitz in your food processor until rice-sized consistency is reached. Save any excess in the freezer for smoothies or stir-fries!
          • Tomato Paste: A 6oz can of tomato paste will yield about 3/4 cup. Portion the remaining tomato paste in 1 Tbsp scoops in a freezer safe bag (reusable or otherwise). Save in the freezer for up to 3 months!
          • Jalapeno: For a spicier kick, add 1 seeded and diced jalapeno into the ground meat mixture.

          Ingredient Swaps

          • Tomatoes: You can use diced tomatoes if you don’t have crushed on hand. Sub 14 1/2 ounce can of diced tomatoes for 28 ounces of crushed tomatoes. Add 1/2 cup of tomato paste and 1/3 cup additional broth to make up for lost liquid.
          • Ground Turkey: Sub lean ground beef (90/10 or 93/7) in place of turkey.
          • Broth: When developing this recipe, vegetable bouillon was used to produce 1/2 cup broth, however, you can sub chicken bouillon or pre-made vegetable, beef, or chicken broth.
          • Soy Sauce: If needing to be gluten or soy free, sub with coconut aminos or Worcestershire sauce
          • Mustard: Yellow mustard was used in this recipe but if you have Dijon or like a kick and have some spicy brown on hand, go ahead and use it!

          How to make Sloppy Joes in the Instant Pot

          Seriously, this Instant Pot Sloppy Joes recipe is the easiest recipe ever! One pot and done!

          (1 + 2) Start by selecting the Saute function on the Instant Pot and sautéing the garlic and meat in olive oil until browned (about 5 minutes).

          Process shots to make sloppy joes.

          (3) Then, add the remaining ingredients into the pot. Stir (ensuring there are no pieces stuck on the bottom) and secure the lid. Set the pot to Pressure Cook (Normal) and seal the Valve. Pressure Cook for 5 minutes.

          (4) When cooking completes, do a Quick Release on the valve of the lid and remove the lid. Stir and serve warm!

          Process shots to make sloppy joes.

          This tastes great on seeded whole grain buns with pickled jalapeños and cabbage slaw!

          Instant Pot Sloppy Joes on white backdrop.

          I will warn you though, it gets a bit messy.

          Picture of sloppy joes in a bun with jalapenos coming out.

          Like fall apart bun messy… but it’s SO worth it!

          Hand holding a bun with Instant Pot Sloppy Joes

          Recipe notes + Expert Tips

          • Do NOT burn the ground meat (whatever kind you choose to use) during the sauté portion. To refrain from doing so, be sure you are stirring constantly, using a spatula or stir stick to scrape the bottom of the pot while sautéing.
          • If it’s your first time using the pressure cooking function, be very careful when releasing the valve! Make sure your hands are positioned properly so that you will not cross paths with the escaping steam.
          Image of 3 sloppy joe buns on a white backdrop.

          FAQs for this Recipe for Sloppy Joes

          I don’t have an Instant Pot. Can I make this recipe in a slow cooker/Crockpot?

          While this recipe was designed with a one-pot, quick-cooking Instant Pot method in mind, you can certainly make this recipe with a conventional slow cooker. Prepare the ground meat in your favorite large sauté pan, following the directions as indicated. Once browned, turn off the heat and stir in only the tomato paste and crushed tomatoes (if your sauté pan cannot hold all of the crushed tomatoes, only add half). Scrape the bottom of the pan to remove any caramelized bits. Then, transfer the cooked meat and all tomatoes to your slow cooker. Stir in the rest of the ingredients, except for the broth. A slow cooker will not require as much liquid as a pressure cooker does. Cook for 4 hours on high or 8 hours on low. Enjoy!

          What goes with sloppy joes?

          When thinking about side dishes for sloppy joes, to counter the tomato-y, savory flavors, I like to go for something lighter, creamy, and refreshing. Some ideas are my Vegan Coleslaw, Cucumber Yogurt Salad, or a simple tossed salad with Yogurt Ranch Dressing or Vegan Green Goddess Dressing!

          Other Instant Pot Recipes you may enjoy

          • Instant Pot Round Roast
          • Image of potato soup in a bowl with salt and pepper.
            Creamy Potato Soup
          • Beef Brisket Nachos
          • Image of pumpkin chili in a bowl for food photography.
            Instant Pot Pumpkin Chili

          PS. Don’t forget to snag your copy of my cookbook, The Instant Pot Cookbook For Dummies, on Amazon too!

          If you try this recipe, would you please do me a favor and leave a star rating in the recipe box and/or comment below! This helps immensely in Google to continue delivering high quality content to you. And please be sure to tag and share what you made with me on social, I love seeing your creations! You can find me here: Instagram – Facebook – Pinterest!

          Plated sloppy joes recipe.
          Print Recipe
          4.80 from 5 votes

          Instant Pot Sloppy Joes

          Craving that comfort classic dish you grew up on in childhood? Then this Instant Pot Sloppy Joes recipe is for you! Made in under 15 minutes in your Instant Pot, you'll be shocked at how much time you'll have to do all the other things on your list! Plus, this recipe is swapped with a special ingredient to boost the nutrition while lowering the traditional sugar found in your standard sloppy joe!
          Prep Time0 minutes mins
          Cook Time15 minutes mins
          Total Time15 minutes mins
          Course: Comfort Food
          Cuisine: American
          Servings: 6 servings
          Calories: 175kcal
          Author: Liz Shaw

          Equipment

          • Instant Pot

          Ingredients

          • 2 tsps extra virgin olive oil
          • 1 tbsp minced garlic
          • 1 pound lean ground turkey
          • 1 1/2 cups frozen riced cauliflower
          • 2 tsps dried oregano
          • 1 tsp dried minced onion
          • 1/4 tsp red pepper flakes
          • 1/2 tsp ground black pepper
          • 1/4 tsp salt
          • 1/4 cup no salt added tomato paste
          • 28 ounces canned crushed tomatoes
          • 2 tbsps low-sodium soy sauce
          • 3 tbsps red wine vinegar
          • 1/2 cup vegetable broth
          • 1 tbsp yellow mustard
          • 1 tbsp brown sugar

          Instructions

          • Press Saute on the Instant Pot. Add the olive oil, garlic, and ground turkey and begin to brown for 5 minutes. Be sure to continue to scrape the bottom of the pot throughout this process so the turkey does not stick to the bottom. If it does, this will cause a BURN message later on.
          • Once browned, press Cancel on the Instant Pot. Add in the remaining ingredients. Stir. Scrape the bottom of the pot one more time to ensure no ingredients stuck to the bottom.
          • Secure the lid, set valve to Sealing, and press Pressure Cook (Normal) and Keep Warm (Off). Set the timer for 5 minutes.
          • When cooking completes, use Quick Release on the valve and remove the lid.
          • Stir and serve warm as desired. This pairs wonderfully with buns and shredded cabbage and pickled jalapeños!
          • Store leftovers in an airtight container in the refrigerator for up to 5 days, or freeze for up to 3 months.

          Video

          Notes

          • Do NOT burn the ground meat (whatever kind you choose to use) during the sauté portion. To refrain from doing so, be sure you are stirring constantly, using a spatula or stir stick to scrape the bottom of the pot while sautéing.
          • If it’s your first time using the pressure cooking function, be very careful when releasing the valve! Make sure your hands are positioned properly so that you will not cross paths with the escaping steam.
          • Tomatoes: You can use diced tomatoes if you don’t have crushed on hand. Sub 14 1/2 ounce can of diced tomatoes for 28 ounces of crushed tomatoes. Add 1/2 cup of tomato paste and 1/3 cup additional broth to make up for lost liquid.
          • Ground Turkey: Sub lean ground beef (90/10 or 93/7) in place of turkey.
          • Broth: When developing this recipe, vegetable bouillon was used to produce 1/2 cup broth, however, you can sub chicken bouillon or pre-made vegetable, beef, or chicken broth.
          • Soy Sauce: If needing to be gluten or soy free, sub with coconut aminos or Worcestershire sauce
          • Mustard: Yellow mustard was used in this recipe but if you have Dijon or like a kick and have some spicy brown on hand, go ahead and use it!

          Nutrition

          Calories: 175kcal | Carbohydrates: 17g | Protein: 22g | Fat: 3g | Saturated Fat: 1g | Cholesterol: 42mg | Sodium: 696mg | Potassium: 851mg | Fiber: 4g | Sugar: 2g | Vitamin A: 536IU | Vitamin C: 34mg | Calcium: 62mg | Iron: 3mg

          Want more Shaw Kitchen recipes? Then sign up here for my 5 Day Stress-Free Meal Plan delivered straight to your inbox!

          Vegan Green Goddess Dressing

          June 30, 2021

          Vegan Green Goddess Dressing

          Stop buying store bought dressing! You can literally make your own homemade salad dressing that’s a third of the price, and tastes even better, from the comfort of your own home. This Vegan Green Goddess Dressing is the perfect easy salad dressing recipe to start making your own.

          Vegan Green Goddess Dressing Image
          [feast_advanced_jump_to]

          Why you need to make this Vegan Salad Dressing?

          Are you a fan of green goddess dressing? If you aren’t, you are about to be!

          I’m sure you’ve come across a decent amount of variations of this dressing online, and I may be biased, but this is the BEST VEGAN GREEN GODDESS DRESSING you will find!

          First, it’s easy. You can literally make this with everything you likely already have on hand.

          Second, it’s delicious. There’s nothing better than a salad topped off with the perfect light but creamy vegan dressing!

          Third, it’s nutritious! There’s nothing in here you can’t pronounce and it has no added sugar (unlike many of the store bought dressings that have 3 or more grams of added sugars hidden in them!)

          Vegan Green Goddess Dressing Image

          What is in Green Goddess Dressing?

          It’s really simple! Not kidding.

          Ingredient Tips

          • Avocado: I highly suggest not substituting the avocado with more oil as the avocado is truly the creamy goodness that really ties the dressing together!
          • Lemon: Half of a medium lemon will yield about 1-1.5 Tbsp of juice so keep that in mind (try to use fresh here!) As a rule of thumb, make sure your lemon has been sitting a room temperature before juicing; keeping it cold will make it more difficult to squeeze. Also, either squeeze over strainer or a separate vessel and remove the seeds. Nothing is worse than trying to fish a lemon seed out of your blender!

          Ingredient Swaps

          • Cilantro: If you happen to be out of cilantro (or it tastes like soap to you), I recommend substituting basil or parsley. It will take on a different flavor, but will be delicious as well!
          • Garlic: If you don’t have any fresh garlic on hand, toss in 1/2 tsp of garlic powder.
          • Black Pepper: If you have it on hand, sub for white pepper!
          • White Wine Vinegar: While I keep this as a pantry staple, apple cider or red wine vinegar would be just fine!

          How to make this Green Goddess Avocado Dressing

          This easy green goddess dressing could truly not be more simple! Add all of the ingredients into a high powered blender and let ‘er rip! You may need to stop it once and carefully scrape down the sides of the blender, but otherwise, this recipe is non-fussy and ready in 5 minutes or less!

          If the dressing is too thick, add a tablespoon of extra virgin olive oil for a heavier dressing or water for a lighter dressing.

          Recipe Notes + Expert Tips

          • When choosing fresh herbs like cilantro, try to choose those that are bright green without yellowing or mushy edges (it’s okay if there are a few, you can pick these off). A bunch will yield approximately a cup of leaves, but leave the measuring cup aside here! If you’re worried, start with a little less and you can always taste-test and add more!
          • To clean your herbs, rinse under cool water, separating the stems a bit, and then give them a nice shake or dry gently with a clean kitchen towel. To use in this recipe, there’s no need to chop or pull the leaves off. Cilantro is tender enough that all you need to do is cut off the stems where the leaves approximately stop and just toss the good stuff straight into your blender!
          • Be very careful when removing the seed from your avocado. For safety reasons, do carefully cut into the avocado and turn it around so that it is completely cut through. Give the avocado a quarter turn and repeat so that you now have the avocado in quarters. Twist the avocado to reveal two halves, and where the seed remains, simply take off a quarter, and pick the seed out. No knives required!
          Vegan Green Goddess Dressing

          FAQs for this Green Goddess Vegan Dressing

          What can I serve this dressing with?

          This recipe is so versatile so truthfully, whatever you want! I have served it over a nice kale salad with sliced apples and a seedy cranberry mix, but it makes a great dip for chopped veggies, and we love pairing it with Air Fryer Meatballs, Cowboy Tacos, or Beet Falafel Tacos. We’ve also tried it over steak, pasta, and sandwiches with great success!

          Can you tell me more about the health benefits of avocado?

          I absolutely adore avocados for so many reasons! I cover this in my blog post for 5 Avocado Snack Ideas, but avocados are a good source of fiber, have a fatty acid profile that is high in unsaturated fatty acids, and contain a handful of vitamins and minerals. When paired with a protein and carbohydrate as part of a well balanced meal, tasty avocados are a great choice for your healthy diet!

          Other Easy Dressing and Sauce Recipes you May Enjoy

          • Yogurt Ranch Dressing
            Yogurt Ranch Dressing
          • Lemon Poppyseed Dressing with Sliced Cucumbers - Vegan, Gluten Free @shawsimpleswaps
            Lemon Poppyseed Dressing
          • White bowl filled with hatch chile salsa verde topped with cilantro and jalapenos slices on a white backdrop.
            Hatch Chile Salsa Verde
          • Image of walnut pesto sauce with basil on top.
            Walnut Pesto Sauce

          If you try this recipe, would you please do me a favor and leave a star rating in the recipe box and/or comment below! This helps immensely in Google to continue delivering high quality content to you. And please be sure to tag and share what you made with me on social, I love seeing your creations! You can find me here: Instagram – Facebook – Pinterest!

          Vegan Green Goddess Dressing
          Print Recipe
          4.84 from 6 votes

          Vegan Green Goddess Dressing

          This Vegan Green Goddess Dressing is the perfect dressing to serve on top of salads, sandwiches and veggies! It's a great way to enjoy a no added sugar, healthy dressing made from the comfort of your own home!
          Prep Time5 minutes mins
          Cook Time0 minutes mins
          0 minutes mins
          Total Time5 minutes mins
          Course: Condiment
          Cuisine: American
          Servings: 8 servings
          Calories: 90kcal
          Author: Liz Shaw

          Ingredients

          • 1 medium avocado
          • 1 bunch cilantro
          • 3 tbsp extra virgin olive oil
          • 1/4 cup white wine vinegar
          • 1 tbsp fresh squeezed lemon juice
          • 1/3 cup water
          • 1 tsp minced garlic
          • 1/4 tsp ground black pepper
          • 1/2 tsp sea salt

          Instructions

          • Add all ingredients to a high powered blender or food processor and process until smooth, about 30 seconds. Be sure to wipe down the sides with a spatula to ensure all ingredients mix evenly.
          • If dressing is too thick, add a tablespoon more of oil for a heavier dressing or water for a lighter dressing.
          • Store in an air tight container in the refrigerator and use within 7 days. Before serving, shake vigorously.

          Notes

          • Cilantro: If you happen to be out of cilantro (or it tastes like soap to you), I recommend substituting basil or parsley. It will take on a different flavor, but will be delicious as well!
          • Garlic: If you don’t have any fresh garlic on hand, toss in 1/2 tsp of garlic powder.
          • Black Pepper: If you have it on hand, sub for white pepper!
          • White Wine Vinegar: While I keep this as a pantry staple, apple cider or red wine vinegar would be just fine!
          • When choosing fresh herbs like cilantro, try to choose those that are bright green without yellowing or mushy edges (it’s okay if there are a few, you can pick these off). A bunch will yield approximately a cup of leaves, but leave the measuring cup aside here! If you’re worried, start with a little less and you can always taste-test and add more!
          • To clean your herbs, rinse under cool water, separating the stems a bit, and then give them a nice shake or dry gently with a clean kitchen towel. To use in this recipe, there’s no need to chop or pull the leaves off. Cilantro is tender enough that all you need to do is cut off the stems where the leaves approximately stop and just toss the good stuff straight into your blender!
          • Be very careful when removing the seed from your avocado. For safety reasons, do carefully cut into the avocado and turn it around so that it is completely cut through. Give the avocado a quarter turn and repeat so that you now have the avocado in quarters. Twist the avocado to reveal two halves, and where the seed remains, simply take off a quarter, and pick the seed out. No knives required!

          Nutrition

          Calories: 90kcal | Carbohydrates: 3g | Protein: 1g | Fat: 9g | Saturated Fat: 1g | Sodium: 149mg | Potassium: 127mg | Fiber: 2g | Sugar: 1g | Vitamin A: 104IU | Vitamin C: 4mg | Calcium: 3mg | Iron: 1mg

          Want more Shaw Kitchen recipes? Then sign up here for my 5 Day Stress-Free Meal Plan delivered straight to your inbox!

          Pistachio No Bake Snack Bars

          June 30, 2021

          Chocolate covered no bake pistachio snack bars in white square container.

          Sweet and salty, these Pistachio No Bake Snack Bars are a wonderful way to satisfy all your cravings! At just 140 calories each, they are the perfect snack that come together in under 5 minutes if you want to eat it straight from the bowl, or 30 minutes after a quick trip in the freezer! The choice is up to you!

          Chocolate covered no bake pistachio snack bars in white square container.
          [feast_advanced_jump_to]

          Why you need to make these Healthy Snack Bars

          Maker beware – you may eat the entire batch of Pistachio No Bake Snack Bars in 2-3 days. That is totally normal when they taste as good as they do and are SO easy to make!

          If you’re looking to add a new nut to your rotation of almonds, walnuts, and peanuts (well they’re a legume, but that’s not the point!) then look no further than pistachios! While you may be more familiar with them in their salty, shelled form like on my party tray, pistachios make a welcome inclusion to these healthy granola bars filled with other wholesome ingredients like dates, oats, chocolate and dried cranberries (and they’re gluten free)!

          What You Need to Make this No bake granola bar Recipe

          White tile background with ingredients in small bowls.

          This simple list of ingredients starts clockwise from the upper left:

          • Oats
          • Salt
          • Pistachios
          • Low sugar cranberries
          • Vanilla extract
          • Pitted dates
          • Dark chocolate (center)

          Ingredient Tips

          • Pistachios: This recipe was developed with raw, unsalted pistachios. That being said, if you only have roasted and salted available, go ahead and use them for these snack bars but do not add any additional salt to the mix.
          • Dates: I prefer Medjool to other varieties but any will do (and don’t use any other dried fruit here for the base). Just make sure they’re pitted before adding to the food processor!
            • Be sure to heat the dates as per directions for a super smooth date paste!
          • Oats: Old fashioned works the best (get certified gluten free if needed)!
          • Dried Cranberries: Try to use unsweetened dried cranberries or you’ll end up with added sugars sneaking into your healthy snack bars!
          • Salt: If you’re fancy, use sea salt! But for more iodine, use iodized table salt.

          Ingredient Swaps

          • Pistachios: While this no bake bar recipe was developed to showcase pistachios, they can easily be substituted for almonds or walnuts. For a nut free version, pumpkin seeds would be great!
          • Vanilla Extract: You can use almond extract for a flavor twist, just use half as much as the recipe calls for since almond extract is a bit more potent!
          • Dark chocolate: We’re BIG fans of dark chocolate but feel free to sub with your chocolate variety of choice: semisweet, milk, or even white would be nice! Oh, and go ahead for dairy free to make these vegan!
          • Dried cranberries: Swap with raisins or dried blueberries to really make this snack bar recipe your own!

          How to Make this Homemade Granola Bar Recipe

          Part 1:

          Heat dates in water in the microwave (or soak for 10 mins in boiling water), then process with the vanilla and salt in a high powered blender or food processor.

          Add in the pistachios and oats, then do a rough pulse until finely chopped.

          Remove and add to a bowl. Fold in the dark chocolate and cranberries!

          Clear bowl with oats, chocolate and cranberries.

          Part 2:

          Press the mixture into an 8×8-inch pan lined with parchment paper. If desired (which I recommend), melt additional chocolate and pour over the top. Then, set bars in the freezer for at least 30 minutes.

          White backdrop with white 8x8 pan with granola bars in it.
          Chocolate covered no bake pistachio snack bars in white square container.

          Part 3:

          Keep them stored in the freezer for best quality! Feel free to slice them so they are ready to go!

          Pistachio No Bake Snack Bars cut into squares on white backdrop.

          Recipe Notes + Expert Tips for Pistachio No Bake Snack Bars

          • Parchment paper makes for easy clean up when you’re ready to remove your bars! If you’ve just run out (just your luck!), spray a little non-stick cooking spray into your dish before pressing the mixture to fit.
          • If you want to increase the protein of these bars to 10g per serving (for an adult friendly spin), you’ll need to include some protein powder. Add the powder when processing the dates, water, vanilla, and salt (if the mixture is more crumbly than paste-like, add water 1 Tbsp at a time). You’ll want to add enough powder to total 72 grams of protein. Here are some guidelines to follow, but double check the product’s nutrition label for specific information:
            • For an unflavored whey protein, add approximately 18 Tbsp of powder
            • For an unflavored pea protein, add approximately 10 Tbsp of powder
          • As an added flavor note, toast both the pistachios and oats! Lay in a single layer on a lined baking sheet and toast at 350 degrees for 5-10 minutes, stirring halfway through (keep a close eye, and nose, on them!)
          White backdrop with white 8x8 pan with granola bars in it.

          FAQs for these Gluten Free Granola Bars

          Are granola bars healthy?

          It really depends on the ingredients added! I’ve made some suggestions as far as making sure there is as little added sugar as possible (in theory, there might only be some from the chocolate while the rest is naturally occurring). For this granola bar recipe, they’re providing plenty of vitamins and minerals, as well as some protein, fiber, and healthy unsaturated fats, while being low in added sugars, sodium, and cholesterol. This is a granola bar that is made for fueling active bodies, so you can feel confident sharing with your family!

          Does this recipe fit in with the Mediterranean Diet?

          Resounding YES!! It’s even featured on my list of 15 Mediterranean Recipes! These no bake snack bars hit all the marks including whole grains (the oats!) and nuts with unsaturated fatty acids, being plant based, and simply being a treat to enjoy that satisfies your cravings and sweet tooth without going overboard. I’m proud of this recipe for how it can seamlessly fit into a healthy lifestyle (and how much it is loved)!

          Other Recipes with Pistachios and Nuts You May Enjoy

          • PLATED MEATBALLS WITH POTATOES.
            Pistachio Turkey Meatballs
          • Deconstructed Trail Mix Party Plates - Vegan & Gluten Free @shawsimpleswaps
            Deconstructed Trail Mix Party Plates
          • Cilantro Pistachio Pesto - Vegan, Paleo & Gluten Free @shawsimpleswaps
            Cilantro Pistachio Pesto
          • Silver baking sheet covered with roasted cashews, almonds and walnuts with a metal serving handle in the center.
            Roasted Mixed Nuts

          If you try this recipe, would you please do me a favor and leave a star rating in the recipe box and/or comment below! This helps immensely in Google to continue delivering high quality content to you. And please be sure to tag and share what you made with me on social, I love seeing your creations! You can find me here: Instagram – Facebook – Pinterest!

          Chocolate covered no bake pistachio snack bars in white square container.
          Print Recipe
          4.69 from 19 votes

          Pistachio No Bake Snack Bars

          A simple, no bake snack that the entire family will love!
          Prep Time10 minutes mins
          Cook Time0 minutes mins
          30 minutes mins
          Total Time10 minutes mins
          Course: Snack
          Cuisine: American
          Servings: 12 bars
          Calories: 144kcal
          Author: Liz Shaw

          Ingredients

          • 15 pitted dates
          • 1/3 cup filtered water
          • 1 tsp vanilla extract
          • 1/4 tsp salt
          • 1 cup no-shell pistachios
          • 1 cup rolled old fashioned oats
          • 1/3 cup dark chocolate chips
          • 1/4 cup dried cranberries low sugar

          Instructions

          • Heat the dates by (option 1) adding to a microwave safe dish, covering with water and heating in the microwave for 2-3 minutes OR (option 2) adding to a heat safe dish and covering with boiling water, allowing to stand for 10 minutes. Drain and discard water.
          • To a food processor fitted with a metal blade, add dates, water, vanilla, and salt. Process 75 seconds until pureed. Add in pistachios and oats, pulse in 15 second intervals 2 to 3 times until crumbly, coarse consistency achieved.
          • Scoop the mixture into a bowl, then fold in the dark chocolate chips and cranberries.
          • Line an 8 x 8-inch pan with parchment paper.
          • Using a spatula remove dough from processor and pour into the pan. Press down firmly to evenly distribute dough in the pan with another piece of parchment paper.
          • Place pan in the freezer with parchment paper on top and free for at least 30 minutes before cutting.
          • Slice into 12 bars and store in an airtight container in the freezer. Enjoy straight from the freezer.

          Notes

          • Bars are best eaten frozen from the freezer! They will become soft and break easier if kept on the counter or fridge (though still delicious crumbled over yogurt!)
          • If you want to increase the protein of these bars to 10g per serving (for an adult friendly spin), you’ll need to include some protein powder. Add the powder when processing the dates, water, vanilla, and salt (if the mixture is more crumbly than paste-like, add water 1 Tbsp at a time). You’ll want to add enough powder to total 72 grams of protein. Here are some guidelines to follow, but double check the product’s nutrition label for specific information:
            • For an unflavored whey protein, add approximately 18 Tbsp of powder
            • For an unflavored pea protein, add approximately 10 Tbsp of powder
          • For an added flavor note, toast both the pistachios and oats! Lay in a single layer on a lined baking sheet and toast at 350 degrees for 5-10 minutes, stirring halfway through (keep a close eye, and nose, on them!)
          Ingredient tips & swaps:
          • Pistachios: This recipe was developed with raw, unsalted pistachios. If you only have roasted and salted available, use them but do not add any additional salt. They can easily be substituted for almonds or walnuts. For a nut free version, pumpkin seeds would be great!
          • Dates: I prefer Medjool to other varieties but any will do (and don’t use any other dried fruit here for the base). Just make sure they’re pitted before adding to the food processor!
          • Oats: Old fashioned works the best (get certified gluten free if needed)!
          • Dried Cranberries: Try to use unsweetened dried cranberries. Swap with raisins or dried blueberries.
          • Salt: If you’re fancy, use sea salt! But for more iodine, use iodized table salt. 
          • Vanilla Extract: You can use almond extract for a flavor twist, just use half as much as the recipe calls for since almond extract is a bit more potent!
          • Dark chocolate: Sub with your chocolate variety of choice: semisweet, milk, or even white would be nice! Oh, and go ahead for dairy free to make these vegan!

          Nutrition

          Serving: 1 | Calories: 144kcal | Carbohydrates: 19g | Protein: 4g | Fat: 7g | Saturated Fat: 2g | Cholesterol: 1mg | Sodium: 55mg | Potassium: 218mg | Fiber: 3g | Sugar: 10g | Vitamin A: 28IU | Vitamin C: 1mg | Calcium: 34mg | Iron: 1mg

          Want more Shaw Kitchen recipes? Then sign up here for my 5 Day Stress-Free Meal Plan delivered straight to your inbox!

          • « Go to Previous Page
          • Page 1
          • Page 2
          • Page 3
          • Page 4
          • Interim pages omitted …
          • Page 14
          • Go to Next Page »

          Primary Sidebar

          Hi, I'm Liz!

          Registered Dietitian, Personal Trainer & Author. Join me in making healthy living fun with quick recipes and fitness tips!

          Learn more about me >

          Search

          Heart-Healthy Sweets

          Sweet Potato Pie Cake - A no added sugar delight to satisfy a sweet tooth morning, noon & night! Sweetened with prunes and sweet potatoes! @shawsimpleswaps

          Sweet Potato Pie with PB Frosting

          Mango Banana Sorbet - No Added Sugar @shawsimpleswaps

          Mango Banana Sorbet – No Added Sugar

          Maple Sunflower Seed Dessert Dip - Tree Nut, Peanut & Gluten Free @shawsimpleswaps

          Maple Sunflower Seed Dessert Dip

          No Added Sugar Chocolate Pudding - a simple recipe to satisfy a sweet tooth with no added sugar! #noaddedsugardessert #sugarfreedessert #healthypudding #chocolatepuddingrecipe

          No Added Sugar Chocolate Pudding

          Sugar Free Chocolate Spread

          Sugar Free Chocolate Spread

          A rich, creamy chocolate dessert dip made with the essential ingredients you likely have on hand! This Sweet Hummus Recipe is the perfect snack or party dip! The beauty of this baby is you can make it all in the blender, aka, no mess clean up! #desserthummus #desserthummusrecipe #healthydesserthummus #desserthummushealthyrecipe #desserthummuschocolate

          Sweet Hummus Recipe

          20 Low Sugar Dessert Recipes

          Picture of white pan with strawberry nice cream inside with crushed golden cake cones and a brown and silver ice cream scoop peaking out the side.

          Strawberry Nice Cream

          More Recipes

          Air Fryer Recipes

          Image of plated falafel with peppers.

          Air Fryer Falafel

          Plated orange chicken.

          Air Fryer Orange Chicken

          4 bratwursts in a white pan with mustard.

          Air Fryer Bratwurst

          Air fryer meatloaf on brown parchment paper with veggies.

          Air Fryer Meatloaf Recipe

          White plate and backdrop with green roasted brussel sprouts and red miso dressing in bowl.

          Air Fryer Frozen Brussel Sprouts with Miso Dressing (i.e. Brussels Sprouts)

          5 Air Fryer Tips for the New User

          More IP Favorites

          Footer

          ↑ back to top

          Collage of publication logos.

          About

          • Publications + Press
          • Books
          • Shop

          Newsletter

          Subscribe to my Substack.

          Contact

          • Disclosure
          • Privacy Policy
          • Accessibility

          Copyright © 2025 Shaw Simple Swaps

          Rate This Recipe

          Your vote:


          A rating is required
          A name is required
          An email is required